4 Useful Ways To Take A Screenshot On Your Mac
Have you purchased a Mac but don't know how to take a screenshot? Or maybe you've been using the notebook for some time, wondering how other Mac users capture their screen, especially if you were a Windows user in the past. Although taking a screenshot on a Mac is not that difficult, it seems like it could be, as there is no dedicated PrtSc button on a Mac keyboard. So, is there a hidden application or a third-party application you can use instead? As it turns out, you have a couple of options that could be helpful in specific scenarios, but you will have to familiarize yourself with the position of the "Cmd," Shift, and number keys on your keyboard.
MacBooks are easy to use but are very different than Windows laptops. For instance, while Windows laptops come in many different shapes and sizes, Apple's lineup of MacBooks is a bit more streamlined. If you want an entry-level model for day-to-day tasks, the MacBook Air is for you. On the other hand, if you're looking for something with more horsepower, the MacBook Pro is the way to go. Depending on which Mac model you have, you can take a screenshot in four different ways.
Capture the entire screen using keyboard shortcuts or the Touch Bar
The easiest way to capture a screenshot on your Mac is by pressing Shift + Cmd + 3. No complicated menus, no drag and hold the mouse, just press the three keys together. This shortcut tells macOS to take a screenshot of the entire screen, capturing all of the content on the display at that very instance. Additionally, if you use multiple monitors simultaneously, the shortcut will save screenshots of all the monitors.
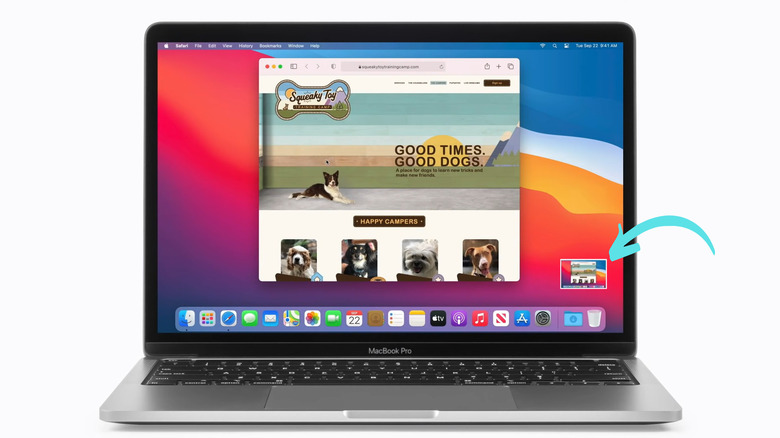
Once you take a screenshot, the image will appear as a floating thumbnail toward the bottom right corner of your display similar to how it appears on an iPhone or an iPad. Now, you can either click on the thumbnail to edit the screenshot, or you can wait for a few seconds until it saves to your desktop.
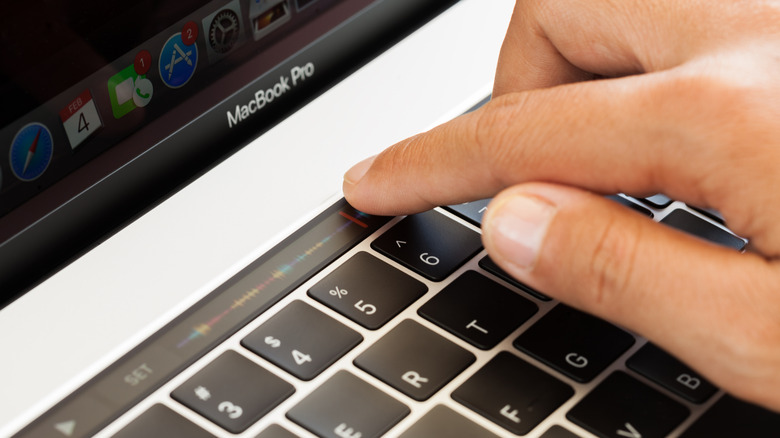
If your Mac has a Touch Bar, you can set up the screenshot button on the Control Strip. Head to the Apple menu, select "System Preferences," "Keyboard," once again click on "Keyboard," and finally on "Customize Control Strip" (via Apple). Click on "Add Buttons" and use the trackpad or a connected mouse to drag the screenshot button from the screen to the Control Strip. Once you've placed the screenshot button on the Control Strip, click Done, and that's it. After this, whenever you need to take a screenshot, tap the screenshot button on the Touch Bar instead of pressing three keys at once.
Capture a specific part of the screen with these shortcuts

Suppose you don't want to capture the entire screen; in that case, press the Shift + Cmd + 4 keys to capture a specific portion. As soon as you press the keys, your cursor will turn into a crosshair. You can drag and select the particular part of the screen you want to capture using the crosshair cursor. Move the crosshair to where you want the screenshot to start, click and drag to the desired area and release your mouse or trackpad to take a screenshot. Press the Esc key before releasing the cursor to reselect.
Now, there are a couple of things that you can do with the Shift + Cmd + 4 command. After pressing the three keys, you can press the spacebar once to take a screenshot of a window on your desktop (via Apple). As soon as you hit the spacebar, the crosshair turns into a camera. When you hover this camera over a window, it highlights the area. You can then click the mouse or trackpad to grab a screenshot.
While hitting the spacebar once will let you capture a window, holding it after you've created an area with the crosshair will lock its dimensions, making it easier for you to move the rectangular selection box around. Similarly, holding the Shift key after selecting an area allows you to adjust its length and width. Hence, you can take screenshots in four different ways using the Shift + Cmd + 4 key combination.
Use the screenshot menu
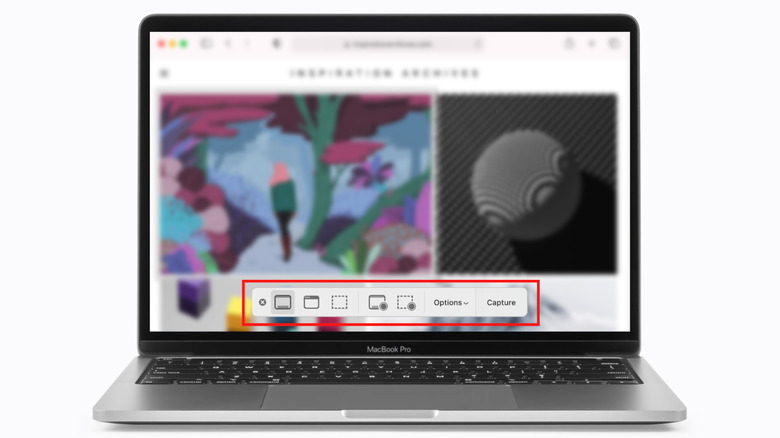
So far, we've told you how to take a screenshot in three different ways: creating a Touch Bar shortcut, using Shift + Cmd + 3 to capture the entire screen, and Shift + Cmd + 4 to capture select areas. For the fourth method, we'll introduce you to the screenshot menu added to macOS Mojave in 2018. Those who wish to change the settings of their screenshot or record their Mac's display may prefer the screenshot menu. To summon the screenshot menu, you've to press Shift + Cmd + 5, and a rectangular menu will appear toward the bottom of the display, right above the Dock.
By default, the screenshot menu shows up with seven icons. Starting from the left, the first three icons are used to take a screenshot of the entire screen, one particular window, or a portion of the screen, respectively. The next two icons are for recording the whole screen or a specific part in the form of a video. Then there's the Options icon that lets you decide where your screenshots will be saved, whether it'll use a timer, and whether you want the system to remember your last selection. If you don't want your screenshot to show as floating thumbnails after you click them, this menu also contains the Show Floating Thumbnail option. The last icon is used to capture a screenshot right away, which is useful when you're using the screenshot selection crosshair (via Apple).
Some useful tips for taking and storing screenshots on Mac
By default, macOS saves screenshots on your desktop with the name "Screen Shot [date] at [time].png," though it'll first show you a preview thumbnail for a few seconds. If you capture screenshots quite often, creating a separate folder on the desktop will be wise. However, if you want to change the default location where the screenshots are saved, you can do so in the screenshot menu. To open the menu, press Shift + Cmd + 5, select the Options icon and choose from several locations such as Desktop, Documents, Downloads, Clipboard, Mail, and Messages.
You can also set a screenshot timer with the screenshot menu. The timer is available in the Options menu described above. It gives you a five or 10-second gap before capturing a screenshot so that you can organize your desktop the way you want. On an official support page, Apple mentions that some apps like Apple TV+ might not let you take a screenshot. Additionally, if you wish to copy a screenshot to the Clipboard for using it afterward, press and hold Control while taking the screenshot. Last but not least, if you have a Mac with a Touch Bar and you want to take a screenshot of the contents in the Touch Bar, press Shift + Cmd + 6.