This Is The Best Way To Destroy An Old Hard Drive

Memories have been a staple of our psyche throughout human history and have even served an evolutionary purpose by helping us learn from and avoid bad experiences. They also help us digest information for future recall and indulge our nostalgia. Fortunately, with advanced technology at our disposal, we have many advanced options to store memories without stressing our brains. The advent of the digital age has made storing memories much easier, thanks to digital data storage solutions like CDs, floppy discs, and hard drives.
But at the same time, with the fast-paced advancements in data storage technology, faster and more secure solutions like solid-state hard drives (SSDs) and flash storage drives have become more economical while optical hard drives are fast going obsolete. If you still have an old hard drive that you want to replace with a faster, lighter, and more compact SSD, there is a good chance you might want to get rid of the older one too. But getting rid of an old hard drive can lead to compromise of any private or sensitive information stored on that drive. That's why it's so important to know the best way to destroy an old hard drive.
As someone with several years of experience dealing with a variety of optical, solid-state, and network based storage devices, I have created an easy guide for you to obliterate your hard drive and its contents.
Why you should destroy an old hard drive
It is vital to dispose of a hard drive carefully because of how easy it is to recover data from a hard drive, even if it has been formatted. Even when a hard drive is not functioning properly, there still are chances where someone can recover it and abuse your private data. If that happens, you can be subject to bullying, blackmail, or even identity theft. An optical hard drive can also survive extreme conditions like being submerged in water for a long time, under a strong magnetic field, or smashed brutally with extensive force — sometimes, even being shot at, says the Washington Post.
To eliminate any chances of your data being abused, it is important to not only wipe the contents on the hard drive using a software solution but also dismember the parts physically. You can also go ahead and smash the parts individually to be completely assured (or even just to have fun). Remember, just water or brute force from outside will not be enough so you will need a few tools to get started.
Tools you will need to destroy a hard drive
To obliterate a hard drive, you must have the right tools to disconnect and disassemble the hard drive. In the case of an internal hard drive that is already — or was previously — connected to your computer, you will need:
• A Torx screwdriver to unscrew the case holding the internal components together
• A flathead screwdriver or a tapered-end tool like a metal strip or a guitar pick to pry the case open
• Protective eyewear
• An office safety knife
• A hammer to smash the parts*
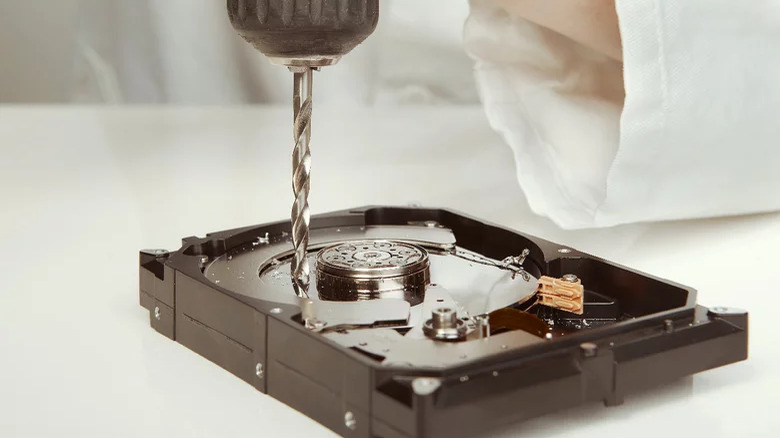
*Alternatively, you can use a nail gun or a drill to poke holes through the circular platter — the rotating disk inside the hard drive that holds the data.
In the case of an external hard drive, you might not want to skip on that flathead screwdriver we mentioned above because destroying it requires an extra step of the plastic case needs to be cracked open as well.
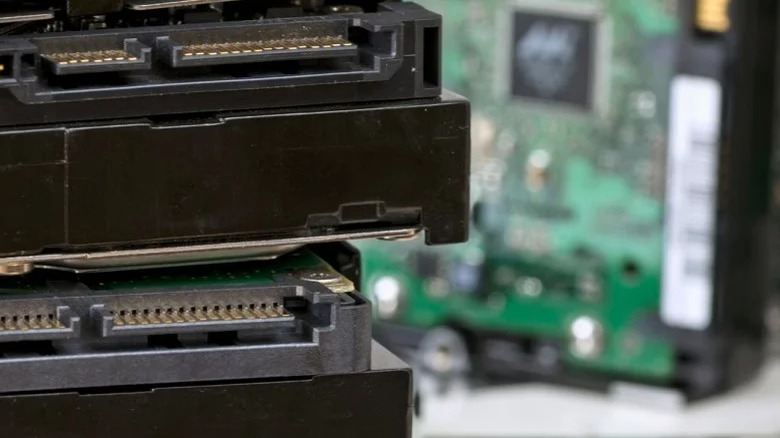
The main components include a stack of circular magnetic disks or platters, usually made of glass or ceramic and protected with a fine later of steel. Sometimes, the platter inside a hard disk can be made of aluminum. Other than the platter, you'll find these parts:
• A spindle that rotates these drives like a record on a gramophone,
• An actuator arm that is fixed at one end while the other moves, and
• A head attached to the arm to read and write data on the platters.
How to physically destroy an old hard drive forever
Once you have all the right tools, you can channel your inner-Hulk to get rid of the hard drive forever. Before starting, connect the hard drive to your Windows, Linux PC, or Mac to check if there are any files you want to salvage. If so, take a backup on your computer. As an extra step, you can also format it using system tools like Disk Management or Disk Utility or a third-party software like DBAN if you've stored highly sensitive data.
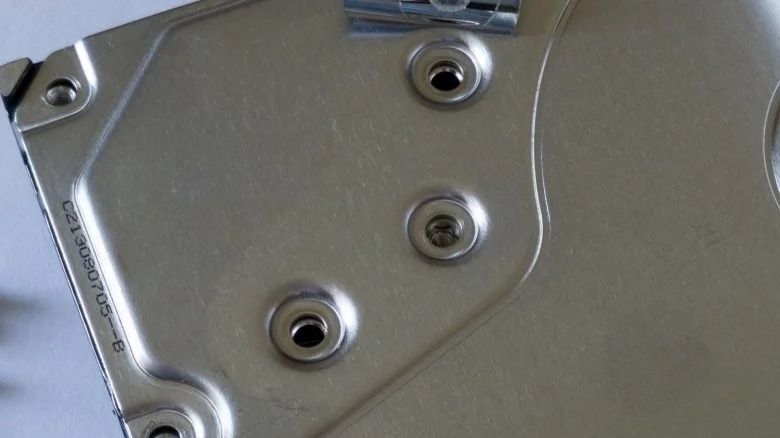
The first step following that will be to remove the plastic casing from the external hard drive by inserting a flathead screwdriver where two perpendicular surfaces meet. This will not apply to an internal hard drive, and the following steps will be the same for both types of drives. Next, unscrew the Torx screws on the top using a matching head.
Opening the hard drive will uncover the internal components. Remove all of these parts and take the platters out to be destroyed. Be sure to use safety goggles. Once done, start by scratching the surface using a safety knife cutter and then smashing the platters with a hammer.
You can also drill holes into the platter using a drill or a nail gun, or even put the platter through a metal shredder to ensure the data is beyond recovery. Some locales have dedicated providers who'll destroy your hard drives — but the experience may never be as comforting or satisfying as doing it yourself.
Dispose of the destroyed hard drive responsibly

Keep in mind that, once destroyed, the shards of the platter can be dangerous and, therefore, must be disposed of responsibly and safely. Not only can the material be dangerous if it comes in contact with vulnerable skin, the interior platter may even be made of a material that is toxic to humans, animals, or the environment. It is critical that you go to an e-waste disposal center in your area to get rid of these broken pieces rather than dumping them in your household garbage.
In addition, you can also lookup dedicated resources such as the following:
• NIST Guidelines for Media Sanitization (PDF), or
• ISO 27001 Annex 8.3.2: Disposal of Media.
Once you complete all of the steps above, you can pour yourself a hot cup of coffee or a cold beer, and treat yourself for destroying an old hard drive thoroughly, responsibly — and for good.