How To Turn Your Raspberry Pi Into A Weather Station
We may receive a commission on purchases made from links.
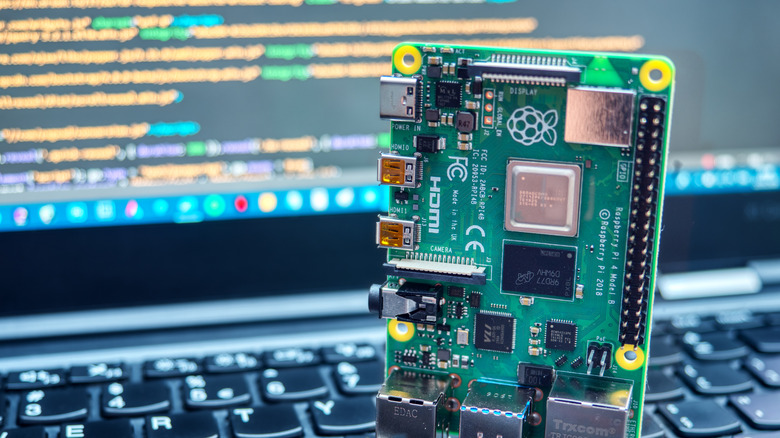
Raspberry Pi, a mini single-board computer (SBC), is a blessing for DIY enthusiasts. It gives users the flexibility to create general purpose or sometimes dedicated gadgets that serve various purposes without burning a hole into the pocket. Besides standalone Raspberry Pi devices, one can also attach HATs or Hardware Attached on Top to achieve a specific function using barebones or homemade hardware. For instance, you can connect primitive temperature and humidity sensors as HATs and use them to convert your Raspberry Pi into a weather station.
Owning a weather station can have many advantages. First, if you are a data nerd like me, you must get a dopamine rush from constantly engaging yourself with numbers. Using a bespoke weather station sensor can give you accurate temperature, atmospheric pressure, and humidity values, alongside other values relevant to your particular location. The same can also be helpful for schools and colleges, office complexes, farms, or laboratories.
This exclusive weather station can be used to study the local climate if you live in a remote location (or live out of a camper or trailer) and don't have a state-sponsored weather station nearby. Moreover, temperature and humidity are crucial for optimal crop growth. This personal weather station can ensure you give your crops just the right amount of water and nutrients, especially for plants requiring extreme care.
What do you need to turn your Raspberry Pi into a weather station?
While there are numerous applications for a Raspberry Pi-powered weather station in different areas, the primary assembly and the installation are pretty much consistent across all of them. Besides the Raspberry Pi module, you need a few more things to get started with the assembly process.
Before we start, we must warn you that you will need substantial experience either working with DIY projects involving Raspberry Pi or enough acumen and diligence for assembling and programming the apparatus into a working one. Moreover, the process may be lengthy and could transpire over several hours or even days (based on your availability). You can start by gathering the following items once you have made up your mind about building this weather station.
Things you will need to build a Raspberry Pi-based weather station include:
-
Raspberry Pi module with wireless connectivity or a Wi-Fi dongle attachment
-
A BME280 module for attaching pressure, temperature, and humidity sensor
-
A DS18B20 temperature probe with a one-meter-long lead
-
Two 4.7k Ohm resistors. If you create DIY projects often, it might be worth getting a set of 100 or so resistors. You may also get a DIY kit with resistors of different resistance values.
-
MCP3008 Analog-to-Digital Converter (ADC) integrated circuit
-
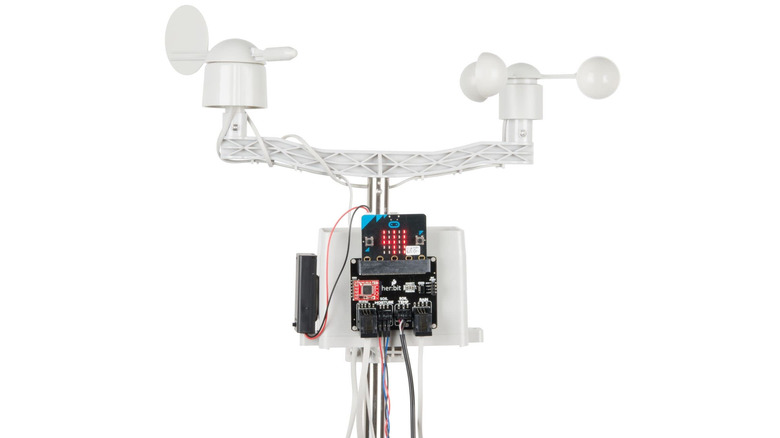
A weather kit that includes all the required instruments, such as an anemometer, a rain gauge, a wind vane, etc., along with a pole to mount them.
-
Screwdrivers, pliers, wirecutters, insulating tape, soldering iron, etc.
-
An enclosure to make the apparatus weatherproof
-
A PC to configure the Raspberry Pi module
If you do not wish to go through the hassle of accumulating all the items individually, you may also find some weather kits pre-installed with basic circuitry.
Once you have had a massive cup of coffee, assembled the tools, and gathered all the strength you need to build a weather station with Raspberry Pi, you can get started with the process below.
How to prepare Raspberry Pi to be used as a weather station
1. Once you get all the items you need for your weather station, start by installing an operating system on your Raspberry Pi module. You can follow the instructions to install Raspberry Pi OS or any other Linux distro. If the Raspberry Pi module has an operating system pre-installed, you can use this tutorial to update the OS.
2. For the next step, you will need to install dedicated Oracle Raspberry Pi Weather Station software for the module to function. To download the software, you can use the command line in Linux and enter the following command:
git clone https://github.com/RaspberryPiFoundation/weather-station
3. Next, you will need to install the BME280 Python library for different electronic sensors. To do that, enter the following command in the command line:
sudo pip3 install RPi.bme280
4. Next, install the MariaDB database server software using the following commands:
sudo apt-get install -y mariadb-server mariadb-client libmariadbclient-dev
sudo pip3 install mysqlclient
Once you have the Raspberry Pi module ready with these prerequisites, get ready to assemble the equipment and install different programs for the individual sensors.
How to set up a Raspberry Pi weather station
Once you have the essential software ready, start assembling the wires for each sensor and mechanical instrument. If you have enough experience dabbling with electronic DIY projects, you may either refer to a collective wiring diagram for the weather station or you may refer to individual sections for setting up the following:
Once all of these devices are individually set up, you use code to import these values from individual Python scripts and save them into a database. These values will be displayed on the front end of your program. Once all of these are set up, make sure you do a test run of the program before taking the setup outside for installation. Move the mechanical instruments manually to ensure the values change with physical movement.
Then you will need to set up a database where these values will be continuously recorded. Follow the instructions to set up the database. Once that is done, configure the Raspberry Pi module for wireless connectivity using a Wi-Fi connection. This will help us record data without having to rely on wired connectivity.
Install your Raspberry Pi weather station outside
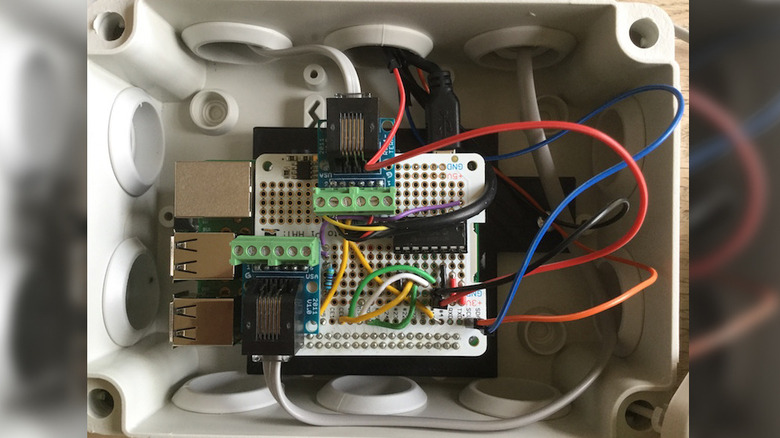
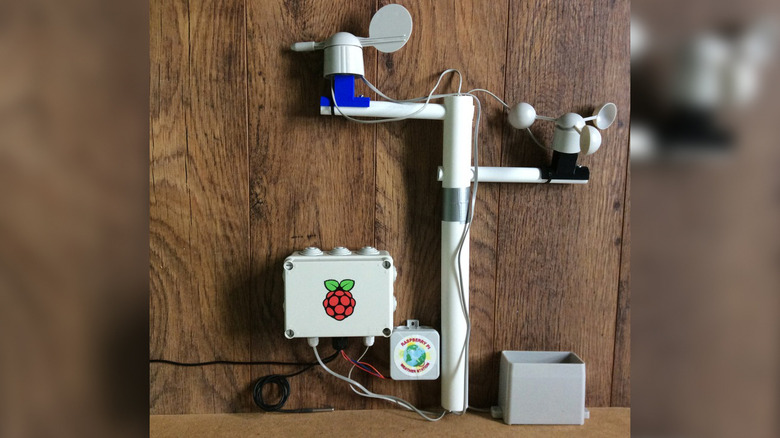
You need to consider one more aspect before mounting your weather station: To ensure it stays upright and continues working against all odds, you must create a waterproof and corrosion-proof enclosure made of non-conducting material. You could use an existing plastic box, cut out precise holes for the wiring, and then seal it off with a sealant. Or, if you want a cleaner and more stable structure, you can get the enclosure 3D-printed, although that might increase the cost of the setup.
Once you have the enclosure handy, ensure a power connection in an area away from rain and the elements. If you cannot provide wireless connectivity, ensure your Raspberry Pi has an Ethernet port that can be engaged for internet connectivity. Then, install the mechanical sensors, including the anemometer, wind vane, and rain gauge, on top of a pole. Place the pole at a position where the instruments get airflow that is not restricted by the surrounding buildings.
After mounting the weather station, you can start recording the values from the sensors. As a bonus, you can also ensure your weather station gets uninterrupted power by building a DIY power backup using Raspberry Pi.
Those who feel engaged and invested enough to enhance the setup can also go ahead and set up a web server for their Raspberry Pi weather station to ensure it doesn't need to rely on a WLAN network to record and read these values. Eventually, you can also expand it into a bigger project to share the data with your fellow researchers or enthusiasts.