Windows 11 USB Installer Guide: How To Make One & Why You Should
Ever since the rise of the personal computer, we've seen multiple different ways to interact with computers, including a variety of different operating systems. It's hard to believe that operating systems used to be just text until the graphic user interface made the computer a much more accessible piece of hardware.
A couple of decades ago, the best way to install an operating system like MS-DOS, as seen on the IBM PC, was through floppy disks. As they could only store tiny amounts of data, some operating systems came with several floppy disks; insert, wait for that bit of data to be installed, remove, insert the next, rinse and repeat. Floppy disks became CDs and DVDs, and eventually optical discs were supplanted by USBs. The interfaces to install operating systems also weren't particularly fancy. On Windows XP, for example, it was just a bunch of white text against a blue background and single-key commands you had to press.
The days of multiple floppy drives are behind us, you can now install Windows from a single USB flash drive and not have to worry about the slow read times of DVDs and the even slower read times of floppy disks. Not only that, but anyone can make a Windows install USB to use on any computer. Here's how you can do that and why it's a good idea to do so.
Making a Windows install USB is pretty easy
First things' first, you need to make sure you have a USB at least 8GB in capacity. You can still use larger ones, but be aware that everything on the drive will be wiped, so either back up everything that's on it or just use a brand new drive. As Microsoft no longer officially supports Windows 10, you'll need to make sure the PC or laptop you're creating this installation media for is compatible with Windows 11, and you also need to make sure the computer you're using to create the install media is a Windows machine as well. If you're running macOS or Linux, you'll have to set up a Windows virtual machine.
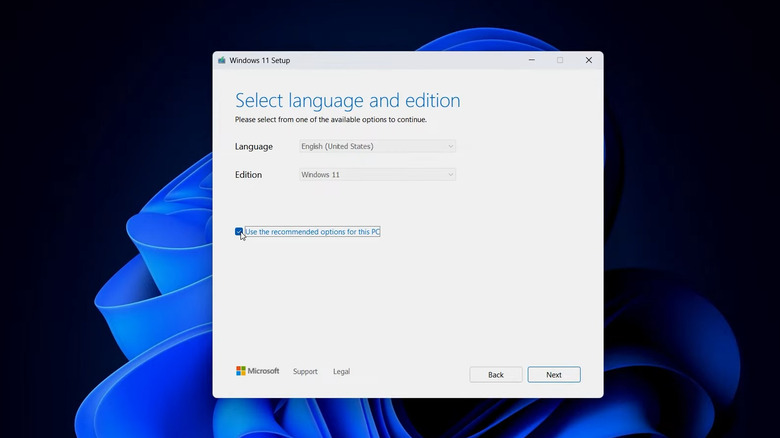
With all that said and done, the next step is to plug in the USB drive and download Microsoft's Windows Media Creation Tool. There's no need to format the drive preemptively, as the Media Creation Tool will take care of that for you. When you download it, open it up, and it will ask you to select the USB drive that you want to install Windows to. After you confirm it, it will begin the process of downloading a Windows 11 image and writing it to the USB drive.
It might take a while, depending on your internet speed and some other factors, but once it's done, safely eject the USB from the computer, and then plug it into the other computer that you want to install Windows to. Depending on how new it is, and especially if there's no OS installed, it will automatically detect the USB as a bootable device, and it will launch the Windows 11 installation for you. After that, it's all business as usual.
Once you're done with that, it's a good idea to designate that USB as your de facto Windows installer. You never know when friends or family, or even your own computer might need a clean install of Windows, and if your access to a second Windows machine isn't always guaranteed, it's a good idea to have a Windows installation ready to go any time.