Harley-Davidson Oil Change Kits: Here's What They Typically Come With
Once you fork over the money to become a Harley-Davidson motorcycle owner, the financials don't end there. Like any form of gas or electric-powered transportation, there are routine maintenance tasks to be done and paid for. Fortunately, not only are there several Harley-Davidson models that are dirt cheap to maintain, but the brand itself makes it easy for those seeking to handle their own upkeep to do so. For example, one of the most important yet simplest tasks one can handle on a Harley is an oil change, which the company has made an effort to make simple for its riders.
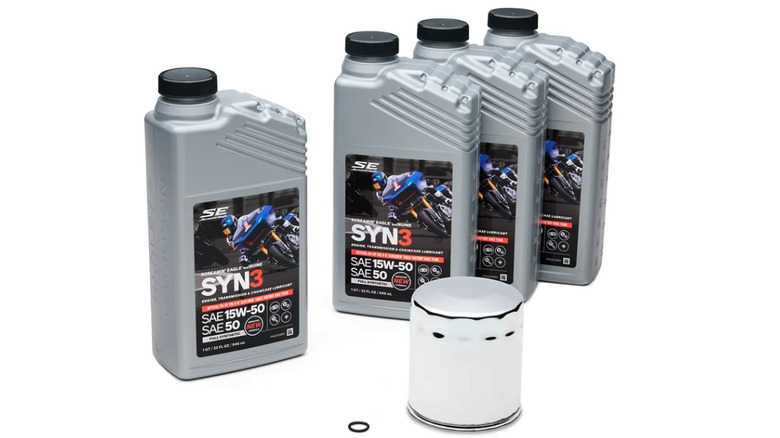
Harley-Davidson has a host of maintenance kits for sale, including those for oil changes. While there is some variation depending on which specific kit you buy, for the most part, there are a few essential elements found in each to get the job done. Naturally, motor oil is included, along with a fresh filter and a replacement O-ring. Combined, these provide fresh oil to move through your bike, a clean filter to catch various contaminants, and a strong O-ring seal around the drain plug to prevent leaks. Elements like oil change funnels, drain pans, and the like are sold separately. Should you opt to purchase a Harley-Davidson oil change kit, you have all the essentials to get a routine oil change done. You can then move on to the actual process, which isn't very difficult.
How to change the oil of a Harley-Davidson motorcycle
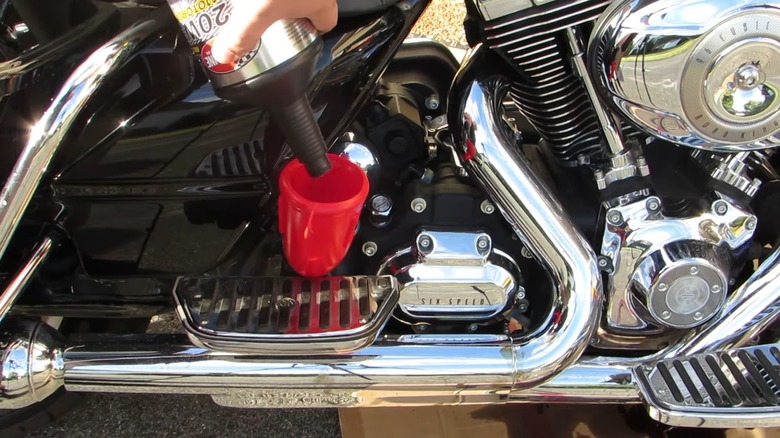
With your Harley-Davidson oil change kit at the ready, you're almost prepared to change your oil. As mentioned, an oil pan and funnel are good to have on hand to safely catch the old oil and help pour in the fresh batch without making a mess. A ratchet and appropriately-sized socket are needed to remove the drain plug, and gloves are a good idea as well. At this point, you're all set to change your bike's oil.
- Start your motorcycle to warm the oil up. This helps it drain from the bike. After a few minutes, turn the bike off.
- Remove the engine's oil cap to allow air into the system.
- With your drain pan situated underneath, remove the drain plug and allow the old oil to pour out. If needed, replace the plug's O-ring.
- Remove the old filter and install the new one. Make sure to add a layer of oil to the new filter's gasket for a proper seal.
- Reattach the drain plug and pour in the fresh oil. Only add as much as is recommended by the manufacturer.
- Clean up the motorcycle and the surrounding area, double-check everything, and fire up the engine to ensure your work is done. Check the oil level with the dipstick as well.
That's all it takes to get a Harley-Davidson oil change done. Of course, it should be mentioned that some Harley-Davidson models require a three-hole oil change, which involves draining oil from three locations. Still, the bulk of the process is the same, and one of the brand's oil change kits can be equally beneficial in getting this work done.