How To Use Google Gemini AI To Create Realistic Photos: A Step-By-Step Guide
In the days of old, every time you needed a personal photo, you had to go out of your way to take it yourself. You had to visit your desired location, set up the scene, and snap the picture. Fast forward to today, and photos are now as easy to make as your cup of coffee. All you have to do is open your phone or computer and type away. This convenience is thanks to generative AI, which, over the years, has evolved from producing wonky images to more believable photos.
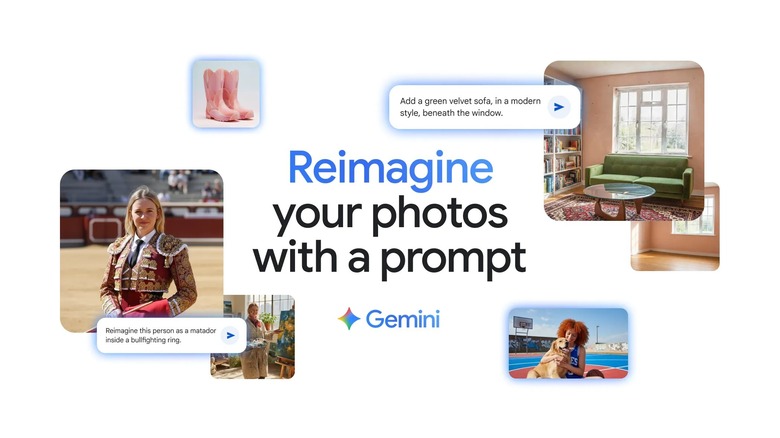
If you're looking to create realistic-looking pictures, then you've probably seen most people using Google Gemini, and for good reason. The tech giant recently introduced its advanced image generation model — Nano Banana — and is going viral for its lifelike results. The best part is that it's free to use Google Gemini as long as you have a Google account (and who doesn't?). We'll walk you through the exact step-by-step process of how to create realistic images with Google Gemini.
Step 1: Access Gemini on your phone or computer
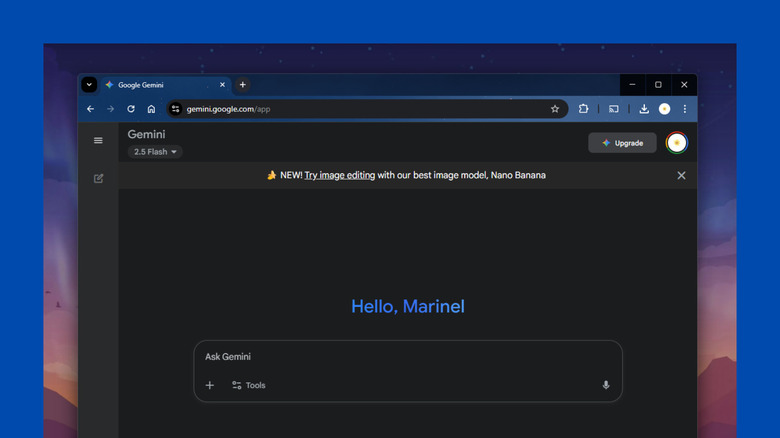
Google Gemini is accessible on both your phone and computer, so you can go with whichever device is most convenient for you. To use Gemini on your computer, simply open a browser and visit gemini.google.com. If you're on your phone, download the Google Gemini app from either the Google Play Store or Apple App Store. You'll need to sign into your Google account to use the tool, so make sure to create one if you haven't already.
Once you have the Gemini chatbox open, choose your preferred AI model in the top-left corner. The 2.5 Flash model is available for all users for free. If you have a subscription, you can switch to the 2.5 Pro model, which is more advanced. You can actually use 2.5 Pro on a free account too, but the access is limited to five prompts per day.
Step 2: Write your prompt
Like most other AI image generators, Google Gemini can create images in all sorts of styles. But to make them as realistic as possible, you have to nail down your prompt. Google recommends following the formula "Create an image of ." So, for instance, you can write something like "Create an image of a group of friends hiking near a river during a sunny day," or "Create an image of a girl wearing a dress in a playground."
Once you decide what your subject, action, and scene will be, add more detail to each one. The more specific you are, the better. You can try describing what the subject and scene look like and including details, such as the age, gender, body type, expression, and number for the subject and location, time of day, season, weather, and background details for the scene. Adding extra details like the photo's overall mood (e.g., serene, joyful, romantic) and color (e.g., monochrome, sepia, vibrant) wouldn't hurt either.
If you want to get all technical, you can also mention specific photography-related details. You can describe the camera (e.g., Polaroid camera, Fujifilm X-T5), camera angle (e.g., wide-angle, close-up), lens type (e.g., macro, fisheye, standard), lighting (e.g., natural morning light, studio light, lantern glow), and even resolution (e.g., 1080x1920, 8K). Don't forget to reference the image style in the prompt as well. For realistic AI-generated photos, include the words photorealistic, ultra-realistic, or hyper-realistic.
Keep in mind that the prompt isn't limited to just one sentence. You can make it two or three, depending on how many details you want to include.
Step 3: Create your image
There are two ways to use Google Gemini to create realistic photos: by using only a prompt and pairing uploaded image/s with your prompt. If you're creating the entire image from scratch, all you have to do is write the prompt with the help of the tips and tricks provided, and then send it in the chatbox.
If, however, you want Gemini to use your own pictures in some parts of the generated image, you have to upload the file first. To do so, click on the plus icon and select Upload files. You can add a maximum of ten images in the chatbox.
When working with an existing image, the prompt formula will differ slightly as Gemini can do so much more with it. For instance, you can upload two pictures — like separate selfies of you and your dad — and ask Gemini to combine them into a single photo of you together. You can also add new objects or persons to your personal image, or change some elements of the image like your outfit, hairstyle, makeup, or background. Gemini can even extract just a certain part of the image, like your face, and use it in a completely different scene — maybe transport you to the Eiffel Tower or turn you into a race car driver, all while keeping your facial features consistent.
Whichever approach you prefer, it's important to keep your prompts as detailed as possible to make Google Gemini's AI response more precise.
Sample prompts to try
Using the tips and tricks, we've tested these prompts in Google Gemini to generate some realistic photos:
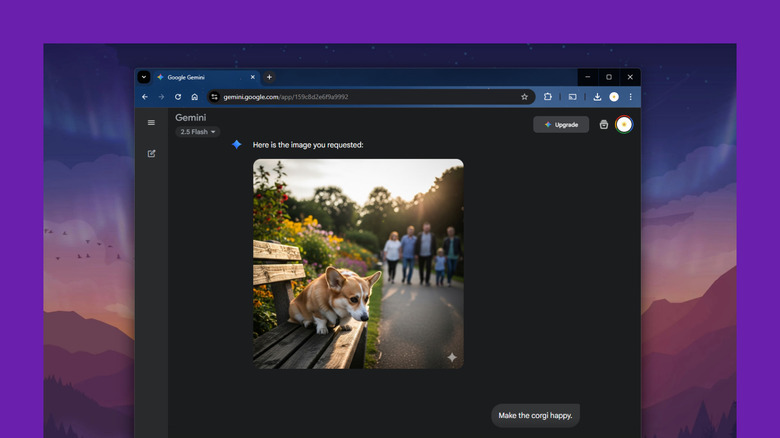
- Create a photorealistic image of a sad Pembroke Welsh Corgi sitting on a bench in a park in the late afternoon, with a lush garden in the background and several people walking past the bench. Make it so that the photo is captured in wide-angle with the Nikon D780 and in natural light. Keep the resolution at 4K.
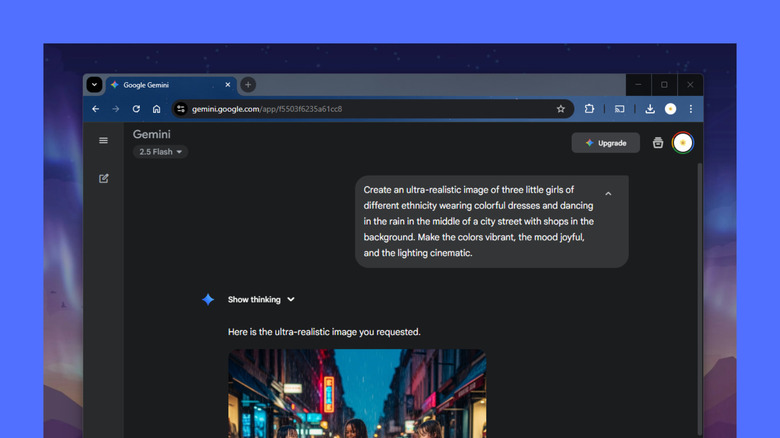
- Create a hyper-realistic image of three little girls of different ethnicities wearing colorful dresses and dancing in the rain in the middle of a city street with shops in the background. Make the colors vibrant, the mood joyful, and the lighting cinematic.
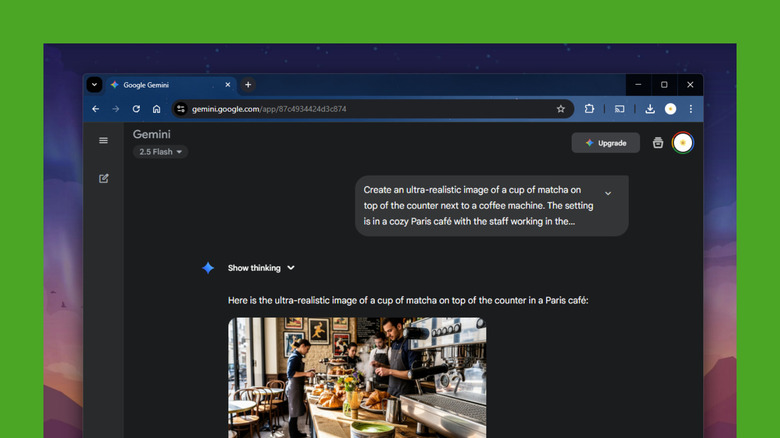
- Create an ultra-realistic image of a cup of matcha on top of the counter next to a coffee machine. The setting is in a cozy Paris café, with the staff working in the background in the middle of the day. Make the photo 1920x1080 and use soft and natural lighting and highly detailed textures.
If you're working with existing images, here are some sample prompts you can try:
- Using your selfie: Change the hair to a '90s hairstyle with fancy hair accessories. The photo should be taken from the waist up in the style of a retro mall photo studio.
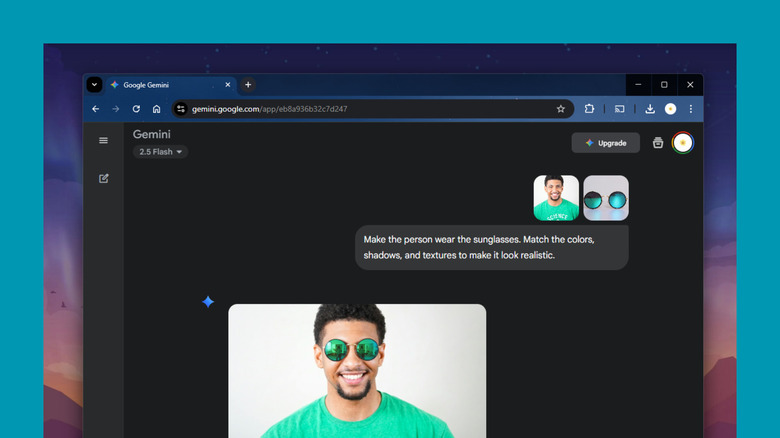
- Using your selfie and a picture of sunglasses: Make the person wear the sunglasses. Match the colors, shadows, and textures to make it look realistic.
- Using two selfies: Make the two hug each other. Keep the lighting and details consistent for a realistic effect. Set the background to a white curtain. The photo should be taken with a Polaroid camera.
Feel free to edit the prompt to your liking.
Step 4: Edit and download the generated photo
After generating the image, you can either download it right away or make further edits if you're not satisfied with the first result. There are two ways to edit the photo. One, just click on the redo button under the generated image. Gemini will use the same prompt but give you a completely different picture.
If you want to keep certain parts of the image, though, you can send a new prompt in the same chatbox. For instance, to replace the subject's outfit, you can say something like, "Change the color of the woman's T-shirt." Gemini will copy every other aspect of the photo, except for the element you want to replace. You can also add or remove elements in the image as needed, and even use an existing photo from your local storage. Here are some sample prompts for editing:
- Change the time of day to sunset.
- Add a bokeh effect to the picture.
- Replace the name of the shop with "Rain and Sunshine."
- Add this person to the photo to make it look like she's a part of the group.
Once you get the result you want, download the image by simply hovering on it and pressing the download icon that appears in the upper-right corner. Just a heads up: the photo will have a semi-transparent watermark in the bottom-right corner. This appears in every Gemini-generated image. You can opt to crop the photo if you want to remove the watermark.