How To Test Your SSD Or HDD For Potential Problems
Unless you keep all 512GB of your local files backed up to the cloud, having your computer drive crash on you is one of the worst nightmares there is. Just imagine being unable to access your precious photos from way back in high school, or the urgent documents you need to submit to your client by the end of the day.
Once your SSD or HDD fails, you'll notice several other issues with your computer, too. One of the key warning signs of a failing SSD or HDD is difficulty booting up. You may need to power it on multiple times before it loads the OS properly. If you encounter problems with your PC or laptop, such as random freezing when running certain programs or opening specific files, it may also indicate that your drive is nearing the end of its lifespan.
No matter how well-maintained your drive is, it will eventually degrade after several years. Before that happens, though, it's a good idea to test your SSD or HDD for potential problems. This way, you're prepared for any unwanted incidents.
See if your Windows disk has any potential problems
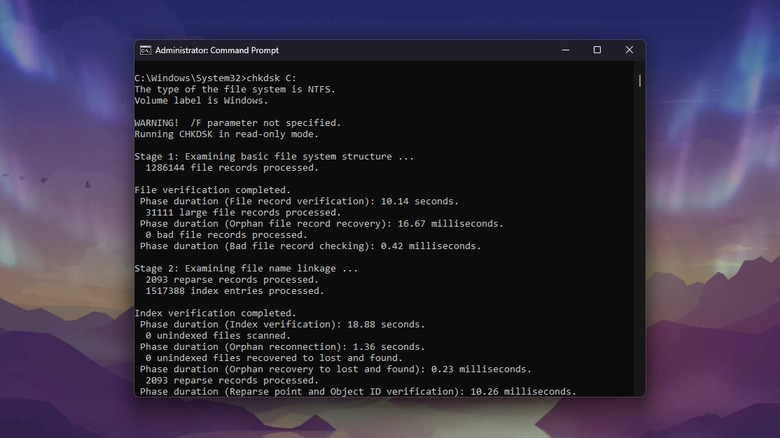
To test the SSD or HDD on your Windows computer for potential problems, you can use multiple native tools. One of the most flexible ones is chkdsk. It's a command-line utility designed to diagnose and fix any physical or logical issues with the storage drive. You can use chkdsk for several things, such as get the status of your disk, fix errors, look for bad sectors, or run an offline scan, among many other things. Follow these steps to test your drive with chkdsk:
- From the Start menu, search for cmd.
- Right-click on Command Prompt.
- Select Run as administrator.
- Type this command and hit enter to see the drive's status:
chkdsk C:
- Wait for the checking to finish. This lasts for just a few minutes.
- Once the process is done, scroll to the bottom of the report. If your drive is okay, you should see a message saying "Windows has scanned the file and found no problems."
- If you see anything but, run chkdsk again to fix the errors. This time, type:
chkdsk C: /r
- This will search your drive for bad sectors, repair them for you, and recover the information. If chkdsk successfully resolves the issue, the message at the bottom of the report will say "Windows has made corrections to the file system. No further action is required."
You can check chkdsk's other available commands by running:
chkdsk /?
Make sure to read the command's description properly before using it — some are only applicable to certain types of disks. If you're not a fan of command-line utilities, you can also go with free Windows apps like CrystalDiskInfo on the Microsoft Store. It can show you the drive's health status and temperature, along with other relevant information.
Test your Mac computer's storage drive for errors
macOS features a built-in app called Disk Utility that helps you run a health check on your computer to check if your storage drive is about to crash. Here's how to use it:
- Search for Disk Utility with Spotlight.
- Choose the internal disk you want to test on the left side panel.
- Press the Info button in the upper right corner.
- If you get a "fatal hardware error" message, start backing up your Mac to iCloud or an external drive. This error typically means your disk is experiencing a hardware failure and needs to be replaced.
- If there's no error message, go back to the Disk Utility home page and expand the disk on the left.
- Select the very bottom volume from the list.
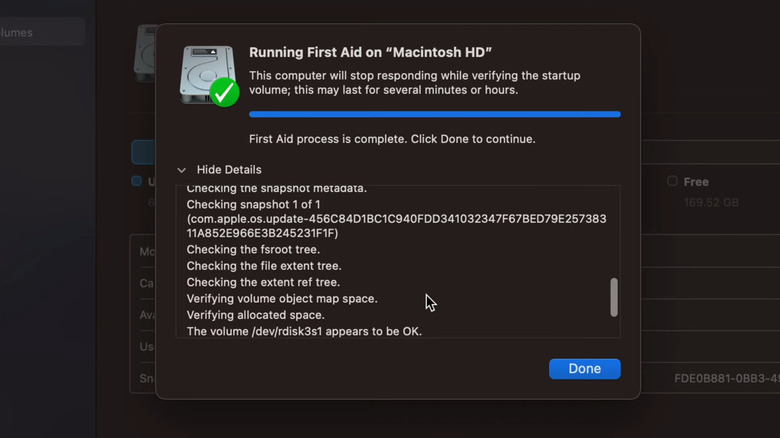
- Click First Aid at the top. First Aid will scan your disk for errors and repair any formatting and directory problems it will encounter.
- Hit Run to proceed.
- Click Continue.
- Wait for the process to finish.
- Press Done to exit.
- Run First Aid on each of the other disks on the list, working your way up until you reach the main storage device itself.
- If First Aid reports no issues or has already resolved them, exit Disk Utility.
- If First Aid fails, try running it again. After several failed attempts, it may be time to reformat your computer drive and reinstall macOS. Make sure you back up your data beforehand.
- If you get an overlapped extent allocation error, check the files mentioned. One of them might be corrupted and needs to be deleted.
If Disk Utility determines that your drive is beyond repair, it's best to take it to a service center for replacement.