Do You Still Have To 'Safely' Remove Flash/USB Drives In 2025?
A USB flash drive is a reliable way to transfer files between PCs, back up important data, or even test out different operating systems. While most USB flash drives can last over a decade, their lifespan largely depends on how you use them. One common tip for keeping your data safe is to always eject the drive before unplugging it. This prepares the drive for removal by making sure all data is written properly and no file operations are in progress. While ejecting a USB drive only takes a few clicks, is it really something you need to do every single time you unplug it from your Windows PC?
If you pull out a flash drive while it's still in use, you risk losing data or corrupting the file system. In most cases, though, you're probably going to remove the drive after you've finished transferring files. As long as nothing is being copied or accessed, it's generally safe to remove the USB drive without using the eject option.
When you plug in a USB storage drive into your PC, Windows uses one of the two policies to manage it. By default, it sets the drive to Quick Removal, which keeps the drive ready to unplug at any time. Unless you've changed this, you don't need to worry about safely ejecting your USB flash drive before removing it.
Checking the default media removal policy on Windows
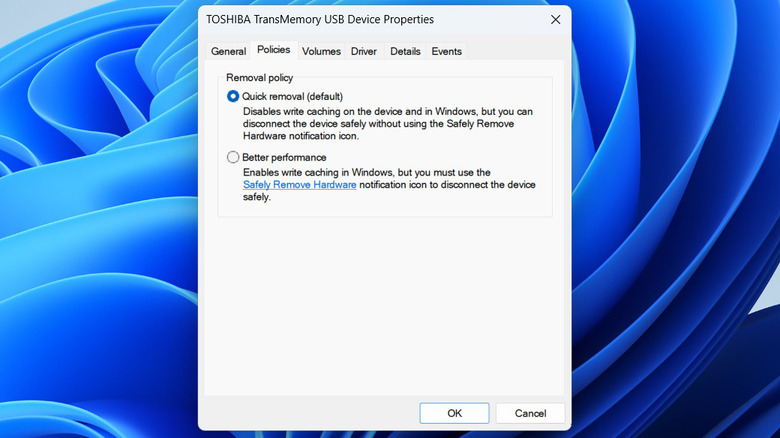
The default Quick Removal policy in Windows is convenient, but it does affect performance. The setting stops the system from caching data before writing it to your USB drive, which can slow down read and write operations. If you're just moving small files, it probably won't be noticeable. But if you want faster data transfer speeds, you can switch to the Better Performance policy for your USB flash drive. Here's how to do it:
- Press Win + E to open File Explorer.
- Go to This PC and note down the drive letter of the flash drive for which you want to change the policy.
- Now, press Win + S to open the search menu. Type diskmgmt.msc in the box and hit Enter.
- In the Disk Management window, locate and right-click the USB drive, then select Properties.
- Go to the Policies tab and select the Better performance option. If the Policies tab is missing, go to the Hardware tab, select your USB drive and then click the Properties button.
- Tick the "Enable write caching on the device" checkbox and hit OK.
Because these policy changes apply to each drive individually, you'll need to configure them for every USB drive you use. After that, make sure to safely eject the drive from Windows before unplugging it. To do this, click the "Show hidden icons" arrow on the taskbar, right-click your USB icon, and select "Eject [Drive Name]" from the menu.