Here's How To Install Ryobi's String Trimmer Line
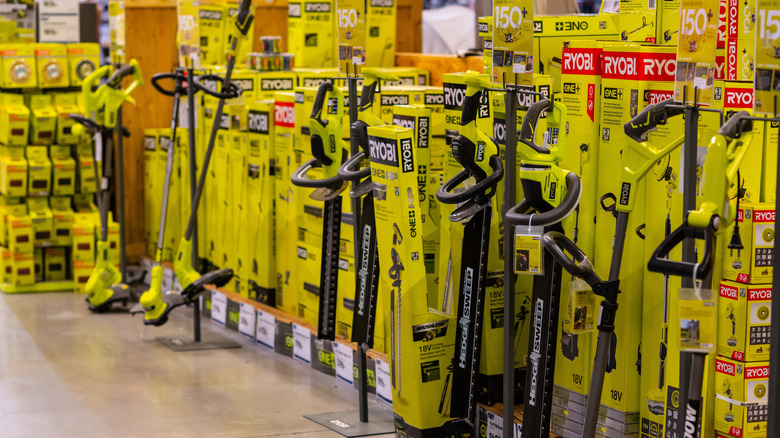
Attempting to fix or replace parts of your electric yard equipment can seem like a daunting task. One such example is installing the line of your Ryobi String Trimmer. As Ryobi has been creating tools since 1943, the engineers have made the process as painless and easy as possible. Instead of requiring a full set of tools and an hour of your time, loading your Ryobi String Trimmer will take about 60 seconds.
This project does require the use of a sturdy pair of scissors and measuring tape to make sure you're cutting the appropriate length of wire. You will only need those two tools for the first step though, as the rest of the installation is a breeze.
Since the Ryobi String Trimmer is a powerful piece of equipment, you should always make sure that you remove the battery and confirm there's no extra power that the String Trimmer is holding. This is for your safety and to make sure you're not damaging your tool.
How to attach Ryobi's String Trimmer Line
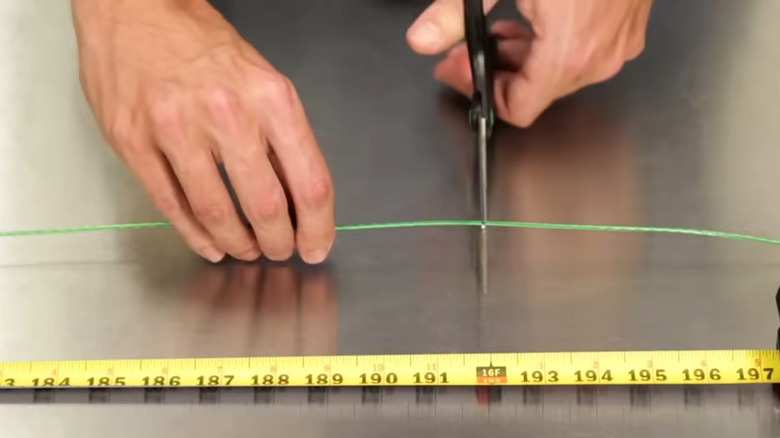
String trimmers, also known colloquially as weed eaters, are a useful tool in maintaining your yard. The first step in installing your new trimmer head is to pull out your measuring tape and count out 16 feet. Once you have 16 feet of measuring tape out, place the line you plan on installing into your Ryobi String Trimmer along the tape. Using a pair of durable scissors, cut the line so you have a 16-foot length of string.

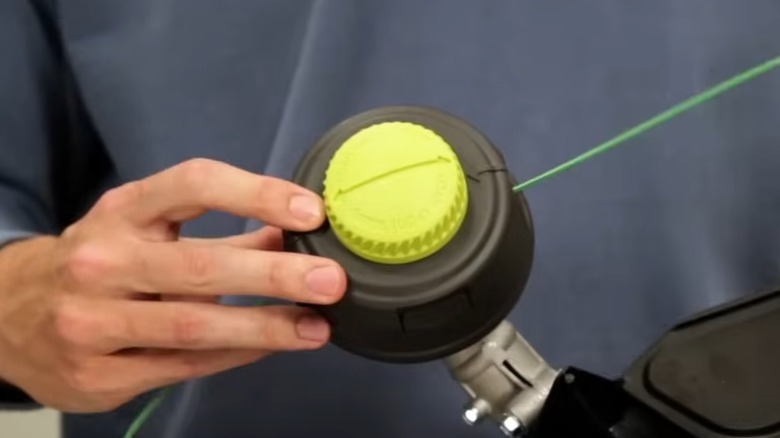
After you've cut your length of line, it's time to start installing it into your trimmer. On the bottom of your Ryobi String Trimmer you should find a green twisting cap that's attached to the black wire holder of the trimmer head. You need to align the arrows on the green twisting cap with the arrows on the black wire holder.
Once the arrows are aligned, grab your 16-foot line and start slowly feeding the wire through the two holes in the trimmer head. If the arrows are aligned correctly, the string should be able to pass right through the trimmer head with ease. You should stop feeding the wire through once there is an equal length of wire on either side.
How to crank Ryobi's String Trimmer Line

Once the wire has been evenly placed in the trimmer head, it's time to reach for your Ryobi crank attachment, which should have been included in your purchase of the Ryobi String Trimmer. Attach the crank device to the trimmer head and begin to twist the head clockwise, spooling the excess string into the trimmer head. You should stop once there is six inches of string on the two sides of the trimmer head.
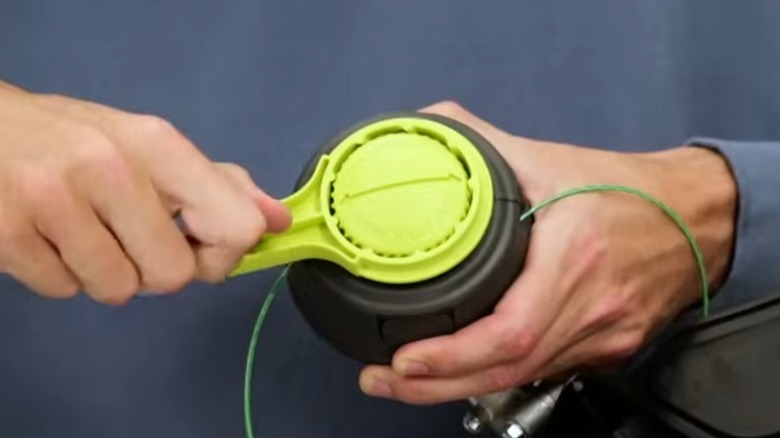
There are some Ryobi String Trimmers that don't have a crank attachment. If your trimmer doesn't have one, you can open up the twisting cap and manually twist the housing for the line. Once you've completed twisting the crank attachment, you should be ready to tackle the pesky weeds in your garden and yard.
Ryobi also gives owners the option of purchasing pre-cut lines, eliminating the necessity of measuring and cutting your own line. They sell the lines for Ryobi String Trimmers in four different sizes, so you'll need to make sure you're getting the correct size line for yours.