How To Easily Etch The Faded Sockets In Your Tool Set
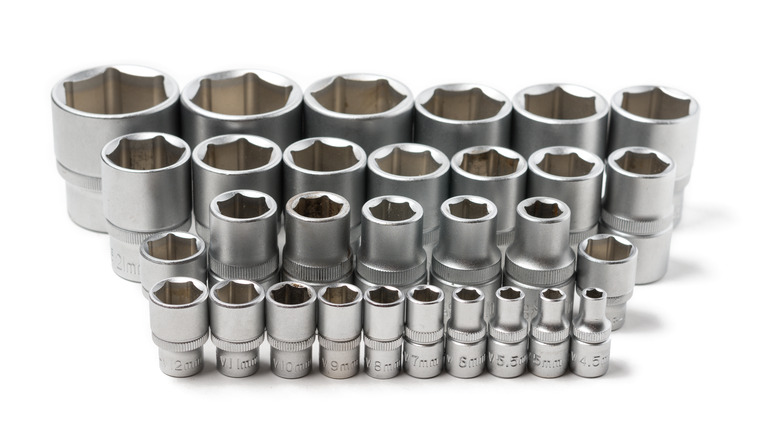
The various sockets that come with branded tools like socket wrenches usually have their precise measurements printed on the side. This is helpful for making quick selections and keeping them organized, but unfortunately, these labels have an annoying tendency to fade over time. When your tools get old enough, the labels become so faint you can only identify them by squinting really hard or trying to trace the outlines of the numbers with your fingers.
Instead of those obnoxious stopgaps, the better option would be to etch the labels back into proper contrast on your own. You can actually perform this task using materials readily available at the hardware store and supermarket. You might even have half of what you need sitting in your pantry right now, though you should still visit the hardware store for some safety equipment like goggles and gloves, just in case.
You can etch fresh labels on metal sockets with a battery, salt, and vinegar

Etching labels onto your metal tools requires a handful of components: a container of ordinary table salt, a bottle of white vinegar, some cotton swabs, sticky stencils, and most importantly, a power source. A 12V DC car charger from one of the big brands would be the best option for this, though you could also use a 9V battery in a pinch. You'll also need two separate lengths of wire with alligator clips, preferably colored in black and red for negative and positive charges, respectively.
What we're doing here is a bit of controlled corrosion, creating a solution from the salt and vinegar and electrifying it to subtly dissolve the outer layer of the sockets in a label shape. There are a few safety tips to keep in mind: first, make sure to wear safety goggles and rubber gloves while you work. Second, this process is going to produce some fumes, so either turn on a fan or work outside. Finally, under no circumstances should you touch the alligator-clipped wires together, as this will create a large spark and could potentially start a fire.
The etching process only takes a few minutes and is fairly simple
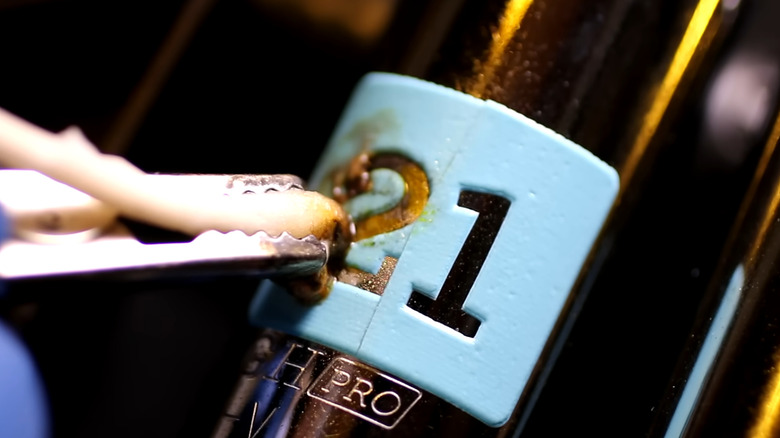
Once you have all your materials and proper safety precautions, let's get down to business. The first order of business is to mix the vinegar and salt in a cup, then swirl it around until the salt has completely dissolved. Drop a bunch of cotton swabs into the cup and give them a couple of minutes to soak the solution up. While you're waiting, attach the black and red clipped wires to your power source, either to the source's own clamps or directly to the connectors on a battery. If you're using a car charger, don't turn it on until it's time to use it.
When the swabs are soaked and the power is ready, get out the metal tool you want to etch and the stencils you want to use. Before you attach the stencils, give the tool a quick wipe down with some soapy water or rubbing alcohol to remove any loose dirt. After you stick on the stencil, take out one soaked cotton swab and attach the black positive wire just above the fuzzy bit. You don't want the clip to touch the metal, as it'll cause a spark. Attach the red negative wire to the tool you're etching, and press the swab into the stencil. Hold it for a few seconds, then press down on another part of the stencil. The swab will start to turn black and stop fizzing after a while, so just swap in another swab as necessary to keep etching. Repeat this until you've filled in the whole number or letter. Peel the stencil off, wipe off the crud, and there you go — a fresh, long-lasting label.