How To Check Your Brake Pads Without Removing The Wheel
When it comes to cars, the brake system is one of the most vital components. Virtually all modern automotive brake systems work using hydraulic brake fluid to generate the pressure necessary to actuate the brake mechanism. Depending on your vehicle, those brake mechanisms are composed of either rotors, calipers, and brake pads; drums, wheel cylinders, and brake shoes; or a combination of the two systems. Both disc and drum brake systems rely on hydraulic pressure and friction materials to stop your car.
In modern disc systems, a caliper compresses a brake pad made of heat-resistant friction material — like ceramic or metal — into a rotor to generate friction. Drum brakes, on the other hand, use a wheel cylinder to push brake shoes against a drum, creating friction to slow your wheels. Regardless of the type of brake system your car has, those brake pads or shoes require replacements after extended use, as well as regular inspections to check for damage and wear.
Fortunately, inspecting your brake pads isn't that difficult. In fact, you can check your brake pads without removing the wheels relatively easily on most cars. To do so, you'll simply need to use a flashlight to peer through the wheel's spokes. Then, you can eyeball the pads to determine roughly how much life they have left. For drum brakes, you'll have to remove the inspection cover on the back of the drum assembly to get a look at the condition of the shoes. If you're interested in learning more about how to check disc brake pads and drum brake shoes without removing the wheels, stick around. Here's how it's done.
How to check disc brake pads without removing the wheel
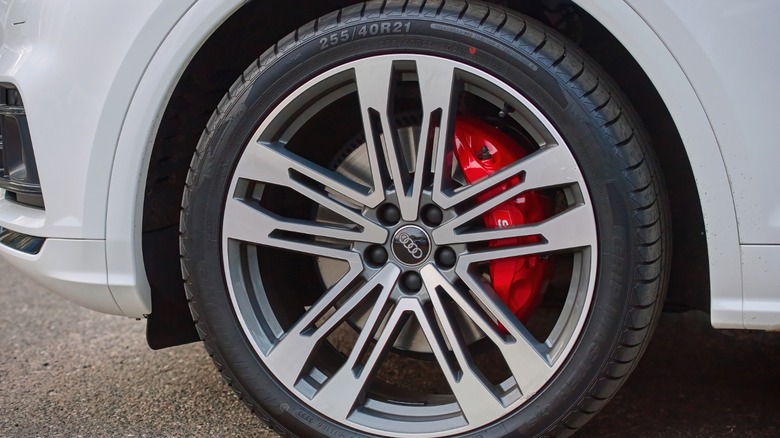
Most modern vehicles have at least one set of disc brakes on the front axle. As mentioned, inspecting the brake pads in these systems can be relatively easy. To do so, the only tool you'll need is a flashlight. If your car has hubcaps or wheel covers, remove them to give yourself a better view of the brakes — most modern wheel covers and hubcaps pop off without requiring the use of a tool, but you may need a flathead screwdriver or a socket set for some models.
Once you have a clear view of your vehicle's disc brake system through the wheel spokes, direct your flashlight at the caliper. First, look at the front of the caliper. You should be able to see the outside brake pad between the caliper and the rotor. When inspecting the brakes, note that the pad's friction material touches the rotor, while the pad's metal plate touches the caliper.
You should be able to see the difference between these two parts of the brake pad, and eyeball the distance between the rotor and the pad's metal plate. After you check the front of the rotor, look at the back. Many calipers have a gap on the backside, allowing you to get a fairly clear glimpse of the outside pad and, sometimes, the inside pad, too. You want to look at the distance between the caliper or the pad's metal plate and the rotor. If the friction material looks to be roughly 3 millimeters thick (about the same thickness as two U.S. pennies) or less, you need to replace your pads.
How to check drum brakes without removing the wheel

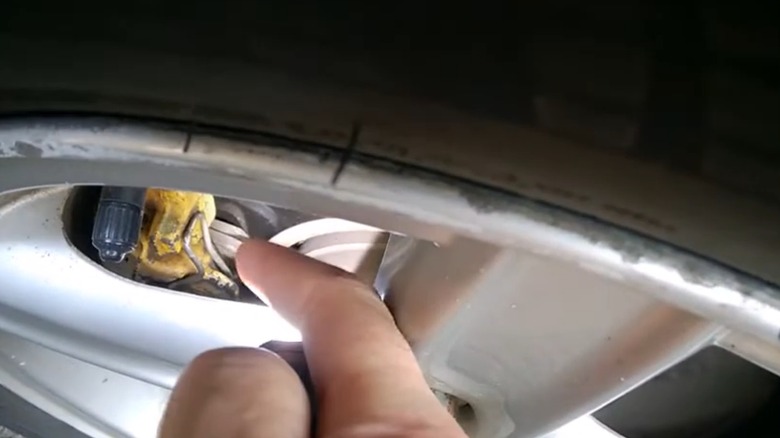
Checking the condition of drum brake shoes is a bit trickier than checking disc brake pads. That's because the drum itself covers up all of the braking mechanisms — even if you can peer through the wheel's spokes, you'll only see the round metal drum, not any part of the brake shoes. Instead, you'll have to use the inspection port on the backside of the drum assembly. Not all drum brakes have an inspection hole, but most of them do, and it's worth checking quickly to prevent having to remove the wheel.
To locate the inspection hole, you'll have to be underneath the vehicle. If you own a small car that sits close to the ground, you'll probably have to lift it slightly using some type of automotive jack. Depending on your car's age, drum brakes can be on both axles or just the rear axle. Once you're under the vehicle, pick one side of the axle and locate the drum brake's inspection port. It should look like a rubber plug toward the top of the backing plate on the backside of the drum assembly. Then, use a small screwdriver or your fingers to pop the plug out of the hole. After you remove the rubber plug, you can use your flashlight to look into the drum and inspect the brake shoes.
Depending on the type of vehicle and the condition of the shoes, it can be difficult to gauge the amount of remaining friction material. Remember to take your time and point your flashlight at different angles. Like disc brake pads, if the friction material on your drum brake shoes appears to be 3 millimeters thick or less, it's time to schedule a replacement.