How To Safely Change The Blade On A DeWalt Table Saw
We may receive a commission on purchases made from links.
DeWalt is a top-tier name in the power tool industry for a plethora of reasons, among them being their high-quality tool selection. DeWalt table saws are no exception to this rule, being among the top-rated options you'll find at The Home Depot and Amazon, appearing alongside equally reputable names such as Milwaukee and Grizzly Industrial. Along with their impressive power output, sturdiness, and cut accuracy, they're also remarkably diverse, with a variety of standard and highly-rated portable options to choose from.
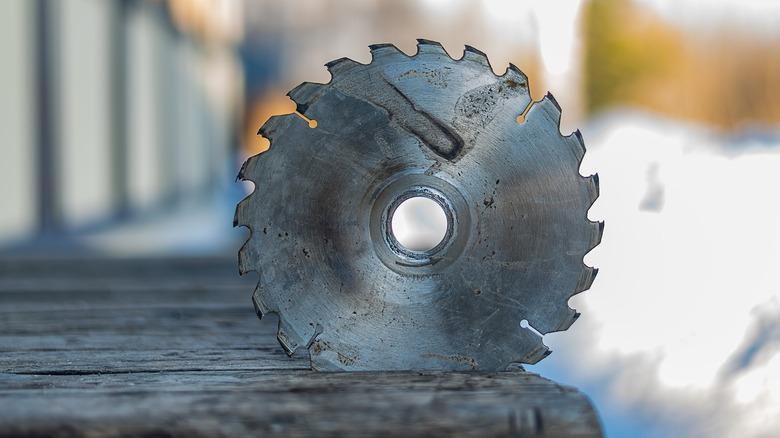
While DeWalt table saws are undeniably powerful, they're not invincible. Just as with a circular saw, part of proper table saw maintenance is regularly maintaining the blade, as this section will wear out naturally over time. This largely depends on the frequency of the tool's use and how heavy-duty its actions are. Eventually, the blade will need to be replaced, as a dull or damaged blade can result in poor craftsmanship, a waste of material, and even potential injury to you.
When the time comes to do so, it's understandable to be a bit nervous about handling the blade in such a way. Thankfully, this task is easy and harmless so long as you take the necessary precautions and follow the right steps.
How to remove and replace a DeWalt table saw blade
Mishandling the blade can lead to serious injury. Be sure that your tool's power source is disconnected, and put on work gloves if it feels safer. Otherwise, the only supplies you'll need are a pair of table saw wrenches to unscrew the nut. Once ready, here's what to do:
- Unlock the throat plate by turning the knob to the left and lift it off.
- Turn the blade height adjustment wheel clockwise to raise the blade to the top.
- Remove the blade's center arbor nut from the spindle, turning it clockwise to loosen it using your table saw wrenches. Place the open end of one wrench on the left side of the blade and the closed side of the second wrench on the right.
- Use your left hand to push one wrench forward and your right hand to pull the other wrench back. Loosen and remove the nut.
- Twist the blade washer counterclockwise to take it off.
- Remove the old blade.
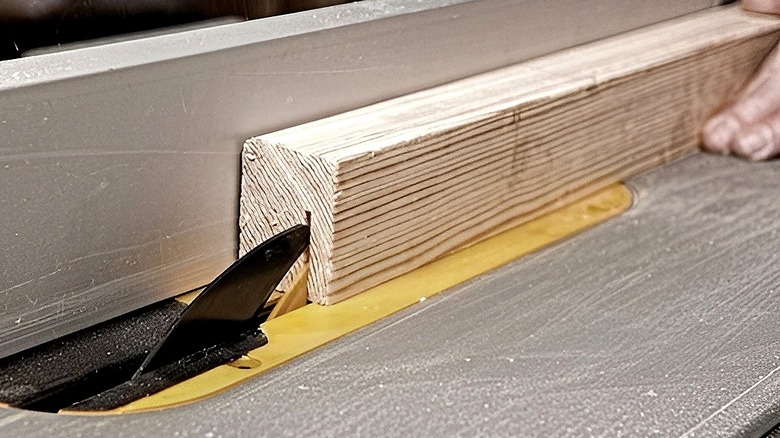
- Place the new blade on the spindle, teeth pointed down towards the table's front.
- Screw back in the washer, flat side facing the blade.
- Screw back on nut in a clockwise direction. Secure with wrenches, pulling with your left and pushing with your right.
- Place back the throat plate, twisting the knob to the right to secure it.
To make the most out of your blade's life, be sure to keep it properly maintained. Never force it to cut through difficult material and wipe it down after jobs to prevent buildup. When not in use, keep it stored somewhere away from extreme temperatures or excess moisture.