How To Create A GIF In Microsoft Clipchamp
Every corner of the internet is packed with GIFs, whether that's an Instagram story, a comment on a Reddit post, a chat from your friend, or a promotional email from a shoe brand. And honestly, why wouldn't there be? GIFs are one of the best forms of expression because they're dynamic enough to grab your attention and short enough to effectively convey the message.
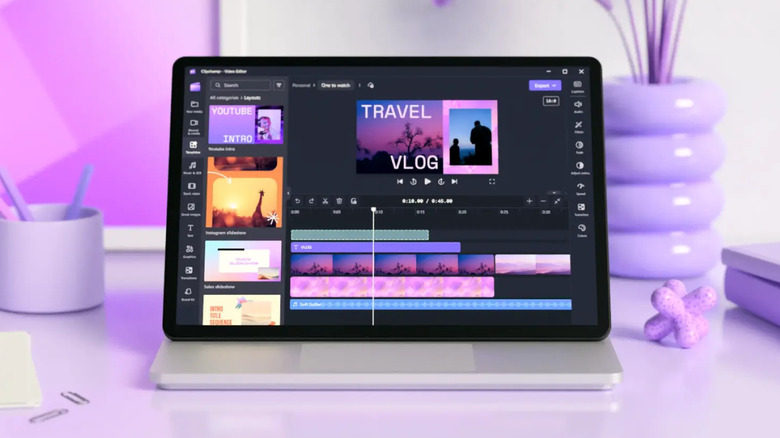
While you'll normally just use a generic GIF for your needs, there are instances when you want something more customized. Perhaps you need a GIF of the dress you're selling or a GIF of you tossing confetti as a birthday greeting for your mom. In that case, your first thought might be to make a GIF in Photoshop, but there's actually a more affordable app you can use if you're on Windows: Microsoft Clipchamp. We'll walk you through the step-by-step of how to create a GIF in Clipchamp.
How to access Microsoft Clipchamp
Microsoft Clipchamp is available on both Windows 10 and 11. It comes pre-installed on Windows 11, so if you're on that OS version, you automatically get the desktop app. All you have to do is open it from the Start menu, sign in with your Microsoft account, and you're good to go. If, however, you're running Windows 10, there's an extra step: downloading Clipchamp from the Microsoft Store on your computer. It's also important to keep in mind that to run the Clipchamp desktop app without a hitch, you need at least 8GB of RAM.
Another way to access Clipchamp from your computer — regardless of the operating system, is via its browser-based video editor. This, however, only works on Chromium-based browsers, such as Google Chrome, Microsoft Edge, and Opera. Make sure you have your browsers updated to the latest versions to avoid issues down the road. To access Clipchamp from your browser, visit app.clipchamp.com and sign in or create an account using Microsoft, Google, or another email address. If you like switching between the desktop and browser versions, you won't have any problems using either interface, as they're similar.
Away from the desktop, Clipchamp offers a mobile app for iOS too (unfortunately for Android users, Microsoft is yet to release a version for you). Just download it from the App Store, and sign in or create an account. The interface is naturally different from the computer versions, but it's quite intuitive and easy to navigate.
In this guide, we'll be outlining the steps of making a GIF using Clipchamp on a PC.
Use an existing video
The easiest way to create a GIF in Clipchamp is to convert an existing video into one. Here's how to do so:
- Launch Clipchamp on your desktop or browser.
- On the home screen, press Create a new video to open the video editor.
- Add your video to Clipchamp. You can do so in three ways:
- Import your video into Clipchamp by pressing the small arrow next to the Import media button on the left side panel. Then, select your video's location (local storage, OneDrive, Google Drive, Dropbox, or Xbox).
- Drag and drop your video from File Explorer onto the "Your media" folder on Clipchamp.
- Select a stock video from Clipchamp's library. Navigate to the Content library tab, click Visuals, and scroll down to Videos. Then, pick your preferred clip. Press Add to my media to add the video to your media folder.
- Go to Your media tab.
- Drag and drop the video into the timeline at the bottom of the screen.
- (Optional) Change the aspect ratio of the video:
- Click the current aspect ratio in the top-right corner. Choose the most suitable size for your needs. Options include 16:9, 9:16, 1:1, 4:5, 2:3, and 21:9.
- Adjust the video to fit your new aspect ratio by dragging the corners inward or outward to resize it. Then, grab the resized video and move it to your desired position.
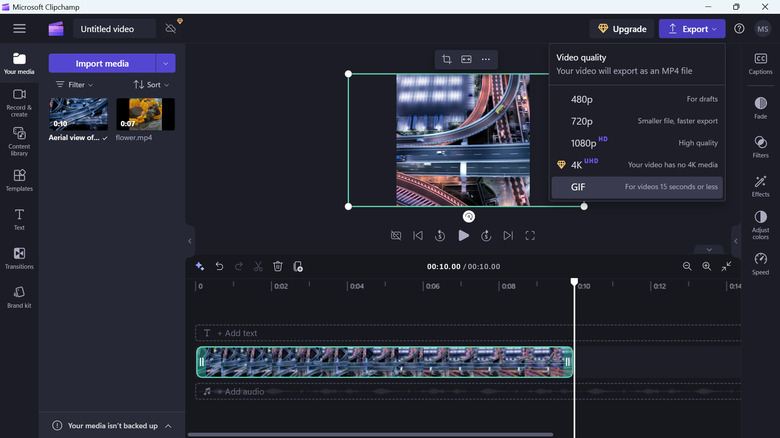
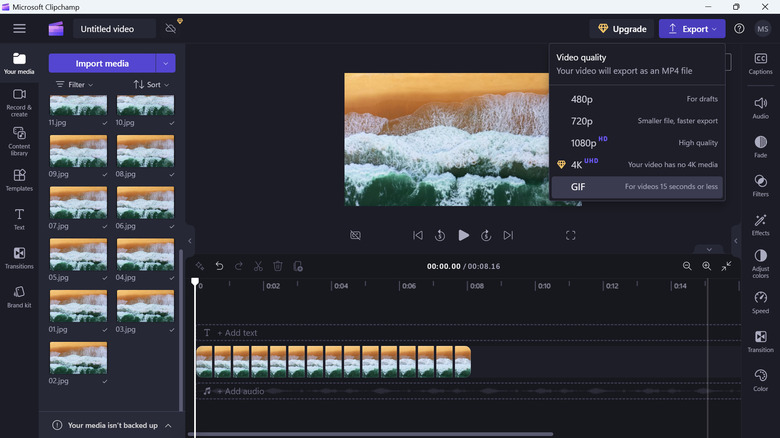
- Trim your video down to 15 seconds or less as Clipchamp's only supports up to 15 seconds for GIFs. In the timeline, drag the ends of the clip to get your desired video length.
- (Optional) Edit the video as needed, such as adding text, stickers, or effects.
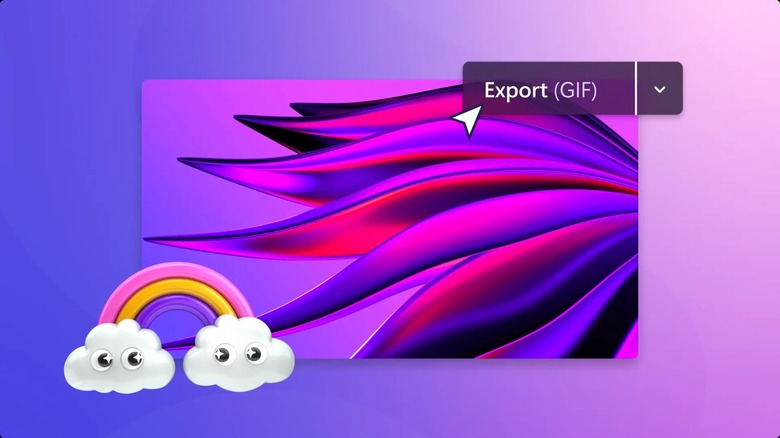
- Once you're satisfied with the output, go to Export > GIF to save your GIF.
Use a webcam recording
One of the most useful features of Clipchamp is its webcam recorder. This comes particularly handy when you want to turn a video of yourself into a GIF but haven't gotten around to actually making the recording. Instead of making a video, then importing that clip into Clipchamp, you can just do both directly on the app. Follow these steps to convert your camera recording to a GIF:
- On the Clipchamp home screen, press Create a new video at the top.
- Navigate to the Record & create tab on the left side panel.
- Select Camera.
- If you have multiple cameras on your computer, change the camera option to the one you prefer to use.
- Hit the big red button to begin recording.
- Wait for the short countdown to finish.
- Pose for your GIF.
- Press the button again to stop the recording.
- Play back the recording preview to check if it turned out as you expected.
- (Optional) If you're not satisfied, click Retake recording to re-do your poses.
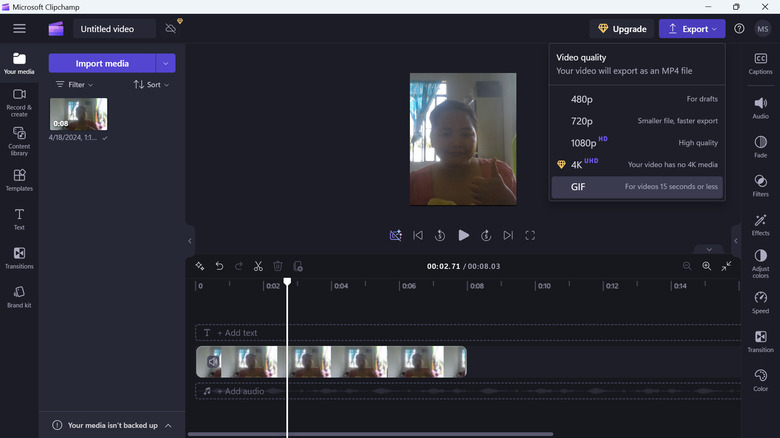
- Select Save and edit to proceed to the video editor. If you're on a browser, you may also get a prompt to download the recording (the recording is also downloaded automatically at times).
- Cut any unwanted parts of the video. To do so, place the playhead (white vertical line) at the end of the clip you want to remove. Then, press the scissor icon to split the video. Continue splitting the clip until you isolate all the parts you want to remove. Finally, delete the unwanted sections by pressing the trash icon.
- Drag the ends of the video to shorten it to at most 15 seconds.
- Make any other necessary edits you want.
- Convert the video to GIF by clicking Export and selecting GIF.
Using a set of photos
Aside from using videos, you can also make an animated GIF with a set of photos. This works best if your images are taken in sequence and from only a single spot. This way, they'll look like a video when pieced together. For instance, you can set up a tripod facing your garden and take photos repeatedly as the wind blows. Then, rename them with numbers, so you'll know in which order to add them. Once you have your set of pictures ready, here's what you need to do to turn them into a GIF in Clipchamp:
- Create a new video in Clipchamp.
- In the video editor, press Import media.
- Add your photos. To add multiple images, press the Ctrl key on your keyboard, and then select the images.
- Drag and drop the photos to the timeline one at a time. Make sure they're in order.
- Adjust the duration of all the photos to 0.5 seconds using this shortcut:
- Click one of the photos.
- Press Ctrl + A on your keyboard to select all the photos.
- Drag one of the photo's right end to the left until you reach 0.5. This will automatically adjust the duration of the other images.
- Remove the gaps between the pictures by right-clicking on one gap and selecting Delete all visual gaps.
- Play the video to check whether you like the pacing. If it's too fast or too slow for your liking, adjust the duration of the photos again.
- Keep your video at a maximum of 15 seconds. If it's longer than 15 seconds, you either need to delete some photos or change the duration to have everything fit into 15 seconds.
- If you're happy with the video, save it as a GIF by going to Export > GIF.