How To Make A Pinhole Projector For Viewing The Solar Eclipse

In a perfect world, humans would have been able to enjoy the beauty of solar eclipses by looking at them directly. In reality, however, that isn't quite possible, given that looking at the sun during an eclipse isn't exactly great for your eyes. Such antics could not only severely damage them but may also lead to permanent blindness.
Luckily, we live in an era where it is relatively easy to get hold of solar eclipse glasses that let you watch the solar eclipse while keeping your eyes in perfect working order. If you get one of these, make sure they conform to the ISO 12312-2 standard, guaranteeing that your eyes won't be damaged if you look at an eclipse using these glasses.
Still, if you are not entirely comfortable with looking directly at the sun — even if you have solar eclipse glasses — there is yet another way to witness the solar eclipse. The only catch is that it involves a small dash of DIY, which isn't quite everyone's forte.
Nevertheless, if you are up for it, here's how you can project the image of the upcoming 2024 total solar eclipse onto a screen and watch the event without having to worry about damaging your precious eyes.
Make a simple pinhole projector to view the solar eclipse
If DIY projects do not excite you but are still seeking an inexpensive, safe, and simple way to view the eclipse, making a simple pinhole projector is perhaps your best bet. The good thing about this method is its sheer simplicity. All you need to have in your possession are two sheets of white card stock (or two sheets of plain white paper), a small sheet of aluminum foil, tape, and a sharp object like a pin, paper clip, or pencil.
To make your simple pinhole projector, grab one of the card stocks, fold it in half, and cut a small 1-inch (or 2-inch) hole at its center. Now, take the aluminum foil and cover the aforementioned hole using it. Use the tape to stick the foil to the card stock. Now, take the sharp object you have chosen and pole a small hole right through the aluminum foil. All you need to do now is place the second piece of card stock onto a flat surface on the ground. If it's a windy day, you could also tape the paper to the ground so it doesn't flutter around.
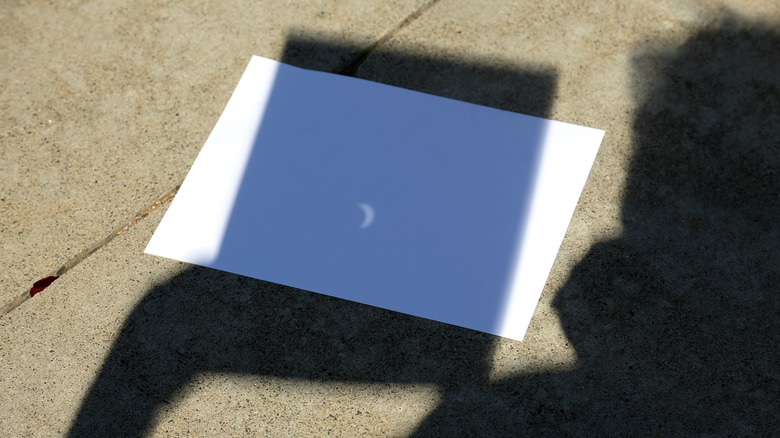
To project the image of the sun onto the card stock on the ground, stand with the sun behind you and hold the first piece of card stock with the aluminum foil and the hole above the card stuck to the ground. If aligned correctly, you should see an image of the sun projected onto the card stock placed on the ground. With this technique, you can make the projected image bigger by increasing the distance between the two card sheets.
Use household items to make a pinhole camera

If you are looking to create a fancier pinhole projector to watch the solar eclipse safely, there is an alternate way to do it. This method is slightly more complex than the one you read above and involves several additional tools. In addition to the white sheet of paper, pin, scissors, and aluminum foil, you will also need a relatively large rectangular box (like a cereal box or a shoebox) to complete this project.
Once everything's set, take the rectangular box and cut out the white sheet of paper in a size that would fit one end of the box that will act as a screen. Use the scissors to cut two rectangular holes on the right and left corners of the box.
Now, take the aluminum foil and cut it to be larger than one of the rectangular cutouts you just made. Use the tape to cover one of these holes while leaving the other hole as is. Now, take a pin (or a sharp object of your choice) and plug a hole into the aluminum foil.
On the day of the eclipse, take this box and stand with it in your hand. Ensure that you hold it with your back facing the sun. Align the box with the sun and ensure sunlight falls on the hole. Once you observe an image of the sun on the white screen inside the box, you can be assured that a safe view of the solar eclipse is now possible. You can do this by looking inside the box using the unplugged rectangular hole on the other side of the box.