5 Things You Probably Didn't' Know You Could Do With iPhone Live Photos
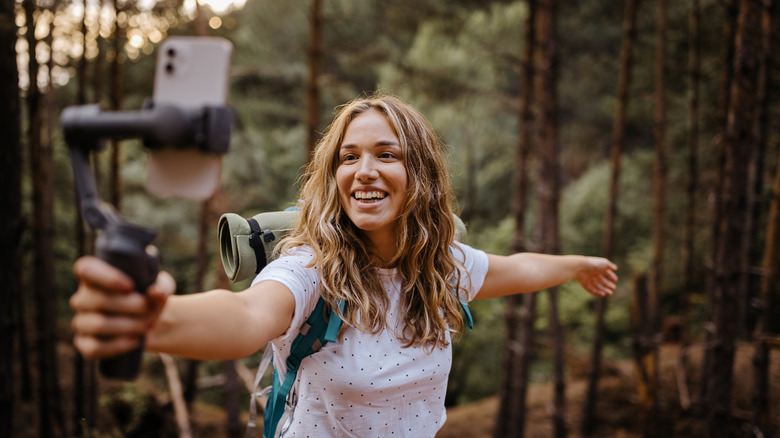
When Apple first introduced the Live Photo feature, it was designed to help people remember the moments that happened when a photo was taken. Unlike a full video, Live Photos give you a glimpse behind the scenes without giving away the whole story.
Since it takes up significantly more storage space than a regular photo, it's unsurprising that many people opt to turn the Live Photo feature off. However, the Live Photo feature may be worth another look, especially if you're a creative person who is looking to play around with what your iPhone can do.
Surprisingly, Live Photo is a pretty versatile type of media that you can use for more than just taking a good photo. For example, you can revert it to videos and GIFs that can help take your content to the next level. So, if you're curious as to know what you can do with Live Photos, here are five things you probably didn't know your Live Photo can do.
Choose the key photo
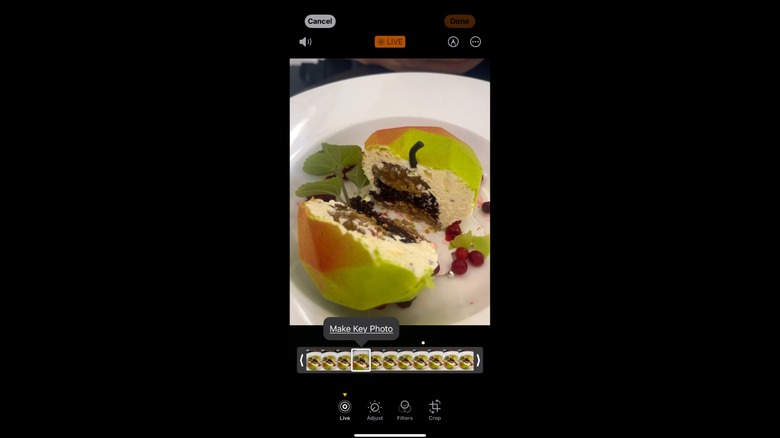
While the Photos app gets a lot of things right, the key photo for the Live Photo isn't always one of them. The key photo is the image that appears as the still photo when you're not using any of the Live Photo features. Thankfully, swapping out the Live Photo key photo can be done in just a few clicks. Here's how:
- On your iPhone, open the Photos app.
- In the lower portion of the screen, tap Albums.
- Under Media Types, tap Live Photos.
- Select the Live Photo that you want to change the key photo.
- In the upper-right corner of the screen, tap Edit.
- In the lower-left corner of the screen, tap Live.
- Drag the white frame across the different shots.
- Once you find your preferred key photo, tap Make Key Photo.
- In the screen's upper-right corner, tap Done to finalize your decision.
While at the Live Photo Edit tab, you might want to make a few adjustments to the rest of the Live Photo. For example, you can adjust the video's length by dragging the frame's beginning or end in the Live tab. You can also crop the key photo by tapping Crop in the lower-right corner of the screen.
Just take note: Apple cautions users that if they decide to change the key photo of an image taken with the portrait effect, they run the risk of losing the effect altogether.
Save as Video
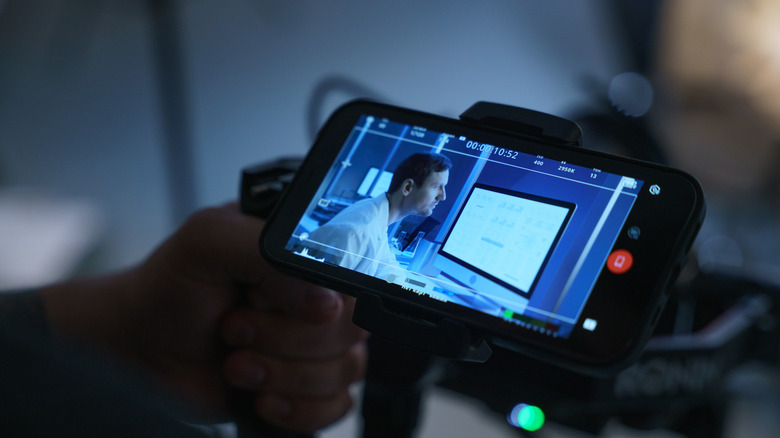
Because Live Photos can pick up a few seconds after you press the shutter, it can sometimes capture moments that aren't usually documented and are typically forgotten. Whether it is how couples look at each other when they think no one is looking, how your pet's eyes light up when it sees you, or how a loved one laughs, you'd be surprised how meaningful these few seconds of video can be. So, if you have a Live Photo with a few seconds of video that you want to save, here's how.
- On your iPhone, open the Photos app.
- In the lower portion of the screen, tap Albums.
- Under Media Types, tap Live Photos.
- Select the Live Photo that you want to save into video.
- In the upper-right corner, tap the more or three dots icon.
- Tap Save as Video.
Depending on the Live Photo, the video will range from one to two seconds in length. Although the regular video can be good enough for some people, you can also make some adjustments to your Live Photo in other ways, such as brightness, shadow, and contrast. In addition, there are also ten filter options that you can use to add some personality to your videos.
Afterward, you can send these videos to your friends and family, upload them to a social media platform, add them to one of your Photos app Memories, or even create a longer video with your iPhone.
Create a GIF
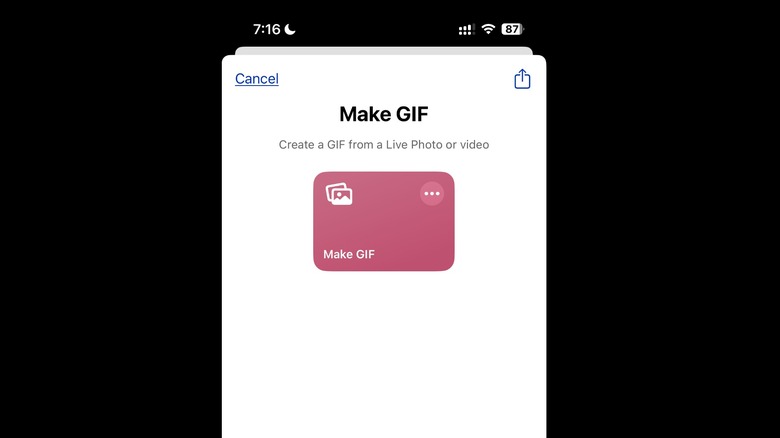
To create a GIF with a Live Photo, there are two ways: the iPhone Shortcuts app or your Mac. Here is how to do both.
- On your iPhone, launch the Shortcuts app.
- In the lower-right corner of the screen, tap Gallery.
- In the top part of the screen, tap the Search Bar.
- Type "GIF" in the Search bar and tap search.
- Tap Make GIF.
- Tap Add Shortcut.
- In the lower-left corner of the screen, tap Shortcuts.
- Tap Make GIF.
- In the upper portion of the screen, tap Albums.
- Under Media Types, tap Live Photos.
- Select the photo that you want to turn into a GIF.
- If you're satisfied with the preview, tap Done.
However, if you prefer using a Mac, here's how to turn a Live Photo into a GIF with it.
-
On your Mac, launch the Photos app.
-
In the left-side column, go to Albums and click Media Types.
-
Click Live Photos.
-
Locate the Live Photo you want to turn into a GIF.
-
On the thumbnail, double-click the Live Photo to open it.
-
In the upper-right corner of the screen, tap Edit.
-
In the lower-left corner, tap Live.

-
Select Loop.

-
In the upper-right corner, tap Done to confirm your decision.
-
In the menu bar, click File > Export > Export GIF.

-
Choose the folder that you want to export your GIF and tap Export.
Aside from making GIFs, there are plenty of other interesting things you can do on Apple Photos that you can also explore.
Bounce

While similar to Loop, wherein it plays a continuous video, the Bounce Live Photo feature rewinds the video from the end of the video to the beginning. To use the bounce feature with a Live Photo, follow this:
- On your iPhone, open the Photos app.
- In the lower portion of the screen, tap Albums.
- Under Media Types, tap Live Photos.
- Select the Live Photo that you want to turn into a live exposure shot.
- In the upper-left corner of the screen, tap Live.
- Select Long Exposure.
Alternatively, if you're planning to upload the video on Instagram, another way to get the Bounce effect using a Live Photo is by making a Boomerang via Stories. Here's how:
- On your iPhone, launch the Instagram app.
- In the bottom middle part of the screen, tap the Post (+) icon and tap Story. Or, you can swipe your screen to the left to reveal the Story tab.
- In the lower-left corner of the screen, tap the Select Photos icon.
- Tap Recents.
- Under Media Types, tap Live Photos.
- Select what photo you want to give a Bounce effect or turn into a Boomerang.
- In the upper-left portion of the screen, tap the Boomerang or infinity icon.
- Depending on your preference, you can choose among the four Boomerang styles: Classic, Slow-Mo, Echo, and Duo.
- If you just want a copy of the video with the Bounce effect, tap the more or three dots icon in the upper-right corner of the screen.
- Select Save.
Snap long exposure shots

Previously, photographers would use DSLR cameras to snap long exposure shots, which is a fancy way of leaving the shutter open longer than usual to get more light, leading to a certain style of photos. Thankfully, you no longer need a big bulky camera to get this effect because iPhones can shoot long exposure shots easily.
To turn your Live Photo into a long exposure shot, here's how.
- On your iPhone, open the Photos app.
- In the lower portion of the screen, tap Albums.
- Under Media Types, tap Live Photos.
- Select the Live Photo you want to turn into a live exposure shot.
- In the upper-left corner of the screen, tap Live.
- Select Long Exposure.
If you want to send your new long-exposure photo to someone (without the behind-the-scenes Live Photo features), you can easily turn it into a still photo.
- On your iPhone, open the Photos app.
- In the lower portion of the screen, tap Albums.
- Under Media Types, tap Live Photos.
- Select the Live Photo that you want to turn into a still photo.
- In the upper-right corner, tap the more or three dots icon.
- Tap Duplicate.
- Select Duplicate as Still Photo.
Alternatively, you can also use third-party apps to get the long exposure shot of your dreams. Afterward, you can send the still photo to other people without worrying about sharing the behind-the-scenes footage. You can opt to keep the original Live Photo or delete it to save storage space.