6 Things You Didn't Know You Could Do On Google Calendar On Android
Rather than a tool for daily planning, that paper calendar hanging in your room likely serves more as a decorative piece (and, of course, as a quick reference to check what day your dad's birthday falls on). In contrast, many people turn to digital calendars for managing their schedules — for good reason. Digital calendars are generally accessible anywhere, so you can readily check your agenda and add new appointments and tasks even on the go. Digital calendars also provide you with more functionality like inviting people to an online meeting or adding relevant attachments to an event.
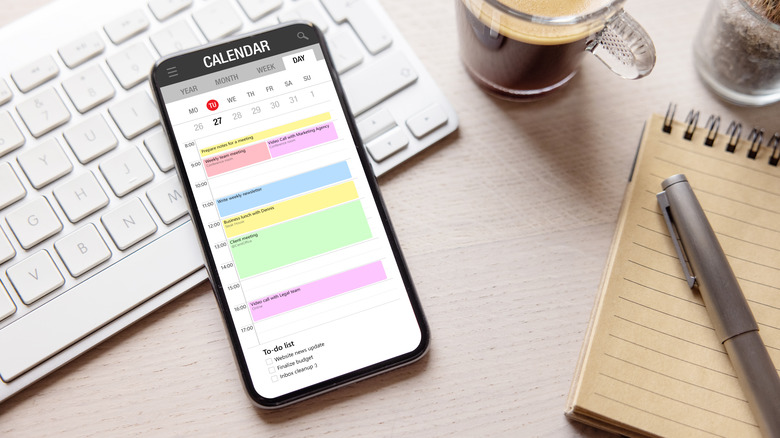
Among the calendar apps for Android, one of the best, and arguably most popular, is Google Calendar. The platform offers a user-friendly interface that makes creating events and tasks a walk in the park. However, to truly make the most out of the app, there are a few Google Calendar features you may want to be familiar with.
Handy gestures
Navigating Google Calendar doesn't have to involve tediously scouring through menus and buttons, not when you can use handy gestures to accomplish tasks in no time. Here's a rundown of some of the time-saving gestures for Google Calendar:
- Swipe to delete: Normally, to delete an existing event, you need to first open its info page, tap on the more icon, and select Delete. But you can simply swipe right on the event in the Schedule view to remove it instantly.
- Zoom in to condense and expand the timeline: Sometimes, you want to see a broad overview of your day, and other times, you just want to focus on events from 7 a.m. to 12 p.m. It's easy to change the timeline displayed by zooming in and out on the screen while you're in the Day and Week views.
- Tap on add event: Adding events is as easy as tapping on a specific date or time. Just switch to the Month, Week, or Day view and tap on the date or time you prefer. This action automatically opens the Add Event info page.
- Slide up or down to adjust the event's time: Move the event's start time by dragging and dropping the outline to your desired start time. Then, long-press the bottom outline and slide it up or down to your desired end time.
- Drag and drop to move events: No need to open your existing event just to reschedule it to a new time or date. All you need to do is go to your Day or Week view, long-press the event, drag it to the new schedule, and then drop it into place. Easy peasy.
Quick responses
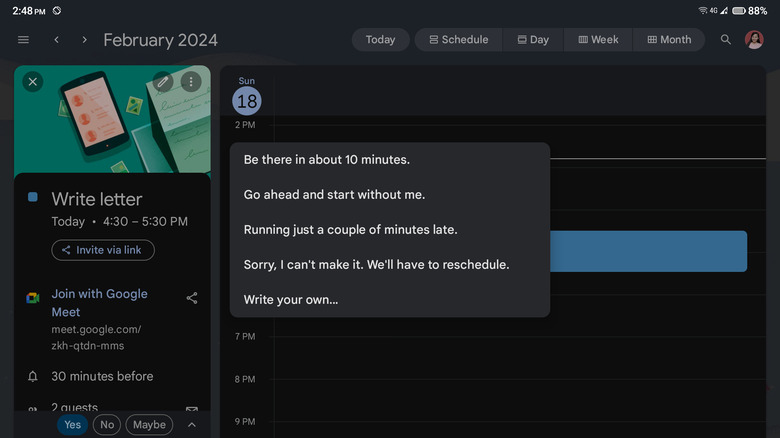
There are times when you need to send an email to your colleagues before a scheduled meeting, perhaps to say you can't make it or inform them of any last-minute changes in the agenda. However, if you initially scheduled the meeting directly in Google Calendar, you can't send your guests an email without having to manually collect and type their email addresses. This, however, is prone to errors as you might overlook someone. Luckily, Google Calendar's Quick Responses feature allows you to send an email to all the participants directly from the event. Here's how to use it:
- Open the specific event in Google Calendar.
- Tap on the envelope icon next to the guest count.
- Select any of the four preset quick responses or tap on Write your own to customize your message. You will then be automatically redirected to the Gmail app with the recipients and subject line already populated.
- (Optional) Edit your response, or add attachments, as needed.
- Hit Send.
If you want to edit any of the prewritten responses, follow these steps:
- On your Google Calendar app, tap the hamburger menu in the top-left corner.
- Go to Settings > General.
- Scroll down to Quick responses.
- Select the prewritten message you wish to modify.
- Type your revised text.
- Press OK to save it.
The Quick Response feature isn't exclusive to event organizers. Even if you're only a guest, you can also send a quick response to the organizer and other participants.
Change the default color of events
Chances are, you use two or more Google accounts with your Calendar: a dedicated work email for those client meetings and board presentations and a personal email for your doctor appointments and friend hangouts. All the events and tasks from both of these email accounts can be displayed simultaneously on your Calendar. But while this is convenient, it can often lead to confusion. This is because the default color coding for events and tasks is the same between accounts, making it hard to distinguish your professional obligations from personal plans at a glance. To minimize confusion and keep your schedule organized, change the settings on Google Calendar and set a different color scheme for each account. Here's what you need to do:
- Open the Google Calendar app.
- Access the menu by tapping the hamburger icon located in the upper left corner of the screen.
- Scroll down to Settings.
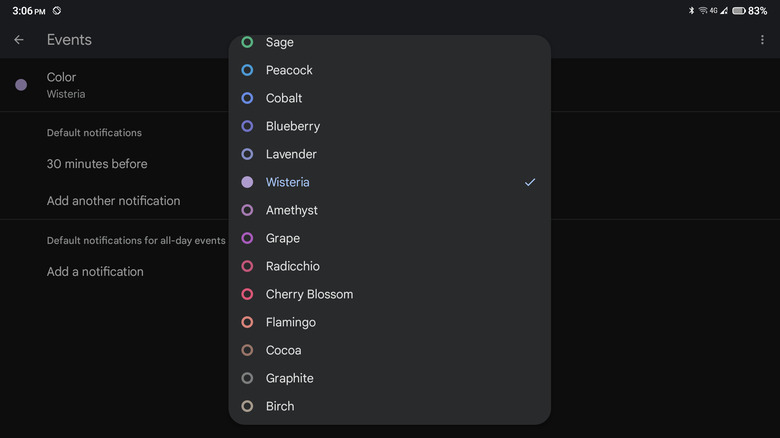
- Under your first email account, go to Events > Color.
- Pick a color from the array of over 20 options available.
- Similarly, adjust the colors for Tasks under the same email account. To make it easier to remember, you might want to use colors from the same palette for both Events and Tasks. For example, choose Cherry Blossom for Events and Flamingo for Tasks for your first email since both are shades of pink.
- Repeat these steps for your second email account. For your second email, opt for Pistachio for Events and Sage for Tasks (both are shades of green).
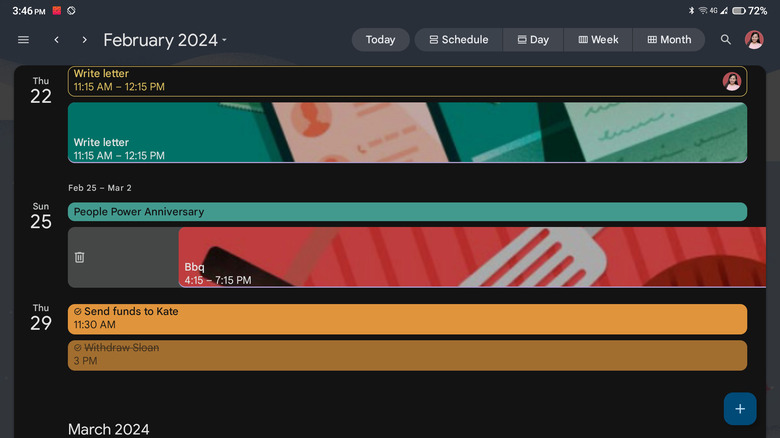
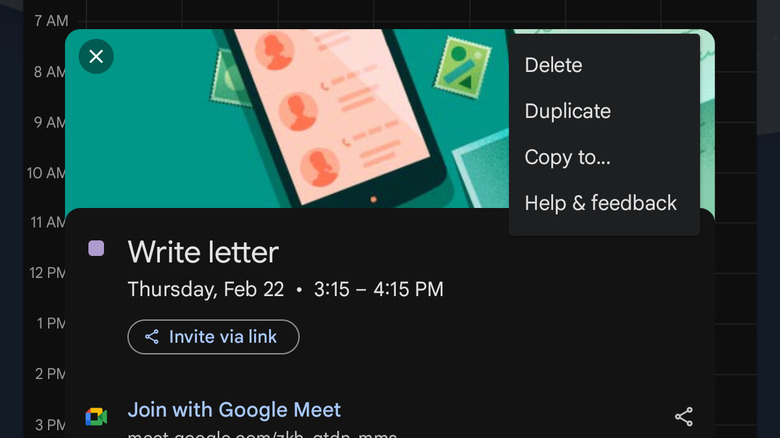
Duplicate events
Google Calendar comes with a nifty feature that lets you repeat an event at specific intervals, such as every Tuesday and Sunday or on the 20th of every month. However, this feature is only useful for activities that happen regularly, so what about those events that don't follow a regular pattern? For instance, you're planning several performance reviews for your employees and need to fit them around your existing schedule without a set repetition.
In this case, what you'll typically do is create the same event but at some other time. This can prove to be an unexciting task, though, especially if you have to add an attachment again and re-enter the email addresses of all your guests. To save you from the hassle, you can simply duplicate the existing event. Here's how you can go about duplicating an event on Google Calendar.
- Create your event on Google Calendar if you haven't already.
- Open the event's info page.
- Tap the more icon (three vertical dots) at the upper right corner.
- Select Duplicate from the menu.
- (Optional) Tweak the other details of the event like name, guests, and location as needed.
- To set a new date and time for the duplicated event, you can:
- Directly tap on the date and time on the info page and choose a new slot.
- Use the down arrow on the info page to show the calendar view, then drag and drop the event's outline to your chosen date and time.
- Select the Save button to confirm the duplicated event.
Propose a new time
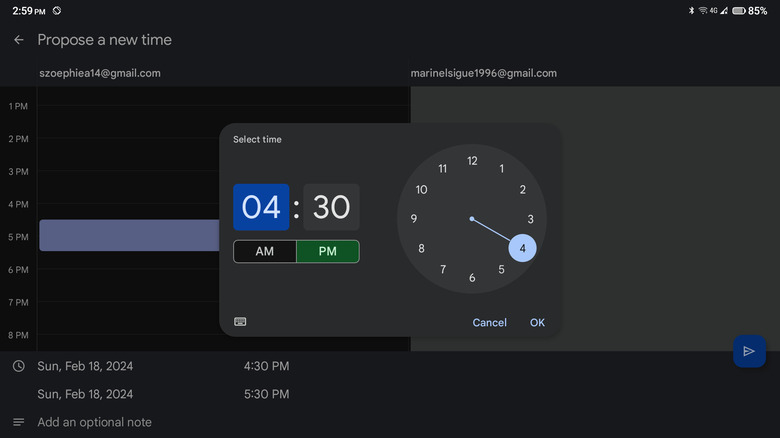
With your hectic schedule, you're bound to encounter scenarios when a new event coincides with a prior commitment you can't move. Your first instinct might be to reach out to the organizer via a separate email or message to request a rescheduling. However, you can actually do that within Google Calendar itself, thanks to the "Propose a new time" feature. Here's a quick guide on how to propose a new time on the Google Calendar app:
- Navigate to the event in question in Google Calendar.
- At the bottom of the event's info page, tap on the down arrow next to the RSVP responses (Yes, No, Maybe).
- Select Propose a new time.
- Adjust the start date and time to your preferred schedule.
- Do the same for the end date and time.
- (Optional) Tap on Add an optional note and enter your message, perhaps your reason for proposing a new schedule.
- Press the Send button.
- Select your RSVP response.
- Hit Save.
- At the organizer's end:
- Open the email with the subject line "Proposed new time: [event name]."
- Review the proposed time. You can also read the guest's note if there's any.
- If the new time works, hit the Accept button. Your guests will then be notified via email about the schedule change.
- If you're not okay with the proposed time, simply ignore the request or send the guest a DM to let them know about your decision.
Allow guests to modify the event
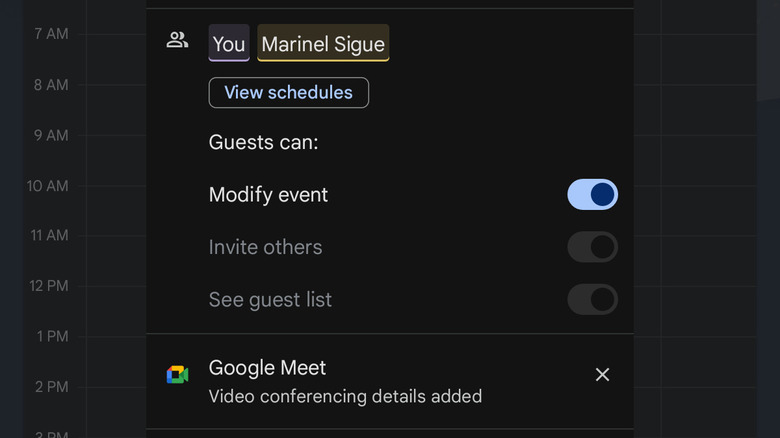
Coordinating schedules isn't always an easy feat. Sure, your contacts can always propose a new date and time for an event, but you'd have to take the time to review and accept the proposal before the event schedule is changed. If you prefer that their proposed changes to an event be implemented instantly without your approval, Google Calendar offers a feature enabling guests to modify the event directly. This means they can freely edit any details of the event, with updates immediately taking effect. To set this up, proceed with the following steps:
- Add a new event to your calendar.
- Fill in the event details.
- Input the email addresses of your intended guests.
- Tap on the "Guests can:" section.
- Toggle on "Modify event."
- If you don't want to give the guests full authority to alter the event details as they please, leave the "Modify event" option off and just turn on "Invite others" to let guests add more participants to the event. You can also opt to enable "See guest list," so guests to check who else is invited to the event.
- Press Save to save your event.
- To send the participants an email about the event, hit Send on the popup.
- On the guests' side:
- Edit an event by opening the relevant event on your Google Calendar.
- Select the pen icon at the top.
- Adjust the event details as you wish.
- Hit Save.
- Notify other participants about the updated event details by selecting Send on the popup prompt to send an email notification.