5 Quick Tips For Organizing Your Google Drive
Google Drive is one of the most essential Android apps to boost productivity, but have you looked at your storage space lately? If you use, create, and work with digital files, there's a high chance that your Drive is filled to the brim with all sorts of files, from class presentations and homework to client contracts and invoices. With such a large amount of documents, photos, and what-have-yous, your storage space would surely look like a hot mess.
This can be quite problematic for a number of reasons. One, it's hard to locate stuff when everything is scattered everywhere. Sure, there's a search bar you can utilize, but that's only helpful if you know the exact name of the file or folder you need. Two, there's a risk of overlooking or forgetting about files with urgent deadlines because they're buried under a sea of clutter. Lastly, such chaos can lead to inefficient storage use because you're likely to resort to duplicating files you misplaced.
To prevent such scenarios and keep you sane and productive, it's always a wise idea to organize your Google Drive. Here are five quick tips on how to do so.
Color code folders
If you have a load of files stored in your Google Drive, chances are you're also juggling a bunch of different folders. Sure, this does keep everything organized, but because the folders are of the same colors, it can be a headache to find anything just by scrolling through your list. One quick trick to solve this dilemma is to color-code your folders.
Google Drive lets you change the default color of your folders to one of 24 colors. This way, when you browse your storage space, you can easily spot the folder you need. Color-coding is also a clever method to categorize folders without lumping them together into one big folder. For instance, you have seven folders for your work-related files and three folders for your personal media. You can simply color all your work folders green and the personal folders purple.
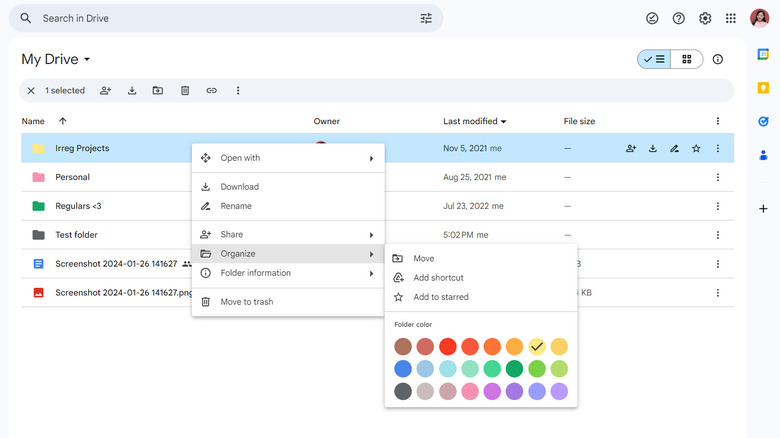
To change the color of your folders, here's what you need to do:
- Log into Google Drive if you haven't already.
- Right-click on the folder you wish to change the color of.
- Select Organize from the menu.
- Under Folder color, pick your preferred shade.
Add descriptions to files
Normally, you would name your files in Google Drive based on what it is or what it's for. This makes it easier to search for the file later. But sometimes, you have no control over how your files should be named. Perhaps your company follows a specific naming convention, where you need to name certain files and folders with a group of numbers, dates, or a reference to a client's project. Unless you have a memory of an elephant, you'll likely have a hard time looking for such files.
This is where file descriptions come to the rescue. They add some much-needed context to your file, helping you find them faster among a sea of oddly named documents. Google Drive allows you to tack on descriptions of up to 25,000 characters to any file or folder. This could be anything from a couple of keywords to a more detailed explanation. Here's how to do so:
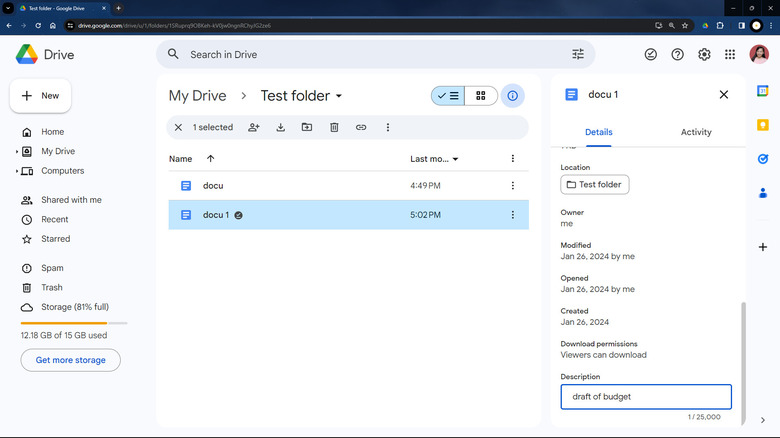
- Right-click on the file or folder that needs a description.
- Select File information.
- Go to Details.
- Scroll to the Description box at the bottom of the Details pane.
- Type your description. It can be brief or detailed — whatever helps you remember what's in it.
- Press Enter to save the description.
Now, the next time you're searching for that file and forget its real file name, just pop some of those keywords or phrases into the search bar. Google Drive will do the rest and pull up files or folders with such descriptions.
Rename your folders and files
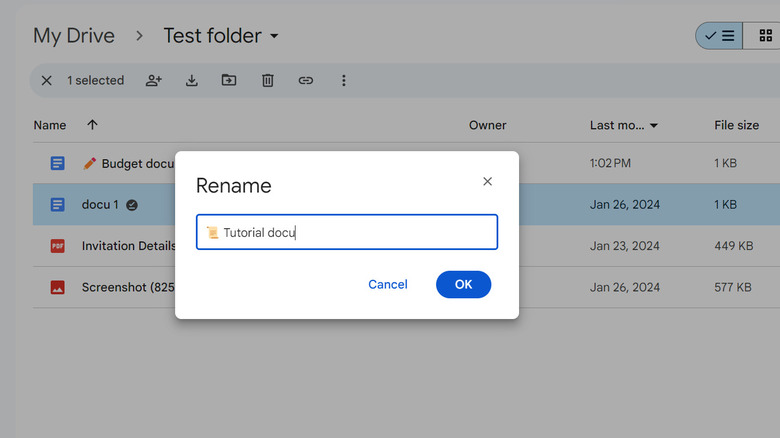
By default, your files and folders on Google Drive are arranged alphabetically. While this can be handy in certain situations, most of the time, you want them to be sorted in a certain way, perhaps in order of importance or frequency of use. So, here's a quick tip: rename your files and folders. Consider implementing these naming conventions:
- Add numbers in brackets before the file name to arrange them sequentially. For instance, instead of just having folders labeled "School," "Work," and "Personal," you can have "[01] Work," "[02] Personal," and "[03] School." This way, your folders will be sorted with Work at the top, followed by Personal, and then School.
- Throw in some special characters or emojis at the start of the files or folders you frequently use. This trick pushes them to the top of your list. Special characters can be periods or asterisks. If you prefer adding emojis, here's how to do so:
- (Method 1) In the name text box, press the Windows keyboard shortcut Win +. (period) or the Mac shortcut Cmd + Ctrl + Space to bring up the emoji selection window. Click on your preferred emoji to add it to the file name.
- (Method 2) Go to an emoji website like Emojipedia or EmojiDB. Search the emoji of your choice, click on it to copy it to your clipboard, and then paste it into the name text box.
- Use different text cases to show folder hierarchy. For instance, you can have uppercase for top-level folders (a.k.a. broad categories), sentence case for subcategories, and, finally, lowercase for individual files within the subcategories.
Use shortcuts for shared files and folders
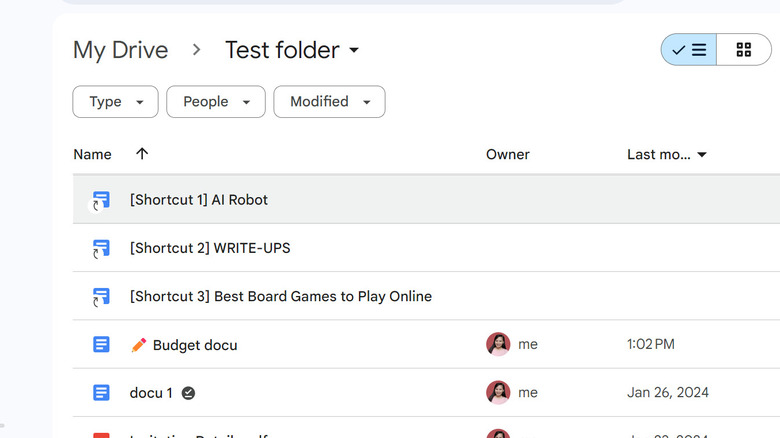
When it comes to the best apps for sharing large files, Google Drive is a top pick. However, there are some issues you can experience with shared files and folders in Drive. Typically, when someone shares something with you, it lands in the "Shared with me" section, which has limited flexibility. You can't create new folders here to organize your files, and if you try renaming the file, the change will reflect in the original file itself, potentially messing up the owner's naming convention. An alternative strategy is to make a copy of the file in your Drive so you can freely organize and rename it. However, the issue with this approach is that the owner would no longer have access to it. This can be counterintuitive when you're doing collaborative work.
To solve this issue, just use shortcuts. Shortcuts, in essence, are quick links to files and folders located anywhere in your Google Drive. When you click on a shortcut, it will open the original file or folder. Create a shortcut for that shared file or folder, and you can place it wherever you want in your Drive, organizing it based on your preference. Another benefit of shortcuts is that you're free to rename it, as it won't affect the original file name. But remember, when you open a shortcut, you're actually working on the original file, so any changes or comments you make are visible to everyone with access.
To create a shortcut for a shared file or folder, follow these steps:
- Navigate to Shared with me.
- Select the desired file or folder.
- Right-click on it.
- Go to Organize > Add shortcut.
- Choose the folder you want to add the shortcut to.
- Press on Add.
Customize the layout and order of your files and folders
Google Drive comes with built-in organization features that enable you to change the layout and order of your files and folders. Let's break down how to use these features.
First off, there are two ways to view your stuff: list layout and grid layout. The list layout displays your files and folders in a list, along with details like the owner, date and time of last modification, and size. The grid layout, on the other hand, arranges your files and folders like a gallery, giving you previews of the files. To switch your current layout, click on the list or grid icon at the upper right corner of your Drive homepage.
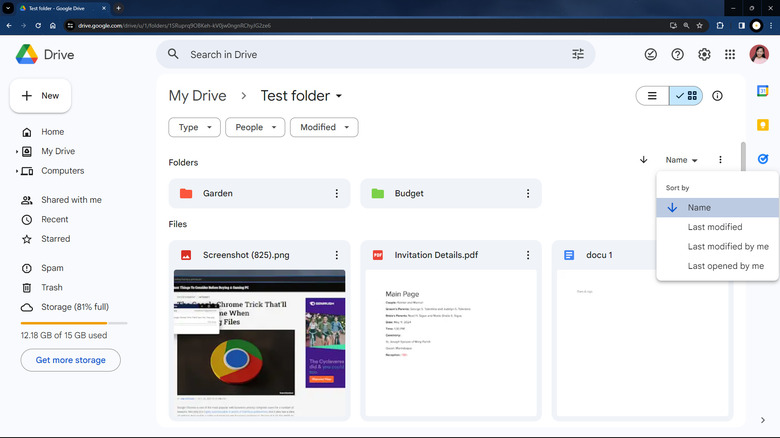
In both list and grid layouts, you're free to reorder the files and folders to suit your preferences. There are several sorting options available:
- Name: Arrange the files and folders alphabetically. To toggle between ascending (A-Z) and descending (Z-A) order, click on Name (list layout) or the up/down arrow (grid layout).
- Last modified: Sort by Last modified (most recently edited by anyone with access), Last modified by me (most recent file/folder you edited), or Last opened by me (most recent file/folder you opened).
- Show folders: Change how folders show up among your files. "On top" keeps them at the beginning of your list or grid, regardless of other sorting criteria, while "Mixed with files" allows them to be sorted alongside files, not separately. To adjust this, click the three vertical dots in the upper-right corner and select your preferred option.