10 Of The Best Arduino Projects You Need To Try
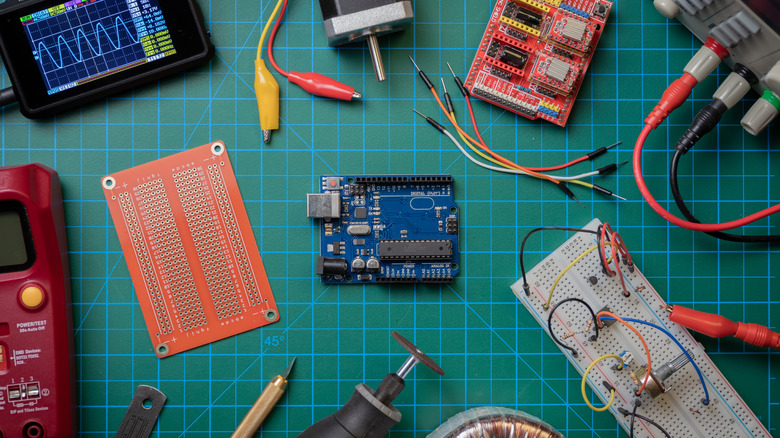
Arduino has certainly made its mark in the world of DIY electronics, providing an accessible platform for a wide range of creative and interactive projects. Known for its user-friendly hardware and software, Arduino appeals to hobbyists, educators, and tech enthusiasts alike.
If you've never tried your hand at Arduino before, this list is a great place to get started. We picked these projects for their practicality and educational value, giving users a chance to dip their toes into digital creation and learn new skills.
Each project will be a gratifying experience that results in practical gadgets, enjoyable toys, or innovative home DIY solutions. They represent the perfect blend of fun and functionality, giving you something to show off to friends and family.
It's no secret that Arduino programming can also quickly become an expensive hobby. That's why we looked for projects that didn't require too many additional parts at the outset or ones that utilized household goods that could be repurposed. Some projects require either 3D-printed or store-bought components to give a good mix of options.
Above all, the projects on our list are achievable. As many Arduino enthusiasts will tell you, they have a million ideas for projects but haven't completed nearly as many as they want. Here are some of the best Arduino projects we have found. They highlight the versatility of Arduino and its ability to spark creativity in technology and digital crafting.
Plant watering system
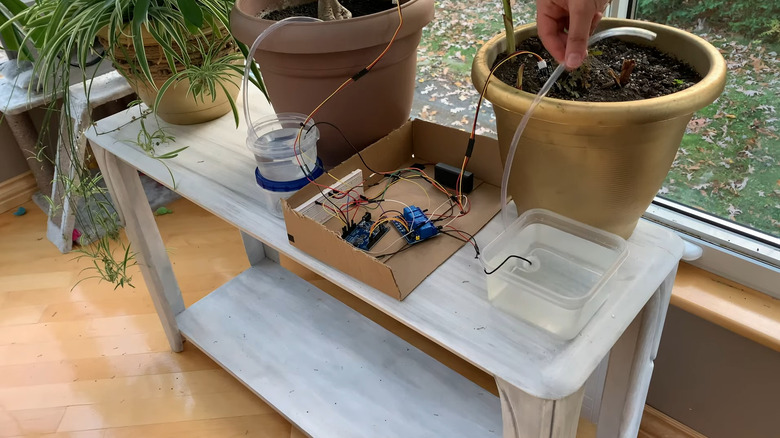
If you're new to Arduino and looking for a great starter project, an automated home watering system for plants is a perfect choice. This project is ideal for those with no prior experience or working on their first build.
What makes this project appealing is its scalability. For your first attempt, you could set up a basic timer mechanism, allowing your watering device to operate at set intervals. As you get more comfortable, you can add moisture sensors and assign them to different garden boxes, enabling the system to water specific areas of your garden as needed.
The simplest version of the code can be up and running in an afternoon. By connecting the board to a small pump, you can use the controller to turn it on at specific intervals. You'd have to manually calculate the optimum time based on climate and humidity.
Since this is an Arduino project, the objective is to achieve full automation with minimal human input. By adding in moisture sensors to automatically detect moisture levels in the soil, you can use the relay to trigger the pump on and off as the moisture level in the soil falls below a certain level to ensure correct water levels.
This project is an excellent choice for beginners. It's not only a great introduction to fundamental skills but also has a low initial cost. As you become more experienced, you can expand the system with more advanced features, growing your skills alongside your project.
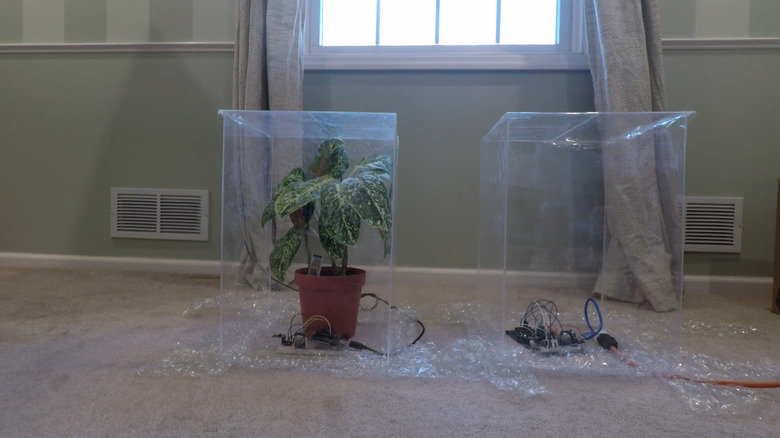
Bucket air conditioner

As summers become hotter, finding creative ways to stay cool is becoming increasingly important. One fun DIY project to tackle this challenge is building homemade passive coolers. These are essentially homemade air conditioners that use ice or other cooling elements. The premise is a simple heat exchange causing air to pass through a cool chamber before being expelled out into a room, and some of the simplest can be made with a home fan and a bucket.
But why stop at manually turning the fan on and off? With Arduino, we can automate the process. For beginners, the Arduino controller can be set to go off at the peak heat of the day for a set duration, ensuring your space stays cool even when you're not around. Then, by incorporating temperature sensors, the cooler can automatically turn on when the room gets too warm and shut off when it cools down.
Since the portable cooler is powered by ice, you can also include a heat sensor inside the bucket. This sensor can indicate when the temperature rises above a certain threshold, signaling that the ice needs to be refilled.
This project is not only accessible, using everyday items like an old fan and buckets from a hardware store, but also highly adaptable to your skill level and creativity. For instance, some resourceful college students even constructed a makeshift central cooling system out of cardboard, enabling the cooling of multiple rooms in their dorm.
Air quality monitor
Creating your own air quality control monitor is another must-try project, especially considering air quality's significant impact on health. For those living in large cities, where the official Air Quality Index might not always reflect local conditions due to distance from the sensors, having a personal monitor is a fun project and a practical daily tool.
The good news is that building your own air quality monitor is relatively inexpensive. You'll need a handful of components: an Arduino controller, a temperature and humidity sensor, an air quality sensor, and an LED display.
Assembly is straightforward: Connect the components to the Arduino controller, and then dive into the programming phase. The code needed for this project is quite manageable, and there are plenty of code examples available online. ProjectHub has an excellent guide that makes it easy to either replicate their version of an air-quality monitor or tweak the LED display output to your preference.
Upon completion, you'll not only have a useful device that you can use every day, but you'll also have sharpened your skills in working with outputs and displays. Plus, there's a creative aspect to this project. You could simply put the Arduino, bare wires and all, on a shelf, but by creating a housing for the components, you'll have a nice little box that can greet you every morning and display your current local air quality.
Robotic arm
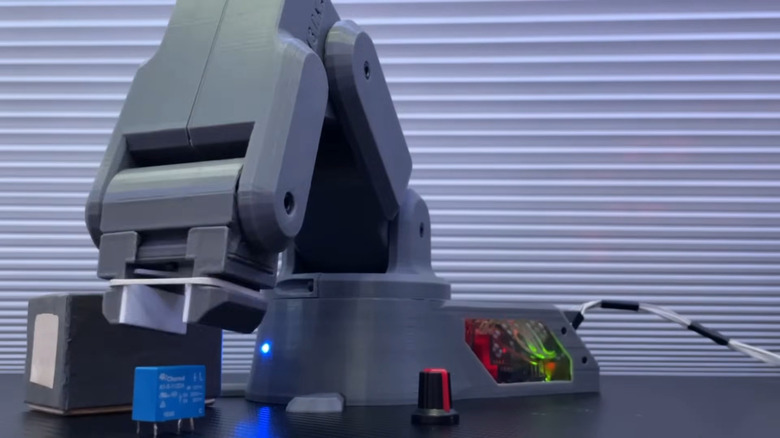
This project is all about creating a precise robotic arm without spending a lot of money. Its simple design means it's flexible for all kinds of projects, whether you need an extra hand for fun hobbies or help with detailed little tasks.
Many people go into robotics to live out their cyberpunk dreams by creating robotic arms, on the way to eventually creating a full-sized mech or Iron Man suit. We're still a long way off from strapping into a Gundam, but one of the most popular projects after gaining some experience with the Arduino is to create your own robotic arm.
Creating an arm involves replicating the muscle and skeletal structure of the human body and is no small feat. This project is a little more advanced than the previous ones, but can still help you grow your programming, fabricating, and Arduino skills.
A basic version of a robotic arm usually uses wires to replicate the tendons in a hand. These can be programmed to move simultaneously, allowing you to form a fist with a constructed physical hand. To take your project to the next level, you could incorporate flex sensors. These sensors enable you to control each finger of the robotic hand individually, almost like controlling your own hand.
Building a robotic hand is a very rewarding project. It requires an intermediate level of skill, but the potential for improvement is limitless. Who knows, maybe one day, this project could be the steppingstone to creating a full-fledged robotic suit.
Six-legged camera bot
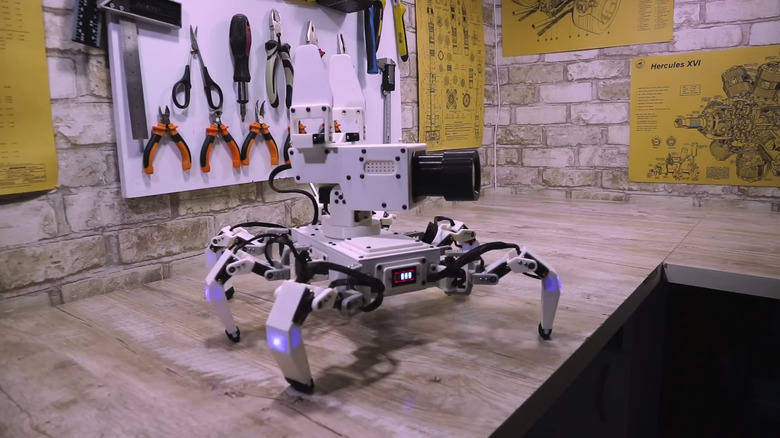
Tishka is a versatile robotic solution designed for multiple applications including remote-controlled camera operation, search and rescue missions, or as a general robotic companion. Although not particularly small, Tishka comes with an integrated camera, making it suitable for exploration purposes or filmmaking activities.
For those who grew up with Star Wars, the fantasy of having a personal droid is a dream come true. With Arduino, you can create something remarkably close to that dream in your own home. However, be warned: This is a more advanced project. It requires a good deal of knowledge, equipment, and a budget. The original creator of this project had a budget of around $340 (30,000 Rubles), and he 3D printed many of the components himself.
This project draws inspiration from a Russian filmmaker who built a robotic spider with a camera mount. To build this, you'll need various parts, including a frame, housing, motors, an Arduino, and a camera.
The original designer, Alex Korvin, has provided a comprehensive list of all the parts used in this build. He's also open to sharing the firmware and software, though you'll need to contact him directly to access them.
This proof of concept shows just how versatile the Arduino controller is. You can create incredible projects and robotics, and building your own specialized robot is a must-try, especially once you've completed some of the other projects on this list. It's a perfect project for users to take their Arduino skills to the next level.
Arduino piano
In this project, you'll be creating a mini piano using Arduino, where each piano key is represented by a push button. When these buttons are pressed, they produce different tones, allowing you to play simple melodies.
For fans of music and programming, creating your own piano is a fantastic project. As a controller, the Arduino can take inputs from any receiver and output a set signal. Combining them with a speaker can allow you to create as simple, complex, or outlandish a musical instrument as you want.
A simplified version simply needs a speaker, breadboard, inputs, and wires. The Arduino controller can be programmed to output any of the standard 12 musical notes associated with the input.
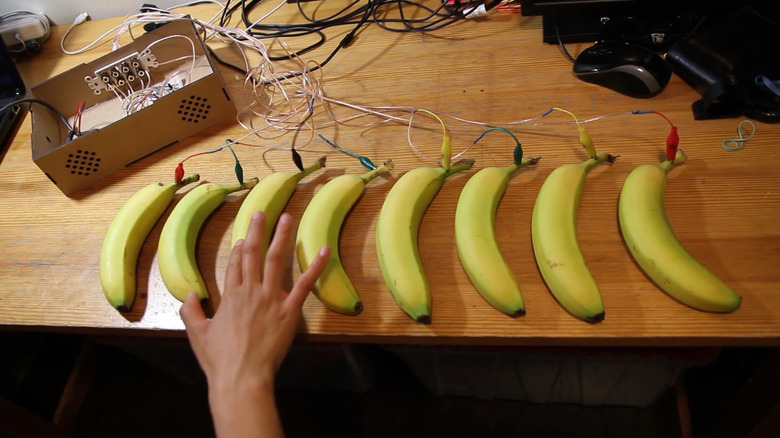
Although a simple piano may not sound like an exciting project, once you get the basics down you can start to get creative. Notice that in the required components only "inputs" are stated. They don't need to be traditional piano keys or buttons. In fact, any object can become an input to create musical notes. For example, using touch-sensitive input controllers like Capsense, you can transform practically anything into a musical instrument. Imagine making a piano out of a stack of bananas or any other object you can imagine.
Once you get particularly good at builds, you may even want to try making a Rube Goldberg machine that plays your favorite song. This project isn't just about building an instrument; it's about exploring the creative intersection of technology and music.
Arduino lie detector

The next project is an Arduino-based lie detector. This device not only reveals potential fibs among friends but also tracks the varied physiological responses of your skin in different emotional states. It also visualizes these changes in real time through an Arduino-generated graph.
This project dives into the world of electrodermal activity (EDA), which is our nervous system's subtle electrical responses that are detectable through the skin. Polygraph tests use this principle, measuring various data points, including the skin's electrical charge, to figure out if someone is being truthful. EDA naturally fluctuates with emotional changes, and while it's not a foolproof lie detection method, it certainly provides a fascinating basis for a DIY project.
The setup is surprisingly straightforward and only requires a handful of electrical components. By connecting a foil sensor to an Arduino, you can detect significant shifts in electrodermal activity during questioning, akin to a basic polygraph test. You could simply program your machine to give a visual indication of whether it's a lie or the truth by programming your Arduino to detect large shifts in your electrodermal activity. Remember, this homemade device won't be entirely accurate, but it's a fantastic and fun way to explore electronics and human physiology with friends.
Sand table
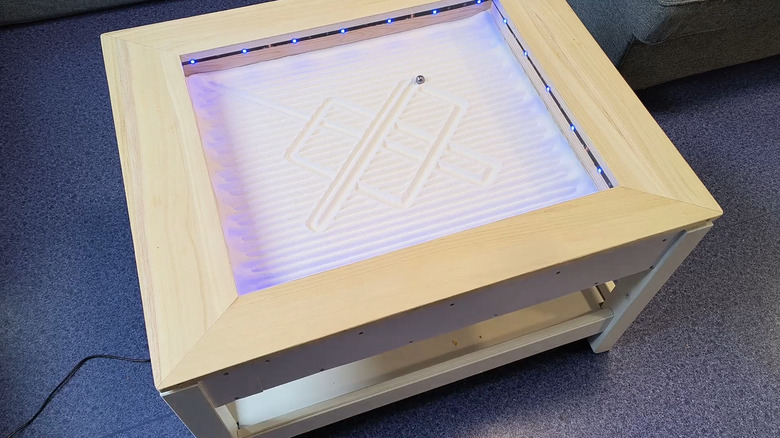
This DIY guide transforms an ordinary coffee table into an interactive piece of art. Using magnets, stepper motors, and an Arduino Uno, this table creates ever-changing, intricate patterns in sand, functioning as both a creative outlet and a unique element of home decor.
This project does call for some carpentry skills. A sand table typically features a layer of sand with a metal ball that moves across the surface, guided by magnets underneath, to sketch patterns and designs in the sand.
This project is a must-try because once finished, you'll have an amazing conversation piece. It's sure to be the envy of not only fellow Arduino programmers, but also friends and family as well.
The first step is to choose or construct a suitable table. Ideally, you want a table with a recessed section or one that can be modified to create a recessed area for the sand. You'll also need to gather various motors and belts to maneuver the magnet that guides the metal ball through the sand.
While this project will put your carpentry skills to the test, the result is very satisfying. Once finished, this sand table will be a mesmerizing addition to your home, continuously drawing and redrawing endless patterns in the sand. With your Arduino, you can program thousands of different designs, making this not just an art piece, but proof of your programming and crafting skills.
An Arduino smartwatch

This project creates a smartwatch that can display notifications from an iPhone and automatically synchronize the time. It involves using various components like an Arduino Pro Mini, an OLED display, and a Bluetooth module to create a functional DIY smartwatch.
It's definitely not covered under Apple Care, but you can technically make your very own smartwatch using an Arduino controller. The standard Arduino will probably be a little too bulky for comfort unless you're cosplaying as Johnny 5, but by using the Arduino Mini, you can create a smartwatch roughly the size of an Apple watch. In addition, you'll also need to create a casing for the watch and a Bluetooth controller.
Without the Bluetooth controller, your smartwatch will just be a regular watch. The Bluetooth controller allows your Arduino watch to connect with your smartphone. You won't have the same amount of functionality, but you will be able to see and read messages directly from your Arduino watch from an OLED display.
This is a really cool project that requires a bit more technical skill than some of the others, and there's always room for improvement. You can continuously experiment with your watch and see how many new functions you can add to it.
Pavlov's cat
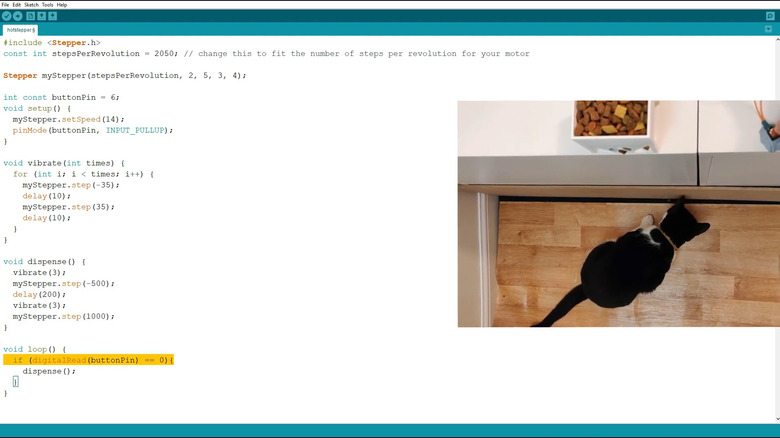
This DIY project teaches you how to build an automated pet feeder inspired by Pavlov's conditioning theory. It's all about training your pet in a fun and practical way. The feeder releases food at the sound of a tone, just like Pavlov used a bell to announce mealtime to his animals.
If you're not familiar with Pavlov's experiment, it showed that animals could learn to associate a specific, unrelated sound (like a bell) with food. Over time, they'd start to react to the sound itself, expecting food. This project brings that idea into your home with a pet-friendly twist.
This project is essentially the same thing. It creates an automatic feeder for your pet that will let them know it's time to be fed. In this project, the Arduino pet feeder plays a tone and then dispenses food automatically for your pet. It's a simple project but will require you to build a box or housing to hold food, which you can build out of anything from random cardboard boxes to 3D-printed plastic.
Eventually, your cat will be conditioned to know when it's time to eat every time it hears the tone. You could even try to play different tones to see if your cat can differentiate between them. Don't worry, this isn't going to be harmful for your pet. It's similar to how they get excited hearing the can opener or the rustle of a food bag. It's all about making mealtime more fun and interactive.