How To Add A New eSIM To Your iPhone

When using an eSIM, you don't have to choose between affordable internet and easy access to your existing mobile number. For people who travel regularly, especially for work, an eSIM still lets you receive important texts like one-time pins (OTP) for your bank transactions or as an emergency contact for your loved ones, even when you're far away.
Not to mention, it's relatively quick and easy to install. Unlike a physical SIM card or Wi-Fi stick, you don't have to claim it at airport counters. Additionally, you don't need to worry about the logistics of returning it. As any who has ever realized that they forgot to return their rented Wi-Fi stick when they arrived in their home country will tell you, it can be expensive to ship it back.
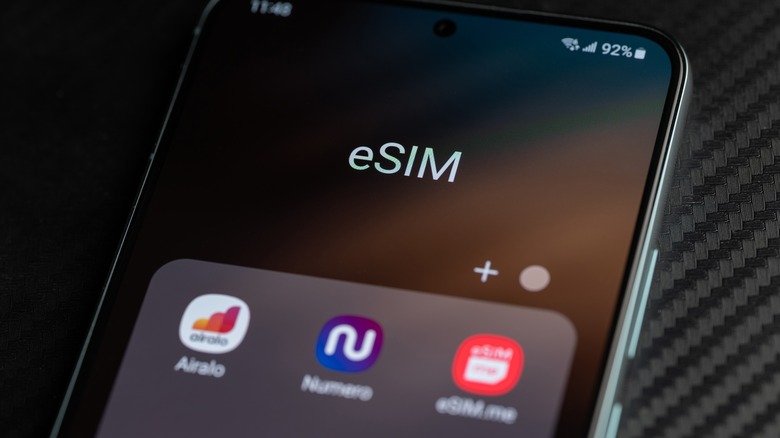
If you've determined that an eSIM is for you, you can purchase it directly from carriers, through online booking platforms like Klook, or via eSIM services like Holafly or Alo. When doing this, make sure to take into consideration your expected data consumption and if you require a plan that is hotspot-compatible.
After you've paid and received the set-up email, here are two ways to install it on your iPhone: QR code and manual encoding. When setting up your new iPhone eSIM, the QR code is the fastest and most convenient option.
How to add an eSIM on your iPhone using a QR code
If you have another device that you can use to view the eSIM registration QR code, here's how to proceed:
- On your iPhone, navigate to the Settings app.
- Select Cellular.
- Under SIMs, tap add eSIM.
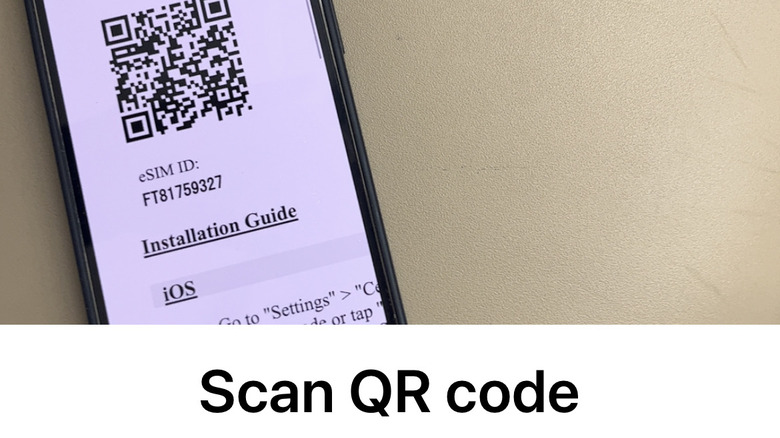
- Select Use QR Code.
- Scan the code given to you by your preferred service provider.
- On the "Activate eSIM" screen, wait for a few minutes until your iPhone is configured by your service provider.
- Once activated, you will see "Cellular Set up Complete."
- Tap Done.
Afterward, you will be asked to label your cellular plans, including your original number, and set up your eSIM settings.
- Choose a cellular plan label: Business, Cellular Data, Personal, Primary, Secondary, and Travel.
- (Optional) You may also create a custom label by tapping "Type label here." Type your preferred label name and tap Continue.
- Confirm what your default line is and what line your iPhone should use for iMessage and FaceTime for the duration of the eSIM validity. Depending on your requirements, you can select either your existing mobile number or your new eSIM.
- Lastly, confirm that you want to use your eSIM for Cellular Data.
While your iPhone may recommend turning on cellular data switching, this can mean activating data roaming on your existing line, which can be very expensive. Unless you need it, it's best to keep the toggle off next to Allow Cellular Data Switching and proceed to confirm your choices by tapping Done.
How to add an eSIM on your iPhone manually
Unfortunately, the QR code scanning method will only work for people with two or more electronic devices because you'll need to be able to scan the QR code on another screen. So, if you're traveling alone without a tablet or computer to supplement your iPhone, it's not an option for you. As of writing, there is currently no way to scan or upload a QR code from a screenshot on the same iPhone.
In addition, QR codes may not work as effectively due to other reasons, such as poor camera quality, broken cameras, or dim environments. Thankfully, it's also possible to set up your eSIM manually using only one device.
- On your iPhone, navigate to the Settings app and select Cellular.
- Under SIMs, tap Add eSIM.
- On the Set Up Cellular screen, select Use QR Code.
- In the bottom part of the screen, tap Enter Details Manually.
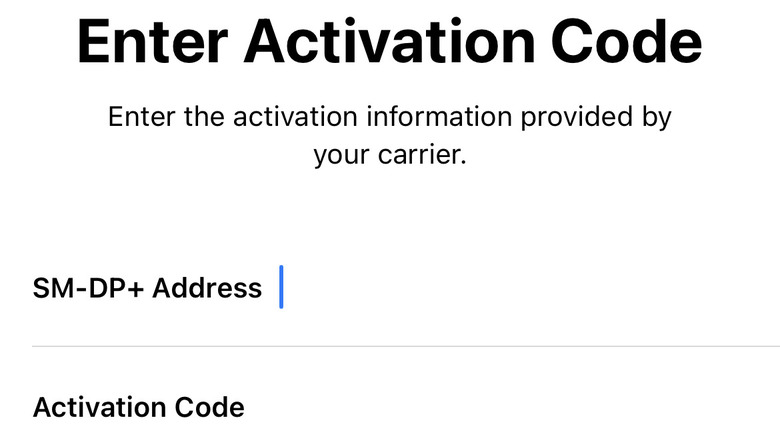
- Next, check your eSIM provider's email for the following details: SM-DP+Address, Activation Code, and Confirmation Code (Optional).
- When you locate this information, copy and paste it into the designated text bars under the Enter Activation Code tab.
- In the upper right corner, tap Next and follow through with the installation as above.
By using the manual setup procedure, you can turn on your eSIM with just your iPhone. Once you do this, check if your internet connection is active. If it isn't, you may need to activate data roaming or change your APN.
How to activate data roaming and change APN on your eSIM
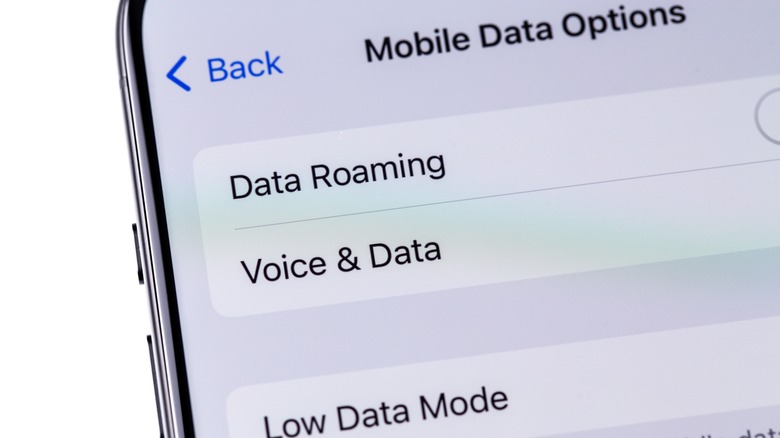
While one of the primary purposes of using an eSIM is to escape hefty roaming fees, you may still need to turn this feature on specifically for your newly installed eSIM. If the eSIM provider you chose is not based in the country you plan to use the eSIM in, it might not work unless roaming is activated.
To activate data roaming for your eSIM, do this:
- Go to your iPhone settings.
- Tap Cellular.
- Under SIMs, tap your eSIM name.
- Next to Data Roaming, toggle on the button.
In some cases, you may also need to change your access point (APN), which will be provided by your eSIM service provider, especially to enable a hotspot. To make changes to your eSIM APN, here's how:
- Go to your iPhone settings.
- Tap Cellular.
- Under SIMs, tap your eSIM name.
- Select Cellular Data Network.
- Scroll down to find the APN settings.
- Encode the APN details.
- Once you exit this tab, these details will be saved on your device.
Afterward, test if your eSIM lets you connect to the internet, which may take a few minutes. If not, you can try to put your device temporarily on airplane mode or restart your iPhone. Among several reasons why your eSIM may not be working is when your iPhone is locked to your carrier, so you may need to contact your original carrier or the support for your eSIM service provider.
Tips when adding an eSIM on your iPhone
When choosing the right eSIM for you, it's your responsibility to check whether or not your iPhone is eSIM-compatible. Although the iPhone XS, iPhone XS Max, and iPhone XR or later can usually use eSIMs, there are a few exceptions. Aside from the model, some iPhones manufactured in certain countries do not allow eSIM, such as mainland China, Hong Kong, and Macau. Alternatively, these models let you use dual SIM with two nano-sim cards.
Although you won't need to pick up a physical SIM card, it's important to remember that it may still take time for the provider to deliver your eSIM details via email. Knowing this, it's best to buy your eSIM a few days ahead so you have time to set it up before your flight and arrive at your destination with full connectivity.
When installing your eSIM, it is recommended to make sure your mobile phone is fully charged and has existing, stable access to the internet before beginning. For some service providers, once the eSIM activation QR is scanned, you will not be able to use it again if your connection is cut in the middle of installation.
Lastly, if you are traveling in a group, consider augmenting your eSIM with a backup pocket Wi-Fi. In any event that your mobile phone gets broken, stolen, lost, or even just runs out of battery, pocket Wi-Fi ensures other members of your group can still access the internet.