How To Install A Light Dimmer To Help Control How Much Electricity You're Using
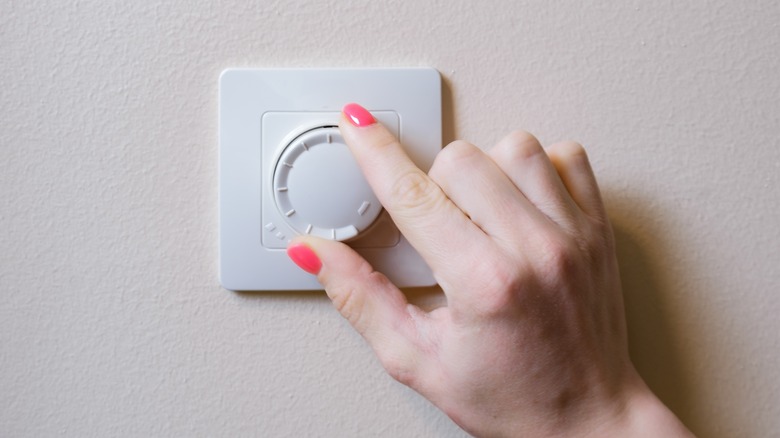
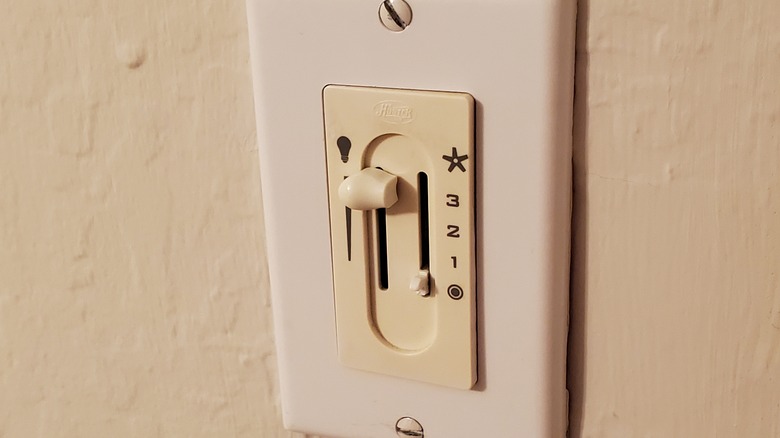
When operating a standard light switch, your choices are limited to turning the lights on or off. However, a light dimmer provides more versatility. Depending on the type of dimmer you choose, you can turn a knob or use a slider to control the brightness. Twist or slide it down, and the room gets a cozy, dim vibe. Turn up, and everywhere gets highly illuminated. It does this by regulating electricity flow to the lights via a dimmer control, and that way, you can spend less on electricity bills and save some money. Plus, they cater to personal preferences. For instance, if you're not a fan of sleeping with bright lights or in complete darkness, a dimmer allows you to set a low light level for a more comfortable ambiance.
So, if you've been wondering whether you can install a dimmer switch yourself, the answer is yes. Installing a light dimmer is straightforward, especially if you know your way around electrical systems, even if you have never worked on any electrical fitting at home. This project can be a fantastic way to learn to start your DIY career in electrical electronics. However, the task can also become dangerous if you don't follow basic safety rules for electrical appliances.
Safety Tips and Essential Gear for Installing a Light Dimmer at Home
Here are helpful safety tips when wiring a light dimmer at home to control how much electricity your bulbs consume.
-
Read the product's instructional manual properly before starting the project.
-
Understand that ordinary dimmer switches aren't intended for use with some fluorescent bulbs. If you use compact fluorescent lamps (CFLs), check whether they're labeled 'dimmable.'
-
Ensure the dimmer's wattage equals or exceeds the wattage of the lights you want to dim.
-
Wear electrically insulated gloves while working to protect yourself from electrocution.
-
Turn off electricity coming to the switch from the main fuse box or circuit breaker box before starting any electrical project.
-
Test the switch or wires to ensure no electrical current before proceeding.
-
Consider calling a licensed electrician when you have any concerns about the installation.
After checking out safety procedures, here are the equipment and tools you need to get the job done: wire strippers, gloves, screwdrivers, needle-nose pliers, wire-cutting equipment, wire labels, a dimmer switch, and a non-contact voltage tester. Now, you can go ahead and install your light dimmer. It's a relatively straightforward process.
How to Install a Light Dimmer for a Single Pole Circuit
When installing a dimmer for a single-pole circuit, it's crucial to identify three types of wires. The green wire serves as the ground wire, the red wire is the load wire, and the black wire is the hot wire. To start, follow these steps:
-
Turn off the power to the switch at the breaker box.
-
Use an insulated screwdriver to remove the existing wall plate.
-
Use a non-contact voltage tester or a volt pen to confirm there are no active wires.
-
Unscrew the mounting screws holding the switch to the wall and gently disconnect all cables attached to the switch. Allow the bare wire to be visible. If the bare wire is bent, use pliers to straighten it or trim the bent portion, leaving the exposed straight bare part.
-
Remove the dimmer switch and connect its ground wire to a green or bare copper wire in the wall box. Twist the ends clockwise to ensure secure connections. Connect the remaining existing cables to the corresponding dimmer wires. If there's an unconnected wire, cap it with a connector nut for isolation.
-
Use a wire connector nut to cover the twisted ends of the other bare wires.
-
Tuck all the wires neatly into the electrical box and screw the dimmer into place.
-
Attach the wall plate to the switch and secure it with wall plate screws.
-
Turn on the power to the switch at the breaker box.
-
Test the dimmer.
How to Install a Light Dimmer for a 3-way circuit

Dimmers for a 3-way circuit have an additional wire. It includes a green ground wire, a hot wire, and two traveler wires, which are usually differentiated by distinct colors or by having one with a colored line running through it. For this type of connection, follow these steps:
-
Go to the breaker box and shut off the power to the switch.
-
Use a screwdriver to remove the existing wall plate.
-
Use a non-contact voltage tester or volt pen to ensure no wires are active.
-
Unscrew the switch from the wall.
-
Disconnect all cables attached to the switch, ensuring the bare wire is exposed.
-
Get the dimmer switch and connect its ground wire to a green or bare copper wire in the wall box. Twist the ends clockwise to ensure secure connections.
-
Connect the traveler wires from the dimmer switch to the matching traveler wires coming from the electrical box, and connect the hot wire.
-
Use a connector nut to cover the twisted ends of all bare wires.
-
Push all the wires into the electrical box and securely screw the dimmer into place.
-
Mount the wall plate onto the switch and secure it with wall plate screws.
-
Restore power to the switch at the breaker box and test the dimmer.
Whether for a single-pole or 3-way circuit, a dimmer efficiently controls electricity usage, allowing you to adjust the brightness of your light as needed rather than keeping it at full intensity.