How To Install Octoprint On A Raspberry Pi

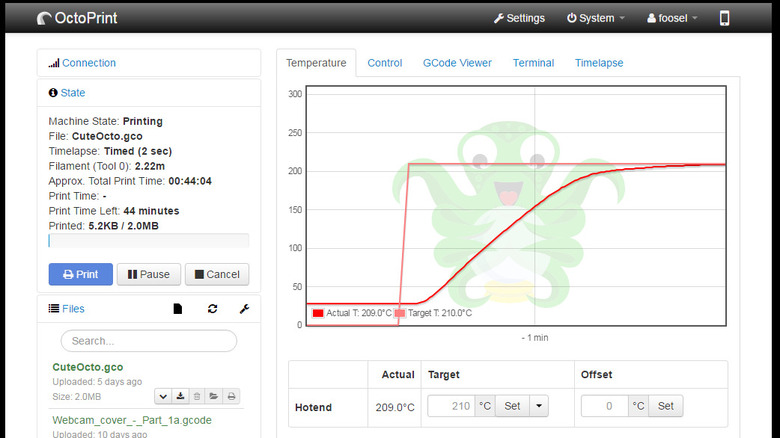
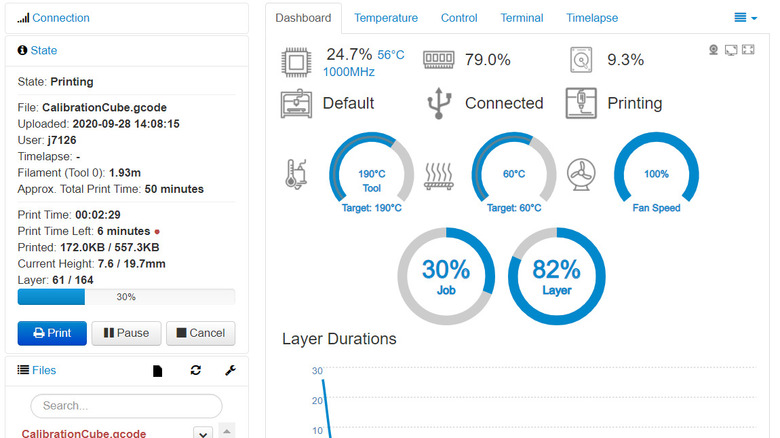
Octoprint is the go-to 3D printer controller for many enthusiasts for a good reason. This open-source web interface communicated with OctoPi software to give 3D printers smart features without needing a hardware upgrade. With Octoprint, users can remotely monitor their 3D printer's temperatures, initiate printing jobs, monitor a webcam feed, create time-lapses, and update the printer's firmware.
One of the major reasons enthusiasts love Octoprint is that it's compatible with many major 3D printer brands. It also is not relegated to a PC. Although you can install it on Windows or Linux, you can also run it on a compact device like a Raspberry Pi. Octoprint recommends Raspberry Pi 3B, 3B+, 4B, or Zero 2 hardware for the software. It advises against using Raspberry Pi Zero and Zero W.
To install OctoPi on a Raspberry Pi, you will need an SD card to function as the boot disc. This means you'll need a computer with an SD card slot or an external reader. But be warned, installing OctoPi on an SD card will delete all the contents on the device, so back up your data if needed.
Installation process
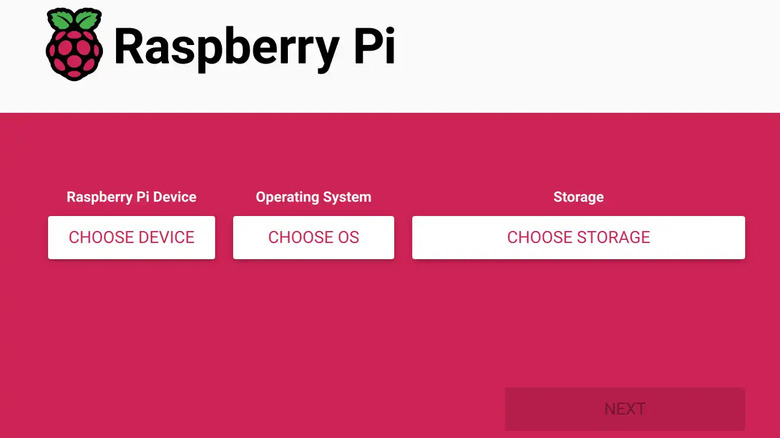
The OctoPi installation is done through the Raspberry Pi Imager. This program allows users to install Raspberry Pi's official operating system and can be found on its website. To install the OctoPi branch of the OS, follow these steps:
- Insert the SD card you want to use for the project.
- Open Raspberry Pi Imager.
- Under Operating System, click Choose OS.
- Scroll down and select the Other Specific-Purpose OS option.
- Click 3D Printing.
- Select OctoPi from the list of options.
- Click OctoPi Stable.
- Back in the main Raspberry Pi menu, click the Choose Storage option.
- Select the SD card you want to install OctoPi on.
Before initiating the writing process, there are a few settings you may want to adjust. To access these settings, click the cog icon at the bottom right of the Raspberry Pi Imager window. From here, you can Set the device's hostname, enable SSH, and set up a username and password. To configure a wireless LAN connection, you will need to input your connection's SSID and password on this page.
After you have everything set up to your liking, close out of the options menu and select Write on the main Raspberry Pi Imager window. Accept any popup boxes that the imager presents to complete the installation process.
First time setup
There are a few different ways to access the Octoprint browser menu. The easiest way is to type in the hostname you input during the installation into your address bar. But this only works if your computer supports Bonjour. You can also use http://octopi.local and http://(your Pi's IP address).
- When you access Octoprint for the first time, you will be greeted with a setup wizard.
- The first page will give you a box to input the system's username and password. Setting this up keeps the printer from being used by other individuals on your network freely.
- On the next page, click Test Host & Port and Test Name Resolution to verify your online connectivity is working with the default settings. If not, you may need to tweak the settings.
- Next up, the setup wizard will ask you if you want to enable features such as having Octoprint check if the internet is available when booting and collecting anonymous usage data.
- The final setup page will ask you to input the name and model of the 3D printer you are accessing with Octoprint.
- Under the Print Bed and Build Volume tab, input the print volume, form factor, and other specifications of the 3D printer. You can adjust the options under the Axes and Hotend and Extruder tabs if needed.
Once you get to the main Octoprint tab, click Save Connection Settings at the top left, then click Connect. To start printing, you can upload files by dragging them directly into the Octoprint window.
How to install plugins
Plugins let you further customize your Octoprint setup. Some let the user adjust the look of the web interface, while others, such as Octodash, can add new features, such as allowing the user to set up a touchscreen interface on your 3D printer. There are two ways to install Octoprint plugins. The simplest way is to use the Plugin Manager in Octoprint. Here's how to do it:
- Open Octoprint's Settings in the web interface.
- Select Plugin Manager from the dropdown on the left.
- Click Get More at the top right of the window.
- On this menu, you can search for Plugins in the Plugin Repository.
- To install one, click the blue Install button to the right of the plugin's title. (You can also enter a plugin URL or upload a file directly from the same menu.)
The second way to install plugins is via a command line. Each plugin will have a Command Line section listed on its page. Copy and paste that line into your Raspberry Pi and execute it. It will then download the file from the web and install it.