6 Hidden Windows 11 Features Every User Should Know About By Now
With every update and upgrade, Windows keeps adding nifty features that improve the user experience. Windows 11 alone comes with a bunch of features designed not only to boost productivity but also to be helpful for those with different needs. There's the Focus assist for distractionless work sessions, the Snipping tool for recording specific parts of the display or taking a screenshot, and the Visual notifications for alerting hearing-impaired users, to name a few.
However, on top of the most frequently used Windows 11 features, there lies a treasure trove of lesser-known gems — hidden functionalities you're probably still missing out on but can enhance how you navigate, manage, and use your digital space. These include shake to minimize, natural voices for the Windows Narrator, clipboard history, Game Bar, built-in troubleshooters, and voice typing. We'll go through what each of these do and how to use them to their full potential.
Shake to minimize
If you use your laptop for work or school, you rarely have only one active window on your computer at a time. Usually, there's a minimum of two of them up and running, and sometimes, if you're multitasking like crazy, that number can shoot up to 20 and even 50! Having all these windows open is great for increasing your productivity, but let's be honest; they can also be a headache to manage. There will be times when you want to focus on a single window, so you have to go through the tedious process of minimizing all the other ones one at a time. Fortunately, Windows 11 has a nifty feature called the Title Bar Window Shake that makes minimizing multiple windows quick and easy. Thirty-seven percent of Windows users don't even know this feature exists, but it can come in handy.
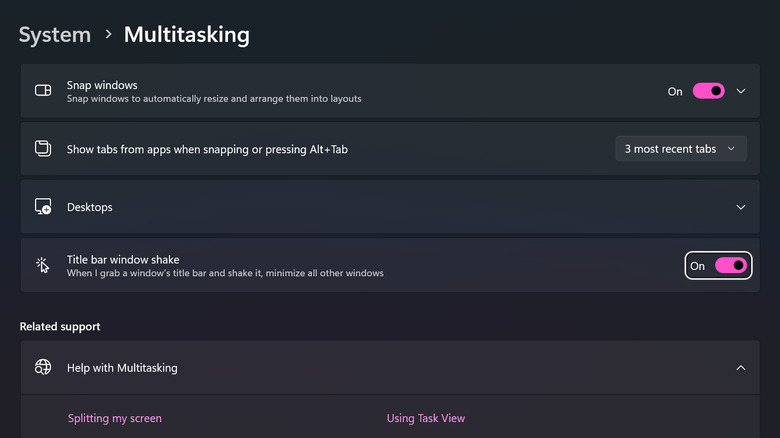
To enable the Title Bar Window Shake feature, open Settings and navigate to System > Multitasking. Alternatively, you can type "shake" in the search bar and select the first result that comes up. On the Multitasking page, turn on the option for "Title bar window shake." You can now give it a whirl. Just grab and hold the title bar of the window you want to stay open and give it a little shake. All your other opened windows will automatically swoop down to the taskbar and out of your way. If you shake your active window again, they'll pop back up.
Natural-sounding voices for Narrator
If you didn't already know, Windows 11 includes a Narrator that reads and interacts with whatever you have displayed on your computer. This accessibility feature can come in handy for visually impaired users and in situations when you prefer to listen instead of read the content on, say, an email, document, or blog post. By default, the Narrator uses a robotic voice. However, you can switch it up to sound more human-like. Here's how to set it up:
- Open the Narrator settings by going to the Settings app and navigating to Accessibility > Narrator. Alternatively, press the Windows 11 keyboard shortcut Win + Ctrl + N.
- Under Narrator's voice, find Add natural voices.
- Hit the Add button.
- If you want to change the language, click on Choose a different language and pick your preferred one from the list. As of this writing, currently available options include Chinese, Japanese, French, German, Korean, Spanish, and Portuguese. After selecting your language, hit Next.
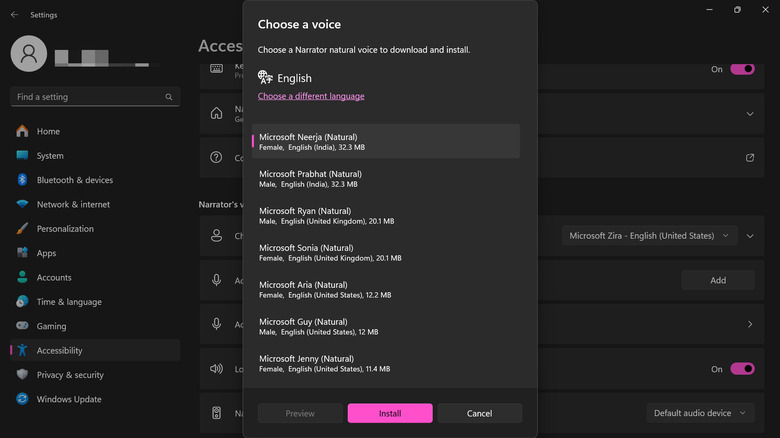
- Scroll through the list of voices and click on your favorite. You can see options for male and female voices, as well as the language version (i.e., Spanish (Mexico) and Spanish (Spain) versions).
- Click on Install to download the voice.
- (Optional) Download the other natural voices you wish to use.
- Back on the Narrator settings page, go to Choose a voice.
- Expand the options.
- Select your preferred natural voice from the list. The natural voices are labeled as such to make it easy to tell them apart from the robotic ones.
- Turn on the Narrator to test out the voice.
Clipboard history
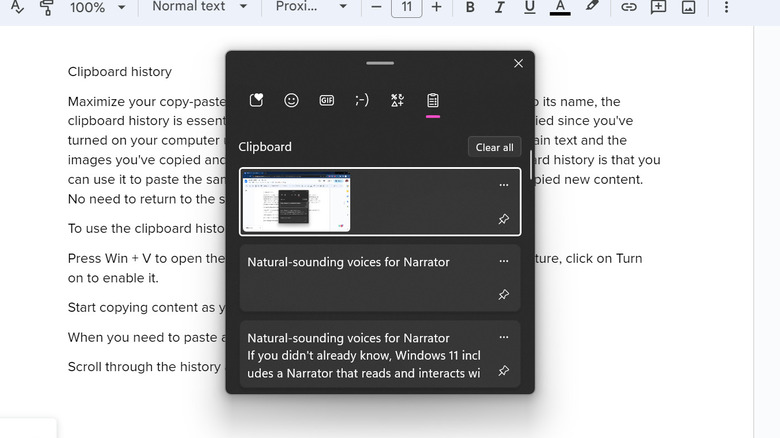
Maximize your copy-paste routine with the Windows clipboard history. True to its name, the clipboard history is essentially a log that keeps track of the things you've copied since turning on your computer until you restart or shut it down. It can store plain text and the images you've copied and screencaptured. The great thing about the clipboard history is that you can paste the same item repeatedly, even after copying new content—no need to return to the source and copy it again.
To use the clipboard history, here's what you need to do:
- Press Win + V to open the clipboard history. If it's your first time using this feature, click on Turn on to enable it.
- Start copying content as you normally would.
- When you need to paste an item, press Win + V again.
- Scroll through the history and click on content to paste it instantly.
- (Optional) Pin a copied item so it won't be deleted even after you restart or shut down your PC. Open the clipboard history and click on the pin icon next to the item you wish to pin.
- (Optional) Delete a copied item. Open the clipboard history. Hit the More icon (three horizontal dots) next to the content you want to remove, and select the trash icon.
- (Optional) Sync your clipboard history across the PCs where your Microsoft account is logged in. Open Settings and go to System > Clipboard. Enable Sync across your devices and select Automatically sync text that I copy. You can now start copying content from one PC and using it on another.
Game Bar
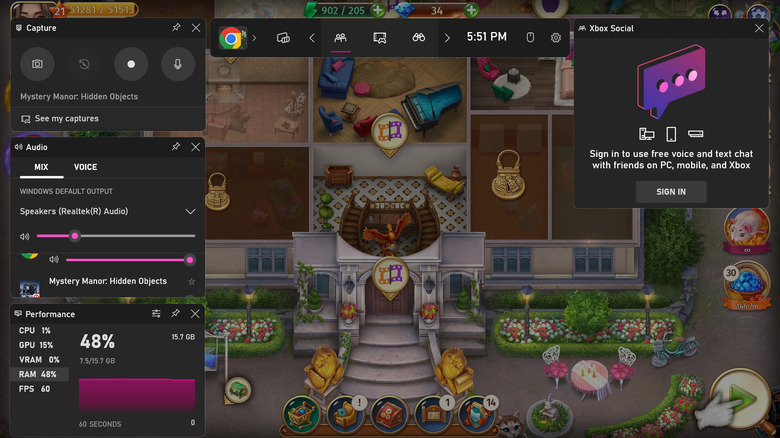
The Game Bar is an overlayed toolbar featuring utilities gamers typically use. It comes complete with the following widgets:
- Capture for recording the screen or taking a screenshot.
- Audio is used to control the volume of individual apps and select the audio output and input devices.
- Performance displays computer stats like CPU, GPU, VRAM, RAM, and FPS.
- Resources show a list of your active apps and the impact they have on your computer resources (high or low).
- Gallery displays the screen recordings and screenshots you took using Game Bar.
- Use Xbox Social to chat with your Xbox friends.
- Xbox Achievement keeps track of the achievements you acquired from your Xbox games.
- Looking for Group for finding Xbox players to join you in your game.
All of the widgets, except for the Xbox-related ones, can be used without any additional setup. For the Xbox-related widgets, you first need to sign in to the Xbox app on your computer to enable them. Apart from the built-in widgets, Game Bar lets you install and use third-party ones, too. Just go to the Widget Store and download your favorite widgets. Some of the available Game Bar widgets include Spotify, Game Bar Calculator, and Microsoft Teams Play Together.
To show the Game Bar, simply press Win + G. Customize the widgets displayed by clicking on the Widget Menu icon on the right of the main toolbar and marking the widgets you want to show up on the screen. You can also rearrange and resize the widgets.
Troubleshooters
You'll inevitably run into some minor issue with your computer, whether it's the Wi-Fi disconnecting or the camera refusing to open. Instead of jumping right to Google to look for a quick fix, you can use the built-in troubleshooters first. Windows troubleshooters can help you diagnose different hardware and software issues and get recommended solutions.
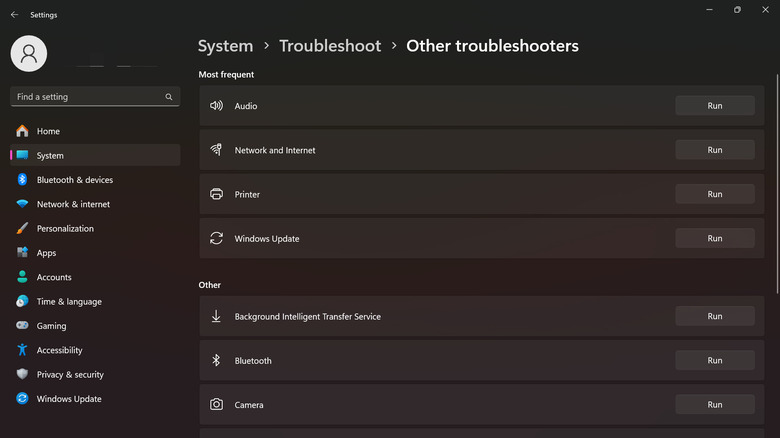
Here are the available troubleshooters you can find under Settings > System > Troubleshoot > Other troubleshooters:
- Audio
- Network and internet
- Printer
- Windows update
- Windows media player
- Bluetooth
- Camera
- Background intelligent transfer service — Typically used by system administrators and programmers to download and upload files from and to web servers and file shares.
- Program compatibility troubleshooter — Use this if you're encountering issues when running older apps on Windows 11.
- Video playback — For troubleshooting videos that don't play as intended.
To use the troubleshooters, follow these steps:
- Go to the Troubleshoot settings by opening the Settings app and navigating to System > Troubleshoot. Alternatively, type "troubleshoot" in the search bar and click on Troubleshoot settings from the results.
- Open Other troubleshooters.
- Find the troubleshooter related to your issue.
- Hit Run.
- In the new window, select Yes to proceed with the diagnostics (for Video Playback, click on I want to continue with this troubleshooter). Windows troubleshooter will then check your system for problems and automatically run the solutions to resolve them.
- If the scan doesn't solve your issue, click on one of the suggested articles under More Help to see other troubleshooting tips you can do.
Voice typing
Typing with your keyboard is all fun and games until you're faced with a very long document, and it quickly becomes a boring chore you prefer to skip out on. Lucky for you, Windows offers a quicker and more convenient way to type on your computer: using your voice. Driven by Azure Speech services, the Windows speech dictation feature converts spoken words to text, so you can write reports, emails, and other documents all hands-free. Voice typing supports over 40 languages, including Thai, Irish, Czech, and Bulgarian.
Here's how to use voice typing on Windows 11:
- Make sure you're connected to the internet and have a working mic.
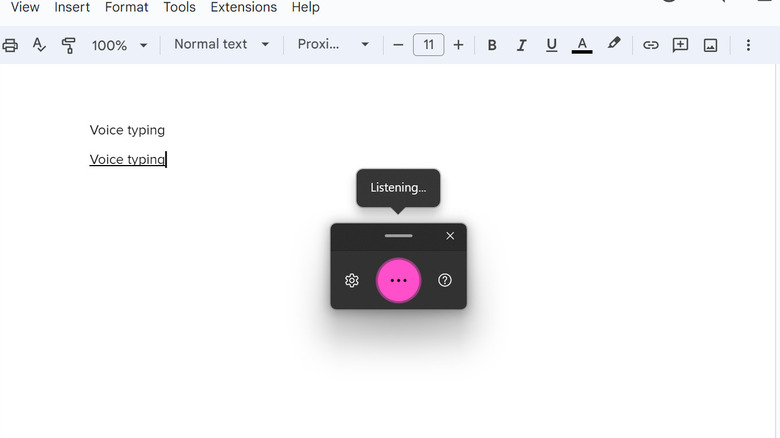
- Place your cursor in a text box, either in a document, notepad, search bar, or what have you.
- Press Win + H to turn on voice typing.
- Start dictating.
- To delete a word or phrase, say, "Erase that" or "Delete that."
- To pause the speech dictation, say "Pause voice typing," "Pause dictation," or "Pause voice mode."
- To stop the speech dictation entirely, say, "Stop listening," "Stop dictation," or "Stop voice typing."
If you want to use a different language, here's how:
- Go to Settings > Time & language > Language & region.
- Click on "Add a language" next to "Preferred languages."
- Select your language from the list. Make sure it supports speech recognition.
- Hit Next to download it.
- Go to your taskbar.
- Click on ENG and switch to your preferred language. You can now use this new language for dictation.