5 iPad Tricks Every Teacher Will Want To Know For Their Classroom

With how versatile iPads are, it's no longer surprising that they have grown in popularity among students. After all, they offer an array of convenient functionalities, from quick note-taking and creative journaling to photo editing and web article compilation, that make learning a little more fun. However, on top of helping students, iPads prove to be powerful tools for teachers, too. Beneath the surface lies a trove of overt and lesser-known iPad features, transforming how educators teach and interact with their increasingly tech-savvy students.
Using an iPad in the classroom may not be a go-to move for many, as there's a prevailing preference for computers. However, this portable device is a valuable asset in an educational setting because its nifty features can be used for a wide variety of subjects and teaching styles. These are five of the top iPad tips and tricks you need to know as a teacher.
Document your lessons using the built-in screen recorder
Perhaps one of the handiest iPad features for teachers is its built-in screen recorder. It's incredibly useful for documenting the entire lesson for the students, especially those who were absent or had difficulty understanding the topic. Instead of merely reading through the material, the learners can watch the video at a later time and listen to the teacher's voice-over explanation.
Screen recording is also valuable when reviewing students' digital submissions. While assessing their work, whether it's an essay or a math assignment, you can record your screen and voice to relay detailed feedback on the learner's activity. You can also use screen recording when you want to capture and save content from the web. Say you've come across a well-written article you want to use as an example for your grammar lesson. Screen recording lets you walk through the piece and highlight specific portions that exemplify certain grammar rules. This can be more impactful than just sharing a link to the article with your class.
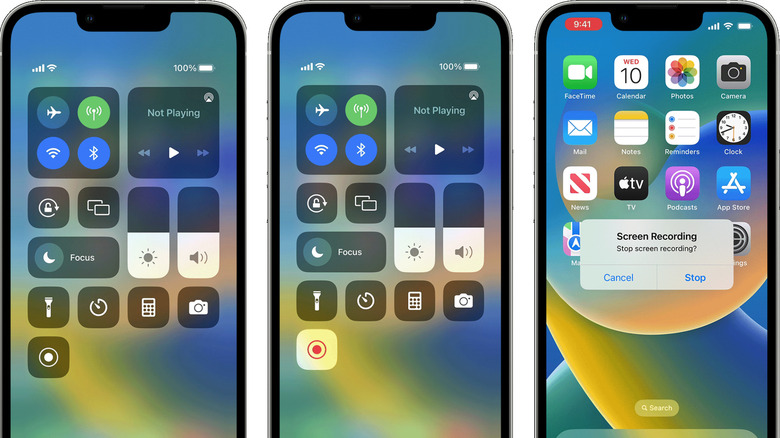
To screen record on your iPad, here's what you need to do:
- Open your Settings app.
- Go to the Control Center.
- Under More Controls, click the plus sign for Screen Recording to add the screen-recorder button to your Control Center.
- Swipe down from the top right of the screen (or swipe up for older models) to open the Control Center.
- Tap and hold the screen-recorder button.
- Turn on the microphone.
- Press Start Recording.
Write on your photos and screenshots
Teaching doesn't only involve talking about the lesson — it also includes a lot of writing. This is particularly true if you're a math teacher constantly solving problems or a literature teacher frequently annotating passages. To demonstrate your topic, you either need to write your math problem or literary piece on a whiteboard before solving or annotating it or flash an already solved or annotated work from your computer to a projector or TV. However, there is a more effective way to do this.
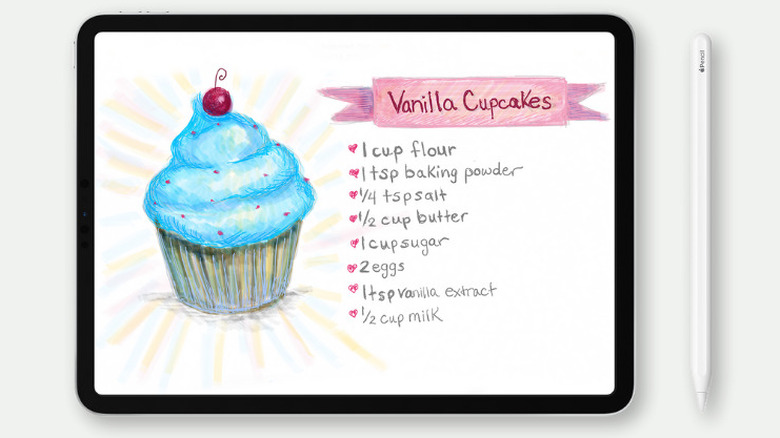
The Photos app lets you add handwriting and drawings to the images saved on your gallery. For example, these images can be JPG files of math problems you've previously made or screenshots of Shakespeare's Romeo and Juliet. To use the Photos app for this purpose, follow these steps:
- Cast the iPad to Amazon Fire TV Stick, Apple TV, Google Chromecast, or whatever streaming/mirroring device you use in the classroom.
- Open the image you want to annotate in the Photos app.
- Tap on Edit in the upper right corner.
- Tap the three horizontal dots to show more options.
- Select Markup.
- Pick a tool from the options at the bottom.
- (Optional) Change the color of the tool by tapping on the color selector.
- Mark up your photo (e.g., solve your math problem, highlight certain texts on an article).
When finished, tap on Done to save your edited image. You can then choose to share it with your students for their reference.
Scan paper documents with Notes
For teachers, the most obvious use for the Notes app on iPad is, of course, for taking notes. Whether that's the minutes of a faculty meeting or a brainstorming session for an upcoming lesson, the app ensures you have a space for quickly jotting down thoughts and ideas and organizing them into lists, tables, and folders.
However, it has one other convenient feature that you might not be utilizing yet: the document scanner. Yes, with this tool, you can turn any physical book or document into a PDF. This proves useful when you want to digitize your students' paper handouts, the writings on your physical whiteboard, and even textbook pages. Here's how to use the Notes document scanner:
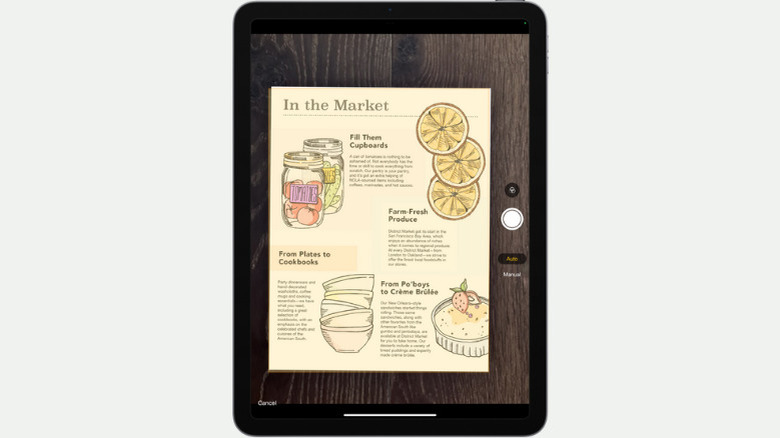
- In a new note in your Notes app, select the camera icon.
- Choose Scan Documents from the options.
- Capture the document. If you position your device such that the entire document is visible, Notes will automatically scan it. You can also go the manual route: press the capture button, drag the corners to choose your document from the captured image, and finally, press Keep Scan.
- If you want to include multiple documents in a single PDF, continue scanning the other pages.
- Once done, tap on Save.
- Tap on the image in your note.
- Press the share button at the top.
- Share the PDF via email or instant messaging apps, or select Save to Files to save the document to your iPad.
Present efficiently with Split View and Slide Over
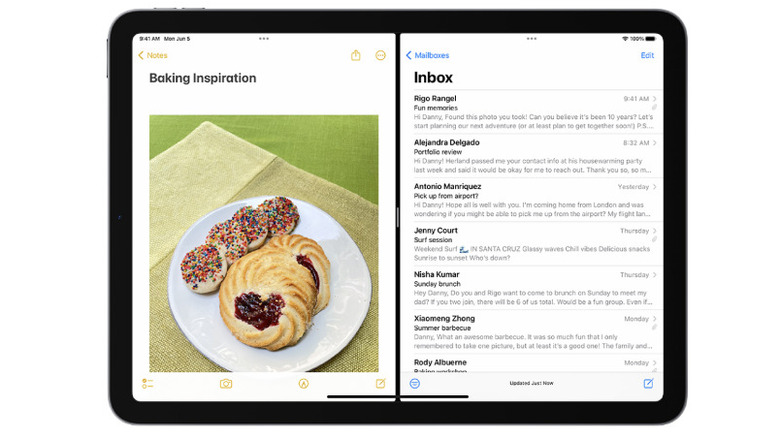
The iPad's Split View and Slide Over features have undeniably taken productivity to the next level. You can now read a PDF and take notes at the same time or scroll through Facebook while occasionally checking in on your inbox. But beyond everyday personal tasks, these multitasking features also serve practical uses inside the classroom. For one, you can use Split View to present two things simultaneously. Say you have a chemistry problem in one window and a periodic table in another; both need to be displayed for your students to understand the topic. Split View is also helpful for comparisons, like when you want to show the difference between a poem and a haiku.
On the other hand, Slide Over lets you open an app in full screen and another app in a side window. It's handy in cases when you need an app but don't want to keep displaying it at all times. For instance, when your students are doing an activity, you can display the instructions in the main window and have a timer in the Slide Over. Then, all you need to do is swipe left to reveal the timer when needed and swipe right to hide it again.
To use Split View, open your first app, select the three horizontal buttons at the top, and tap Split View in the middle of the options. Then, launch your second app. To use Slide Over, open the app you want to add in the side window. Tap on the horizontal buttons and choose the rightmost option. Then, open your primary app.
Customize your Control Center
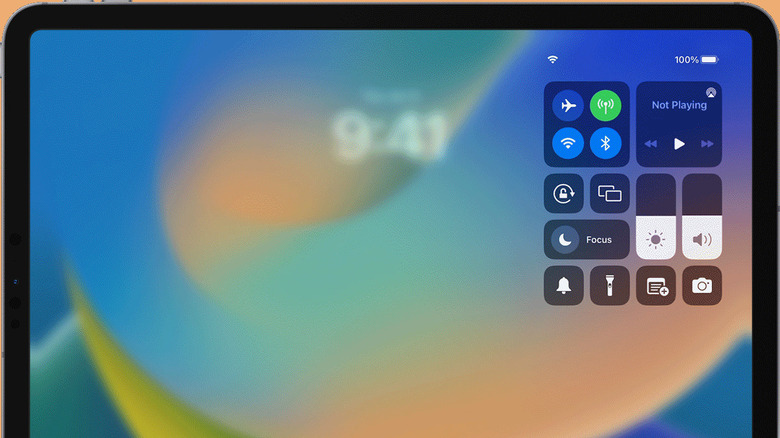
Don't you hate it when you repeatedly have to go through the hassle of unlocking your iPad before you can open the utility tools (e.g., timer, notes, calculator) you need for your class? To keep things streamlined, just customize your Control Center, which, if you don't already know, can be accessed even with your device locked. This way, you can conveniently open your frequently used utility tools when needed.
Here's how to customize the Control Center on your iPad:
- Open your Settings app.
- Navigate to the Control Center.
- Add your preferred tools to the Included Controls section by tapping the green plus sign.
If you're unsure which tools would be most useful in the classroom, here are a few ideas:
- Screen Recording: For recording your screen and voice during lessons.
- Calculator: For instant calculations, such as when an unexpected math problem comes up or when grading a student's paper.
- Timer: For setting a timer during class activities.
- Magnifier: For zooming in on texts, images, and other types of presentations.
- Notes: For thoughts, ideas, and reminders, you'd like to jot down at random hours of the day.
- Text Size: For making the text on your iPad larger.
- Flashlight: For emergency situations.
- Camera: For taking photos and scanning QR codes.
Once you're happy with your collection of tools, just exit Settings. You can then open the Control Center from any app or from the lock screen.