How To Factor In Travel Time On Your Apple Calendar Reminders
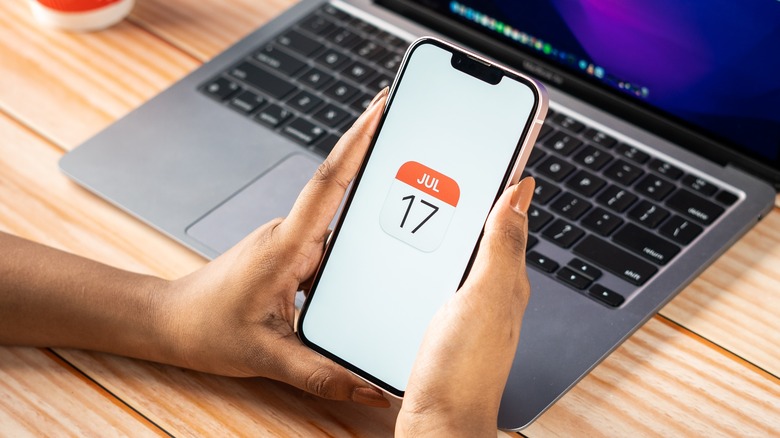
Maintaining a calendar app on your mobile phone is one of the most effective ways of getting a handle on your daily schedule. Whether you go to school or work or regularly have appointments and meetups, placing every activity you need to attend (whether virtually or in real life) on its designated date and time can aid you in making preparations prior to the event.
For activities that are taking place at a certain destination, it's common to tag the location within the calendar event so that when it pops up on your phone on the day, you can use it to launch your map app of choice and plan the most efficient route and mode of transportation to get there on time. In addition, those who want to ensure that they arrive promptly for scheduled events can give themselves a time allowance for travel by rigging the notification to pop up a bit earlier than the official start.
iPhone users who have the device's built-in Calendar app keep their daily, weekly, and monthly schedules organized can do a lot by simply adding events. A new Calendar event may contain a location or a FaceTime video link for remote meetings. It can be scheduled as "all-day" to block off the entire date or have start and end times to reserve a certain slot. It can be programmed to recur a number of times as well as include attachments and other users as participants so that the event shows up on their respective calendar apps, along with any files they need to see. Finally, if you intend to get to an in-person activity by driving your own vehicle or taking public transit, you can tack on however much time you need to get to your destination.
How to include travel time in a new Calendar app event on an iPhone or iPad
To create a brand-new event that includes travel time, do the following on an iPhone or iPad:
- Launch the Calendar app.
- Tap the plus symbol at the top of an iPhone or iPad screen.
- Type in a Title for the event.
- Tap the Location or Video Call field to include a physical address for the event or the option to FaceTime, if the meeting is happening remotely.
- Choose a start and end time for the event's duration.
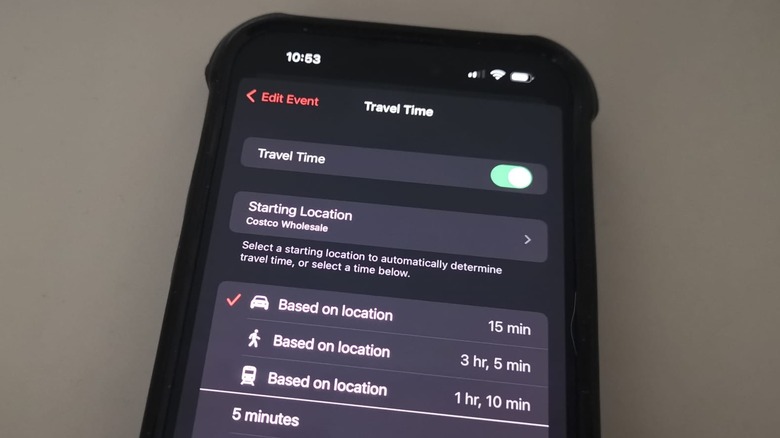
- Tap Travel Time, and enable the toggle next to Travel Time.
- Pick a Starting Location or choose one of the time increments suggested.
By default, the starting point of the Travel Time option will detect your current location. Whatever address you put in this field will automatically determine travel time options for driving, walking, or taking public transit as well as time increments between 5 minutes to 2 hours.
You can technically use the Travel Time feature in a calendar event even if you don't put in a destination in the Location field. However, without an actual physical address, you can only choose one of the manually set time increments instead of the precalculated options based on your starting point.
You also have the option of tweaking other fields in the new event, such as setting it to repeat at your chosen interval, adding it to a certain calendar (if you are maintaining several), including invitees, setting up an alert, and adding attachments and other notes. Once you've placed all the relevant information, tap Add to save the event.
Do note that if you choose the "All-day" option and don't define a start and end time for the event, the Travel Time feature will be disabled.
How to use the travel time feature in a new Calendar app event on Mac
The process of carving out some time to get to a certain destination in a new calendar event is similar on a Mac computer. Here's the easiest way to include travel time on a new Calendar app event:
- Launch the Calendar app and make sure you're in Month view.
- Find the month you want and double-click on the day you want to add an event.
- Type in a title in the New Event field.
- Type in your event's location in the "Add location" field.
- Tap on the date and time duration to expand the field.
- Choose a start and end time for the event's duration.
- Tap "travel time" and choose one of the suggested options or hit Custom to assign your own.
Again, if you want the option to choose a travel time precalculated according to your starting location, you must assign a location to the event itself. Otherwise, you'll have to choose a time increment yourself. To save the event, simply click out of the New Event window after you've added all the necessary details.
How to tack on travel time to existing Calendar app events
You can modify already-created events on the Calendar app so that your travel time is also accounted for. Here's how to do it on an iPhone or iPad:
- Launch the Calendar app.
- Tap on the event entry and hit Edit.
- If the event doesn't have a specified destination, tap Travel Time, pick one of the given time intervals, and skip to step 7. Otherwise, go to step 4.
- For an event that has a destination entered, tap Travel Time and enable the feature's toggle.
- Make sure you pick the correct address for the event's Starting Location to generate accurate travel time suggestions.
- Choose one of the suggested time intervals.
- Hit the back arrow and tap Done when you've checked and added all the pertinent information.
The steps are similar on a Mac. Simply double-click on the event entry you want to modify, hit the date and time to expand the field, click "travel time," and pick one of the generated time interval options or choose your own. Restrictions are the same for existing events that don't have a location defined: You will only be able to choose a manually estimated time increment rather than a time based on Apple Maps calculations. In addition, it's important to note that if the event has a location defined and you modify it to a different one, you might need to click on the time travel option again to get updated time suggestions related to the new address.
More about the Calendar app's travel time option and setting event alerts
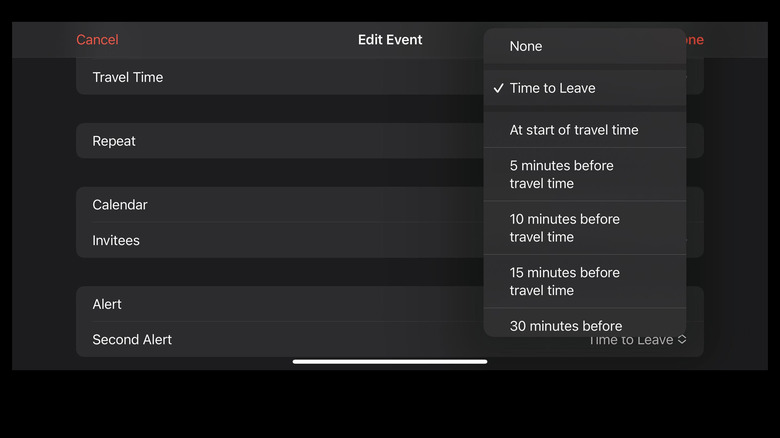
As previously mentioned, the Apple Calendar app's Travel Time feature works in conjunction with Apple Maps in providing travel estimates that have been determined based on current traffic conditions and available transit options. When you add or modify a calendar event with a location defined and enable the travel time toggle on it, you'll be able to set alerts to go off before you're scheduled to leave. There's a wide variety of time intervals to choose from: You can set an alert one, two, or seven days before the event or several minutes before your scheduled travel time.
An extra option to turn on a "Time to Leave" alert for the event will also become available. This alarm will likely go off at a time that's determined by Apple Maps based on your current location and chosen mode of travel (i.e. drive, walk, or public transit) in the Travel Time field and should give you enough time to prepare to start your journey. Alternatively, you can also set an alert to go off "At start of travel time" so you know exactly when to hit the road, in case you're ready to go ahead of schedule and are merely burning time before you have to leave.