How To Install Your Favorite Streaming Apps On To Your Steam Deck
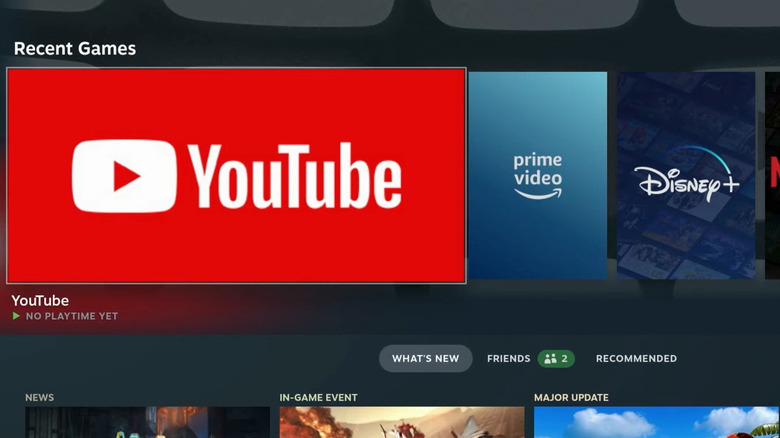
The Steam Deck is the perfect device for playing PC titles, especially free games, on the go. What you might not know is you can also watch television and movies on your Deck via your favorite streaming services such as Netflix and Amazon Prime Video. It can also stream music through Spotify, and host social media apps such as Discord and Twitter.
This makes it an even more versatile device for when you are out and about, or don't feel like getting out of bed. Unfortunately, setting up streaming platforms is not as simple as downloading them from the Steam Store.
Previously, you had to input a hefty amount of code into the Deck to install Google Chrome, which would then be used to access streaming platforms. This process no longer works, as the web browsers had trouble displaying the content. Thankfully, a new technique was discovered, and it's much easier. This will require you to install EmuDeck, the app that lets you emulate other systems. You can skip to the final slide if you already have EmuDeck on your device.
How to install EmuDeck
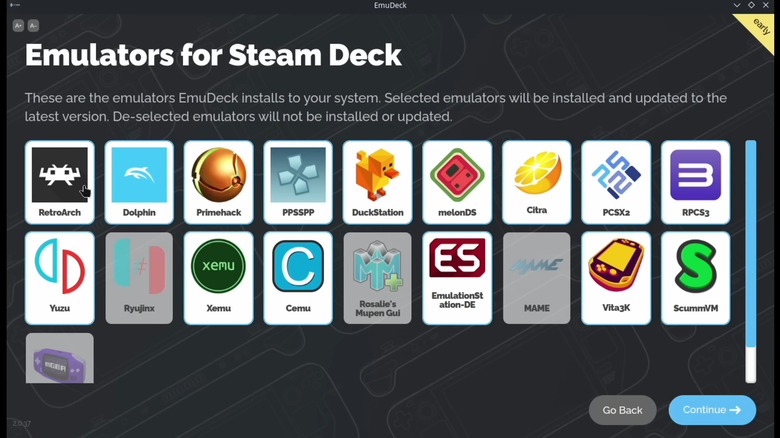
EmuDeck is a powerful tool that lets you do many different things. Many people use Emudeck to play retro games, but it can also host streaming services. If you plan on using an SD card to house EmuDeck, you'll need it formatted in ext4 or btrfs. Here's how to do it:
- Insert the SD card into your Deck and boot up Steam's Game Mode
- Hit the Steam button and go to Settings.
- Tap on System.
- Scroll down to System Settings in this menu and select "Format SD card" (note that this will delete any data you have on the card).
The next step is to get the EmuDeck installer onto your Deck. You can do this by putting your SD card in your computer and transferring the files manually, or by downloading the installer directly on the device. Once the installer is on your device, you must switch to Desktop View. To do this, hold down the power button, then scroll down and click on the Switch to Desktop option. Now that you're on your Deck's desktop screen follow these two steps:
1. Open the EmuDeck installer and proceed through the installation process.
2. Select the "Easy Mode" Installer option when it appears. If you are confident enough, you can use the Custom Installer to tweak the app to your liking.
Now that EmuDeck is ready, we can move on to getting the app's cloud services up and running.
How to add streaming platforms
Connect to the internet before opening EmuDeck to automatically update the app for best results. Now, with your updated EmuDeck, follow the steps below:
- Open EmuDeck, and under Tools & Stuff, select "More Info on the Cloud Services Manager" option.
- Click Manage Cloud Services on the pop-up and press okay.
- Checkmark any services you want on your Deck from this screen, then click okay (note that Peacock TV does not work on the device at the time of writing).
- Once you get the message "You Must Update Steam Rom Manager," you can exit EmuDeck.
When you installed EmuDeck, you may have noticed that a Steam Rom Manager program was placed on your desktop. This program is needed for the final step. To finalize everything, follow these instructions:
- Open Steam ROM Manager and select "Yes" on the Exit Steam popup. Once Steam has been closed, it will automatically boot you into the Steam ROM Manager app.
- In Steam ROM Manager, click on Preview at the bottom right.
- Click Parse on the next page.
- On the Parsing screen, select Category at the top right and click "Cloud Services" from the dropdown menu.
- Once the streaming services are on your screen, click "Save to Steam" at the bottom right. After the app says it is "Done Adding and Removing," you can exit it.
Finally, you will find your streaming apps in the Cloud Services category of your game library in your Steam Deck's Game Mode.