12 macOS Tips New Mac Owners Should Know (Especially Former Windows Users)
If you're a longtime Windows user who has just bought your first Mac, you'll likely find the experience a bit jarring. Apple's way of doing things does take some getting used to.
While Mac enthusiasts have bandied around pithy comments like telling Windows switchers to "stop doing things the Windows way and start doing them the easy way," the truth is that things are a bit more complicated than that. Sure, macOS can be a lot easier once you get used to it (although Windows 11 has closed that gap), but there's still an adjustment curve to go through when you first move over.
Fortunately, when it comes down to it, using a Mac isn't all that different from a Windows PC. You're still dealing with applications, windows, files, keyboards, and mouse pointers. It's just that macOS puts some of these things in a few different places than Windows does.
However, there are also a bunch of really useful features that will make your entire macOS experience much richer, especially if you're already using an iPhone, iPad, or Apple Watch. After all, now that Windows Phone has been relegated to history, Apple is the only company that makes devices that run the entire computing gamut, and it's done a really good job at turning that into a functional ecosystem. Here are just a few tips you should know to get started on your journey to enjoying life on macOS.
The colorful window controls on the top left
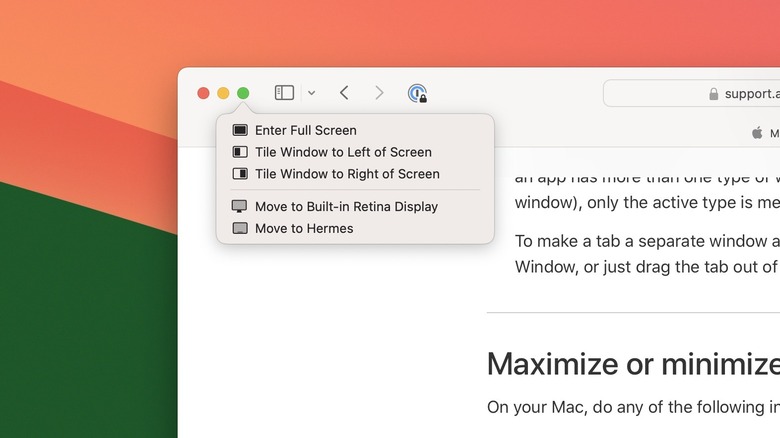
One of the first differences Windows users will likely notice when opening an app on a Mac is the absence of buttons in the top right corner. That's because Apple has always put them in the top left instead, but don't worry, they do (mostly) the same things.
They're more colorful than their Windows counterparts but perform the same general functions. Red closes the current window, yellow will minimize it to the right side of the Dock, and green will maximize it to a full-screen view. That last one is slightly different than what happens on Windows, as it expands the app window into a second virtual screen.
For a more Windows-like maximize, hold down the Option key when clicking the green button, and the window will expand to a larger view on the current screen instead. Apple refers to this as Zoom rather than Maximize. By default, double-clicking on the title bar will also zoom a window.
If you hover your mouse pointer over a green window button, a pop-up menu will appear with options to Tile windows on the left or right side in a separate split-screen view. Holding down the Option key while hovering will allow you to move the window to the left or right of the current screen instead.
Control is Command
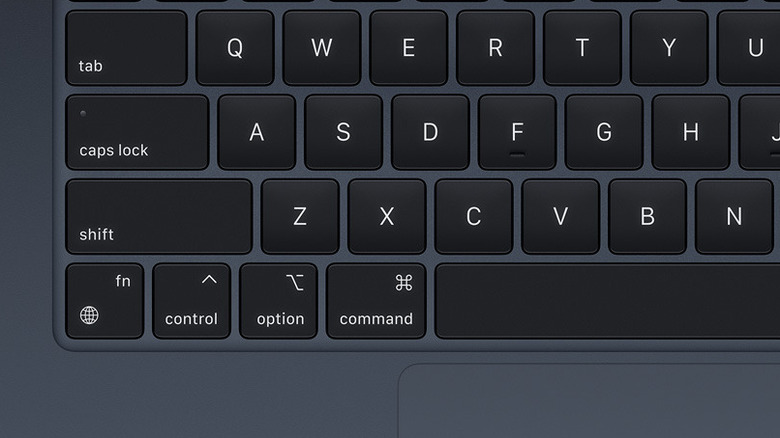
If you're a long-time Window user, you're probably already familiar with shortcuts like Ctrl + C for copy and Ctrl + V for paste. The good news is that the same type of shortcuts are available on macOS, with the critical difference being that Apple uses the Command key instead. There is a Control key on the Mac, but it's not used nearly as often.
If you remember to hold down Command instead of Control, you'll find many of the keyboard shortcuts from Windows work equally well on the Mac. For instance, Command + C copies whatever is selected to the clipboard, Command + X cuts it, Command + V pastes what's on the clipboard, Command + W closes the current window, Command + P prints, Command + Z undoes the last action, and Command + Q quits the current app.
In most cases, the Option key does things that would use the Alt key on Windows, but there's one important exception — on Mac, you use Command + Tab to switch between apps rather than Alt + Tab.
The Menu Bar is always at the top
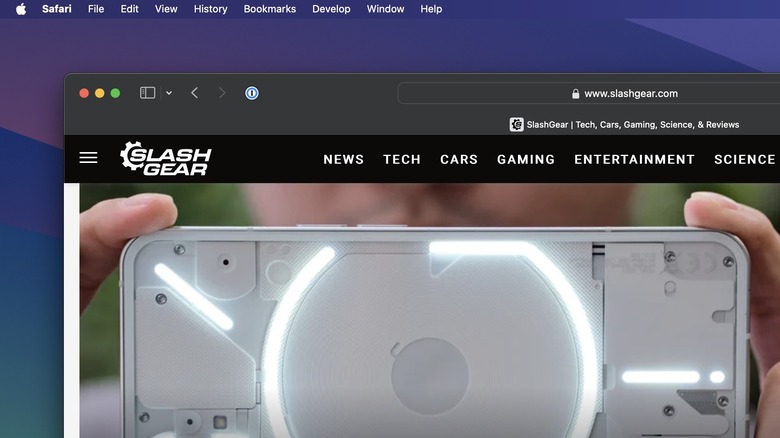
Another distinguishing feature of macOS is that no matter what app you're using, the menu bar is always at the top of the screen and not the top of the current app window. This can be disorienting for veteran Windows users at first, but once you get used to it, it's actually a bit more convenient as you always know where to look.
Even though the menu bar lives outside the current app window, it will update to show the appropriate options for whichever window is active, and you can tell which that is since the name of the app is always shown in bold at the left side of the menu bar. The app's name is also a menu, usually containing options to get version information about the current app, access its settings, and hide or quit the app.
The Apple logo at the very left side of the menu bar is also a clickable menu that lets you access system-wide information and perform tasks such as logging off and shutting down or restarting your Mac. These options are roughly equivalent to what you'll find on the left side of the Windows 10 Start menu or the secret Windows 11 menu for power users.
Advanced trackpad gestures
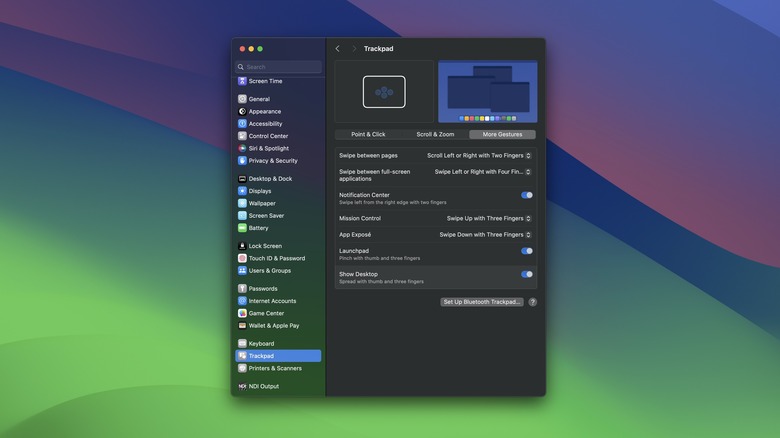
Apple's trackpad is one of the best features of its MacBook lineup. Very few Windows laptops offer anything even close when it comes to how easy it is to use. In fact, Apple's trackpads are so great that many desktop Mac users opt for the external wireless Magic Trackpad rather than a traditional mouse.
However, there's more. Apple's trackpad also features some convenient multitouch gestures that can be used for things like zooming in on web pages and photos, rotating pictures, and calling up other system functions.
For instance, you can zoom in or out on web pages, documents, and photos using a two-finger pinch gesture, similar to what you'd do on a smartphone or tablet. Double-tapping with two fingers engages a Smart Zoom that hones in on whatever specific photo or block of text you're pointing at, and you can two-finger-double-tap again to return to the previous view. You can also rotate photos or other objects with a circular two-finger gesture.
Since there's no right mouse button, this is replicated with a two-finger click or by holding down the Ctrl key while clicking with a single finger. Most Apple trackpads also support a Force Click that can activate other actions by pressing harder. For instance, Force Clicking on a word will bring up a pop-up window with a dictionary definition, while Force Clicking on a web link will show a preview of the destination web page.
Note that these are just the default trackpad gestures — you can customize nearly all of them under the Trackpad section of the System Settings. If you're using Apple's Magic Mouse, it also has its own collection of gestures that can be similarly tweaked to your liking.
Quickly peek at what's inside your files
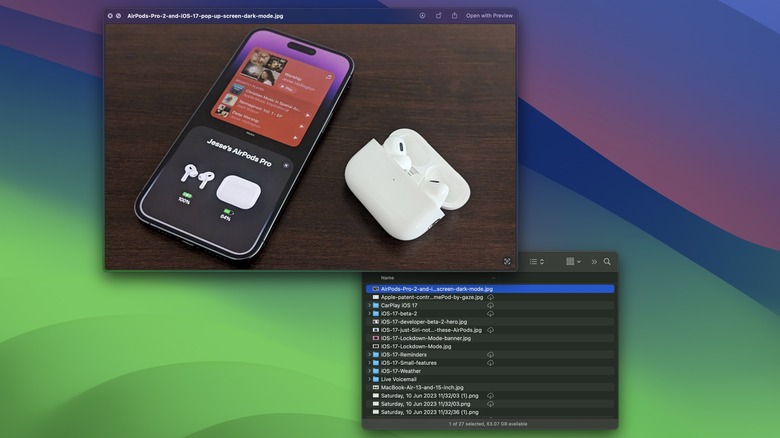
If you find yourself often sifting through large folders of documents and pictures trying to sort out what's inside each one, you'll appreciate the Quick Look feature that Apple has baked into macOS.
Select any file in the Mac Finder (Apple's equivalent of Windows File Explorer) and you can press the Space bar to bring up a preview window to show its contents. This works for a wide variety of file types, from photos, videos, and PDFs to Microsoft Word and Adobe Photoshop documents.
Pressing Space again will close that window, but if you're looking through multiple files, you can also leave it open and select the next one with your mouse or keyboard, and the window will update to show its contents. You can also select multiple files before bringing up Quick Look and move through them with the arrow keys or zoom out to a grid view.
While Quick Look is most useful for viewing files, it also includes some useful options for trimming videos, rotating photos and videos, and even marking up PDF files and images without opening another app. There's also a share menu to let you quickly send out a file via AirDrop, Mail, Messages, and other supported apps.
Taking screenshots anywhere
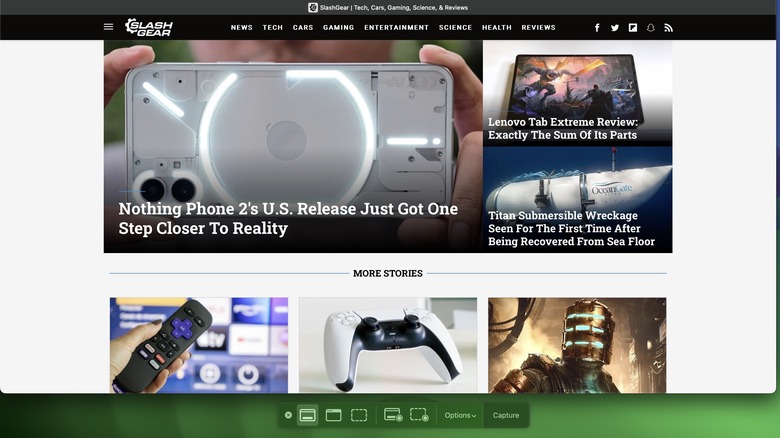
If you've ever tried to take a screenshot on Windows, you know it can be a bit of a hassle. Windows 11 has improved this significantly, but macOS nailed it years ago.
No matter what app you're using, you can press Shift + Command + 3 to take a shot of the entire screen and save it as a PNG file on your desktop. If you're using multiple monitors, you'll get individual screenshots of each saved in separate files. A thumbnail of your screenshot will briefly appear in the bottom right corner of your screen that you can click on to open it in Quick Look and share it or mark it up.
Pressing Shift + Command + 4 will turn your mouse into a targeting reticle that you can use to highlight and capture a specific section of your screen. Just drag a box over whatever you'd like to capture and you'll get a PNG on your desktop containing only the highlighted portion. If you press Space while in targeting mode, the reticle will turn into a camera icon that you can use to capture an entire window with a click.
Beyond that, Shift + Command + 5 will bring up a whole set of capture tools that will let you take screen recordings or set a delay before capturing a screenshot. You'll also find options here to disable the floating thumbnail preview or change the folder where your screenshots are saved.
Last, if you have a MacBook equipped with a Touch Bar, you can use Shift + Command + 6 to capture a screenshot of whatever is displayed there.
Express yourself with emoji
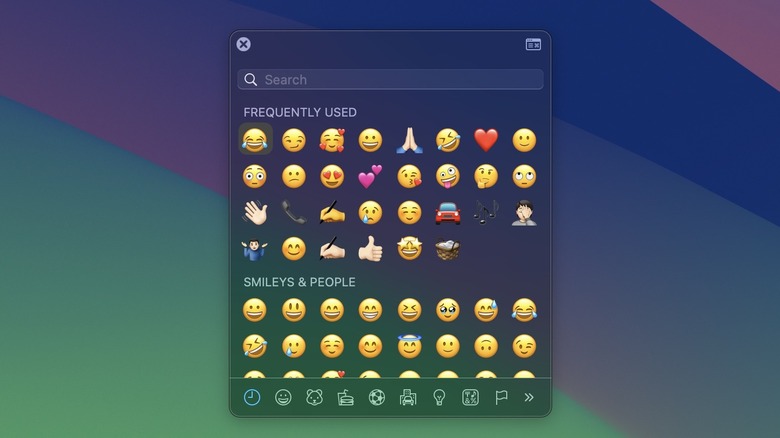
Another feature that's only recently come to Windows 11 that Macs have had for years is the ability to easily bring up an emoji character picker. If you like to drop in smiley faces and other emoji into chats and emails, macOS makes this really simple.
If your Mac keyboard has a Globe or Fn button, you can pull up an Emoji & Symbols pop-up window by pressing Globe/Fn + E. You can also customize this in the system Keyboard Settings to use just the Globe/Fn key for even faster access. If you're using a keyboard that lacks this key, pressing Control + Command + Space will also bring it up.
Once the emoji window appears, you can click on any glyph to insert it into whatever you're writing, whether that's a text message, email, or Word document. You can also type in the search bar at the top to find a specific emoji or browse through the entire set using the categories at the bottom.
This also goes beyond emoji. Clicking the button in the top-right corner will expand the Emoji & Symbols window into a full Character Viewer that will let you access and insert a whole collection of extended characters, from accented letters to currency and math symbols.
Move seamlessly from your iPhone to your Mac
If you're an iPhone user, one of the biggest advantages to switching to a Mac is how smoothly all your Apple devices will work together. Apple has built Continuity features into macOS that allow you to effortlessly share data and move fluidly between your iPhone, iPad, and Mac.
For instance, whatever is on your clipboard is available on all your devices, so you can copy some text on your Mac and paste it into an app on your iPhone — or vice-versa. This also works between two Macs, where you can copy entire files from one to the other via the Universal Clipboard. Just highlight a file on one Mac and press Command + C, then open Finder on the other and press Command + V.
You'll also see a Handoff icon on the right side of your Mac's Dock for apps you have open on your iPhone that have Mac counterparts. You can click on this to not only open the app on your Mac but also transfer work in progress from your iPhone, such as a draft in Apple Mail or a webpage in Safari. Some iPhone apps with web counterparts also work with Handoff, showing a Safari icon to take you to their web page.
Continuity features like Universal Clipboard and Handoff are enabled by default, but you'll need to make sure all your devices are signed into the same iCloud account and running the latest versions of iOS, iPadOS, and macOS.
Unlock your Mac with your Apple Watch

One seriously cool feature that Apple Watch-wearing Mac users can enjoy is the ability to automatically unlock their Mac just by wearing an Apple Watch.
This eliminates the need to enter a password or even use the Touch ID sensor when you come back to your Mac. Once you've set this up, it will just scan for your Apple Watch nearby, and you'll be back where you left off.
You'll need to turn this feature on in the System Settings under Touch ID & Password or Login Password (depending on whether your Mac has a Touch ID sensor), but it's usually just a matter of toggling a switch beside the name of your Apple Watch. Of course, you'll also need to make sure that you're signed in with the same iCloud account on both devices and that you're using two-factor authentication for that Apple ID.
Once this is set up, you can also use your Apple Watch to approve other requests for the system administrator password, such as when installing a new app. Instead of typing in your password, just double-click the side button on your Apple Watch when prompted to approve a request from your Mac.
The power of Spotlight
Apple has its own version of Windows Search that it calls Spotlight, and it can do a lot more than just track down files on your Mac. Spotlight can also pull up weather reports and sports scores and even perform mathematical calculations and unit and currency conversions.
Spotlight is accessed from the magnifying glass icon in the top-right section of the menu bar or by pressing Command +Space on your keyboard. This brings up a text entry pop-up window in the middle of your screen where you can type anything you like. Spotlight will provide a list of matching results, including apps and files stored on your Mac organized by type, links to websites from your Safari history, and any matching Contacts, Calendar events, conversations from Mail and Messages, Photos, Apple Music tracks, and more. In fact, Spotlight is a handy way to start up an app — just hit Command + Space and start typing the name of whatever you'd like to open.
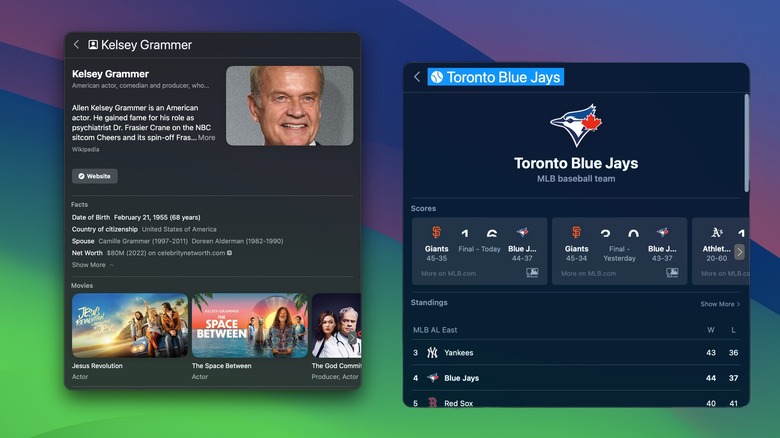
In addition, Spotlight will also provide general knowledge cards for a wide variety of information, such as places, films, TV shows, and celebrities. You can even type phrases like "Population of New York" to see a quick result. Spotlight also recognizes math and unit conversions — including complex functions like square roots and trigonometry — and a broad range of unit and currency conversions, including miles to kilometers, Celsius to Fahrenheit, and even joules to British Thermal Units (BTUs). Just type in your request using natural language the result will come up almost immediately.
Make your requests to Siri
Despite some valid criticisms, Siri is still a pretty solid voice assistant that certainly holds its own against Microsoft's Cortana. Naturally, Siri is available on macOS, so if you're already using other Apple devices, it's the same voice assistant you already know.
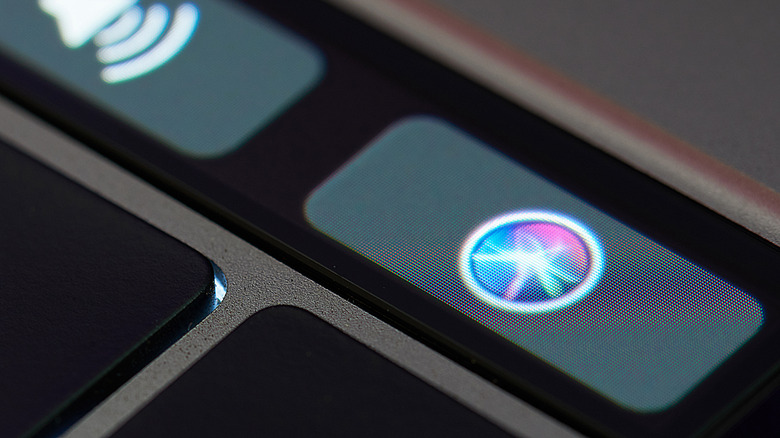
On modern Macs, you can use "Hey Siri" to call it up by voice or press and hold Command + Space to bring it up from the keyboard. There's also a Siri icon up by the clock you can click at any time.
If you've already used Siri on an iPhone or iPad, you'll find you can make most of the same requests on a Mac. This includes opening apps, showing information like calendar events and messages, setting timers and reminders, creating notes, playing music, getting answers to general questions, doing unit and currency conversions, adjusting system settings, controlling HomeKit devices, and more.
Trigger actions from your screen's corners
If you're more of a mouse user than a keyboard jockey, then you'll appreciate how much easier it is to get things done on a Mac with your mouse or trackpad. We've already talked about the trackpad gestures, but there are lots of other little tricks here too.
One of the more useful of these is turning the four corners of your screen into shortcuts for various system functions, such as making quick notes, showing notifications, or invoking your screen saver.
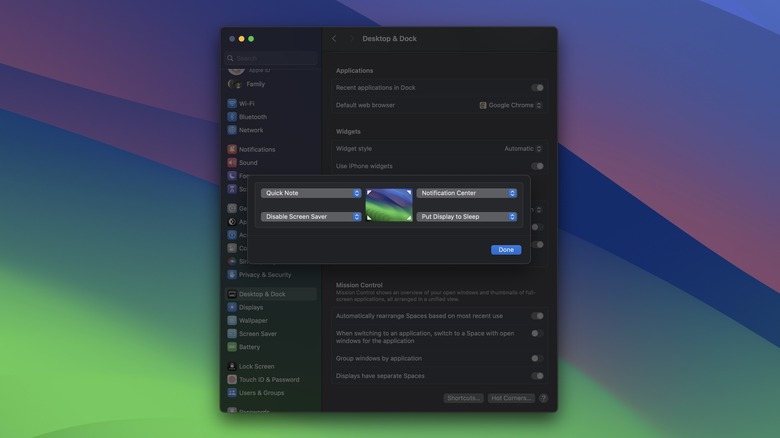
These can be set up in the Desktop & Dock section of the System Settings app, where any of the four corners can be configured to activate one of ten functions, including locking your screen, putting your display to sleep, disabling your screen saver to keep your display from going to sleep, showing your Desktop, creating a Quick Note, opening the Launchpad, and more.