6 Apple Multi-Touch Trackpad Gestures That Make Using Your Mac Or MacBook Easier
MacOS is constantly iterating, often leading to several features that may or may not be helpful individually, depending on personal preference and usage requirements. This also extends to your MacBook's (or Mac's) trackpad, which has several built-in gesture functions that can act as a quick way to do all sorts of things.
Some of these gestures are turned on by default when you set up your Mac for the first time, while others must be manually activated. You may also want to turn some gestures off if you often find yourself accidentally using them when you don't mean to (tap to click is a frequent offender). Either way, there are quite a few ways you can adjust your trackpad to make day-to-day use of your Mac a little smoother and perhaps a little faster.
These gestures can be turned on, off, or adjusted from the Trackpad menu. If you aren't sure how they will work in practice, highlight them in the menu and check out the animated demonstration at the top of the window.
Secondary click
Right-clicking is a ubiquitous mouse function, and even though Apple's peripherals lack such a button, macOS still utilizes it. But how do you right-click when your trackpad only has one physical click option? Well, that's where secondary clicking comes into play.
- Select the Apple menu in the top-left corner of the screen, then choose System Preferences (or System Settings in macOS Ventura and later).
- Scroll down the menu on the left side of the window and select Trackpad, which you'll find grouped with Keyboard, Game Controllers, and the like.
- Select the Point & Click tab, then scroll down and find Secondary Click.
- Select the drop-down menu next to Secondary Click and choose a gesture that suits you — Click (or tap) with Two Fingers is the default.
With secondary click turned on, you can now click (or tap if tap to click is active) the trackpad with two fingers, and your Mac will act like you were right-clicking. It's then easier to access those handy right-click menu options like Save As, Open Link in New Tab, and so on.
Zoom and scroll
Anyone who uses a smartphone with regularity has likely gotten used to pinching their fingers to zoom in and out quickly and dragging their fingers along the screen to scroll through a web page or document. Well, your trackpad can do this, too!
- Open the Apple menu in the top-left corner of the screen and select System Preferences (System Settings in macOS Ventura and later).
- Scroll down the menu, select Trackpad, and then the Scroll & Zoom tab.
- Turn on Zoom in or out to allow zooming.
- Scrolling is always on, but you can turn on Natural scrolling (i.e., swipe up to scroll down and down to scroll up) or turn it off.
Zooming with the trackpad works very similarly to an iPhone: Make a pinching gesture on the screen with two fingers to zoom out (or spread two fingers out in a "reverse pinch" to zoom in). Scrolling is slightly different because you must slide two fingers up or down the trackpad to scroll rather than one.
Show Desktop
Jumping from an app to Finder isn't a difficult task, as you can usually select Finder from the Dock at the bottom of the screen or press Command + H to Hide the app entirely. But hiding an app won't necessarily take you straight to the desktop if you have multiple apps open at once, and viewing Finder on top of an app isn't quite the same as being on the desktop itself — no direct Macintosh HD access, for example. Fortunately, there's a trackpad gesture for that, too.
- Click the Apple menu in the top-left corner and select System Preferences (System Settings in macOS 13 and up).
- Scroll through the menu and select Trackpad towards the bottom and just below Keyboard.
- Select the More Gestures tab, then scroll down and find Show Desktop (it should be at the bottom of the menu).
- Turn the toggle next to Show Desktop on.
With Show Desktop on, put your thumb and three fingers on the trackpad, then spread them apart — keeping your thumb separate and your three fingers grouped. This will immediately move all apps out of the way and jump to the desktop. To return to the app you were using, perform the same gesture in reverse (i.e., with your thumb and three fingers separated, "pinch" them all together).
Swipe between apps
Another common action for anyone who uses multiple apps in full-screen simultaneously is jumping back and forth between them. You can do it by hiding (Command + H) an app you're currently in or by exiting full-screen and manually clicking on each app in the Dock at the bottom of the display. However, it's a bit faster to use the trackpad instead.
- Click on the Apple menu in the top-left corner of the screen and open System Preferences (System Settings in macOS 13).
- Scroll down the menu on the left and select Trackpad, which sits just below Keyboard.
- Select the More Gestures tab and find Swipe between full-screen applications.
- Open the drop-down menu and choose between using three fingers or four fingers.
Now you can place three (or four, depending on your chosen setting) and swipe left or right to quickly jump between the full-screen apps you currently have running.
Open Launchpad
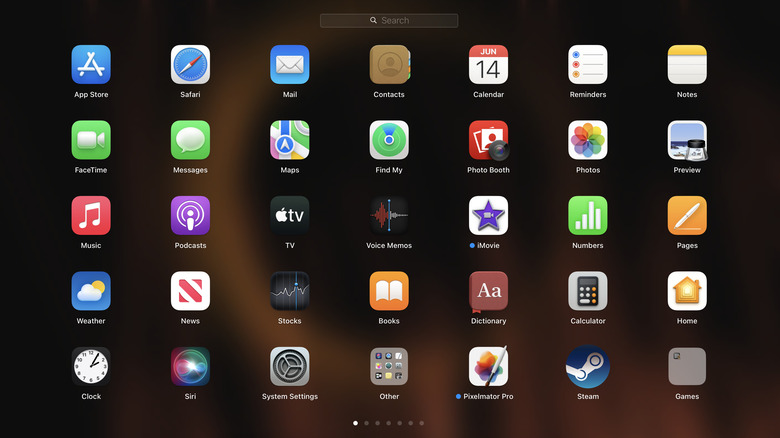
Launchpad acts as a sort of glossary of installed apps, making it easier to locate and open software you don't have on your Dock or desktop. If it's a feature you find yourself using somewhat often (or all the time), then you should consider turning on the trackpad function that lets you call up Launchpad from anywhere at any time using a simple gesture.
- Open the Apple menu in the top-left and select System Preferences (or System Settings if you're using macOS 13 Venture and later).
- Scroll down to find Trackpad (just under Keyboard), then select it.
- Find and select the More Gestures tab, then scroll down and find the Launchpad option.
- Turn on the toggle next to Launchpad.
To use this particular gesture, place your thumb on the trackpad, followed by three fingers (grouped together). "Pinch" your thumb and three fingers together on the trackpad to instantly pull up Launchpad.
Show all app windows
Due to their nature, some apps may support (and even encourage) having multiple windows open at once. This could mean more than one project open at a time in graphical editing software, multiple text documents, a handful of different spreadsheets, etc. Of course, you can jump between them using the app's Window drop-down menu, but the more windows you have open, the more clunky and cumbersome that can be. So why not use a single trackpad gesture instead?
- Click the Apple menu in the top-left corner of the screen, then choose System Preferences (System Settings in macOS 13 Ventura).
- Scroll down past Keyboard and open the Trackpad menu.
- Select the More Gestures tab, then scroll down and look for App Exposé.
- Open the drop-down menu and choose whether to use three or four fingers.
With App Exposé active, you can swipe down on the trackpad using three or four fingers (based on the setting you chose) to view all of the open windows in the app you're currently using. Your Mac will automatically size them all to fit on the screen together. Then you just have to click on the specific window you want to jump to.
