Here's How You Can Develop Film At Home Without A Darkroom
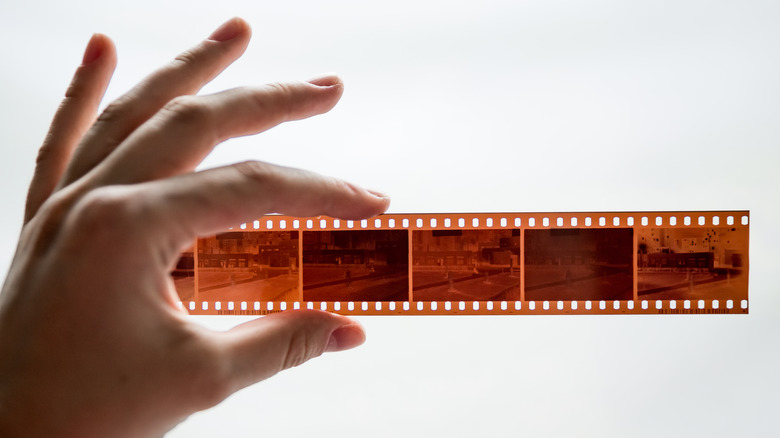
Most photographs we take these days are digital, but film-based photography never left — and in some circles is even making a comeback. Before you rush out to buy a 35mm camera, you should note that developing film and photos is a significantly more involved process than what you might be used to with digital photography.
It's not an impossible task, certainly, but you will need a variety of tools and supplies. Keep in mind, some supplies include toxic chemicals. So you'll want to wear rubber gloves, make sure you're working in a well-ventilated area (or wear a good respirator), and don't get any in your eyes or mouth. Also do not, under any circumstances, use those chemicals if you are or believe you are pregnant. It's also wise to perform a dry run with a roll of film you don't care about first.
Keep in mind that these instructions pertain to the development of black and white film, not color. Color film development is even more toxic and far more complicated, so if you need to develop color film it's in your best interest to take or send it to a professional film development provider.
What you need
Assuming you're not taking a photography class with access to darkrooms or renting one, you'll need to have several important items on-hand for the process. These include:
- Access to running water — either from a sink or bathtub.
- A place (preferably a bathroom) where you can safely hang your film to dry once it's developed.
- Clips to hold the film in place as it dries.
- A timer (or a smartphone that can keep time).
- Scissors and a bottle opener so that you can open your film canisters.
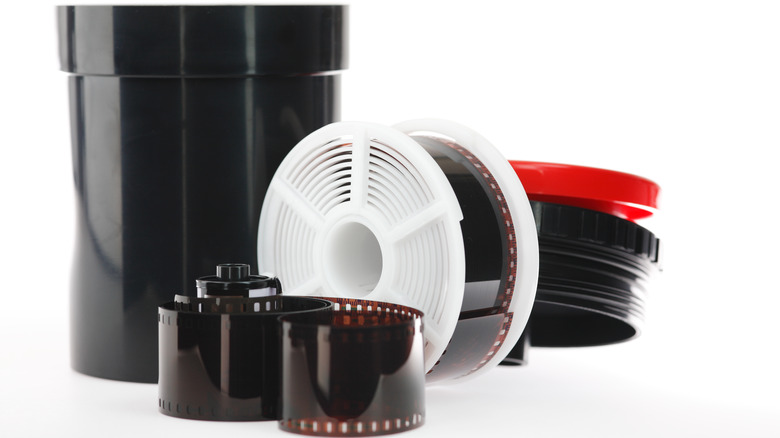
- A light-proof development tank, as well as reels (usually included with the tank, but make sure before you buy) to put your film in.
- A film changing bag for transferring film from its original canister to the development tank.
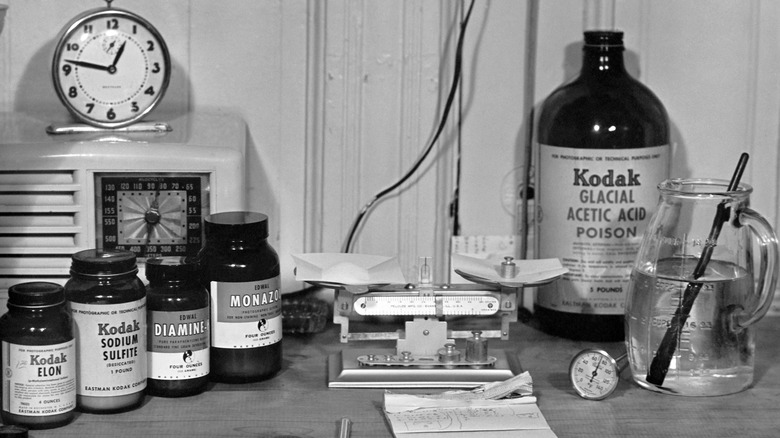
- A digital thermometer to track chemical temperatures — this is extremely important as temperature changes can and will throw off the effects of your chemistry.
- Light-proof plastic bottles (these are typically brown in color) to store your chemicals, along with plastic containers for measuring them. Do not use these measuring containers for anything other than photo chemicals.
- The chemicals themselves. These include black and white developer, as well as a fixer.
Stop bath is a recommended addition to your chemical lineup, but it's not strictly necessary. It's also an acetic acid, which you'll need to be careful with. Without it you'll need to pay close attention to the timing between developing and fixing, but using it gives you more leeway between steps.
Prep your chemicals and film
Once you have everything you need, it's time to get it all ready. When it comes to chemical mixing, the amounts needed will vary based on the size and requirements of your development tank — which should have the necessary numbers on its bottom side.
- Mix your developer and fixer according to the instructions for each — these should be found on their respective containers.
- If necessary, use the digital thermometer to keep an eye on the temperature.
- Begin loading film by placing the reel and center into the development tank, then place the lid and agitator on top.
- Place the development tank, film canister, bottle opener, and scissors inside the changing bag and close it up entirely, then slip your hands into the bag's side openings.
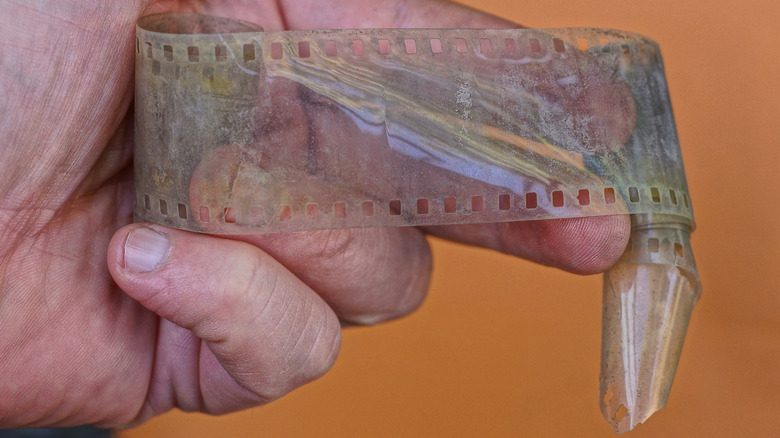
- While keeping the bag closed, take off the development tank lid and remove the reel, then use the bottle opener to pry open the bottom of the film canister.
- Remove the spool from the canister and unroll the film, then use the scissors to cut the film off of the reel where the two connect.
- Slowly thread the film onto the development reel, starting with the thicker end, then wind the reel until the film is fully in place.
- Place the reel back onto the center piece of the tank, put the lid and agitator back on (make sure it's on tight).
Now you can take your development tank out of the bag and move on to the development phase.
Film development
With your development tank all loaded up, it's time to actually develop your film. Before you start pouring chemicals, it's very important to pre-wash your film. Slowly pour cool or lukewarm water into the top of the tank, give the tank a couple of soft taps against your surface (kind of like tapping a can of soda before you open it), then let it sit for about five minutes. Once you've done that:
- Pour the water out of the development tank (don't worry if it looks weird).
- Double-check your developer temperature, making sure it's at 68-degrees fahrenheit. To adjust the temperature, fill your sink with warm or cold water (to heat or cool down, respectively) and then place the developer container into it and watch the thermometer.
- Double-check developing times using the developer's included information or the company's instructions on their website.
- Slowly pour the developer into the tank, then gently lift and tap the tank against the surface again (to prevent bubbles).
- Begin agitating the tank, based on the instructions provided by the developer's producer, while occasionally performing more taps against the surface.
- Pour out the developer (either down the drain if you're connected to a sewer system or back into its container if you plan to reuse it).
With the developer poured out, you can now move on to the stop bath or fixer.
Stop or fix
As mentioned previously, stop bath isn't a strictly necessary step in the process. So if you've opted out of using it, ignore those steps and skip ahead to using the fixer.
- Slowly pour the recommended amount of stop bath into the development tank and let it sit for the recommended time.
- Once ready, pour the stop bath back into its container.
- If you decide to skip using stop bath, place the tank in the sink and rinse with room temperature water for one to two minutes immediately after finishing with the developer. Speed is of the essence because any developer still clinging to your film will continue to develop it until it's rinsed off.
- Pour the recommended amount of fixer — which should be fine to use anywhere between 50- and 86-degrees F — and let it sit for the recommended amount of time.
- When done, pour the fixer back into its container for reuse. Do not pour your fixer down the drain as the silver inside can create clogs and other issues.
And the hard parts are all over! The only thing left for you to do with your film dry it out.
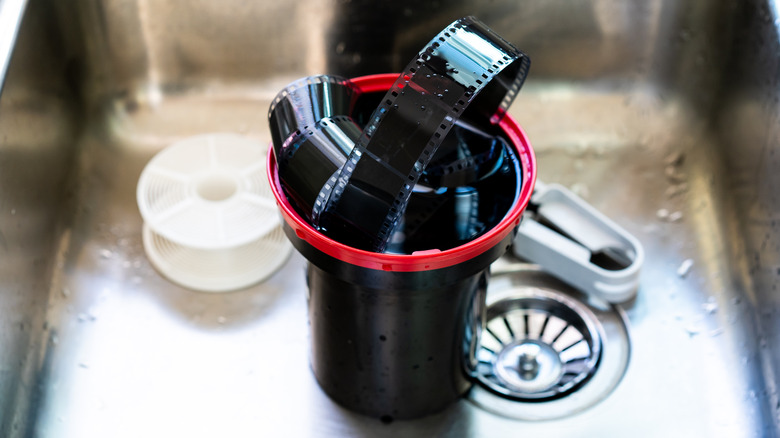
Rinse and dry
You're in the home stretch, so now you just have to give your film one last wash before hanging it up to dry.
- Place the development tank in the sink and begin pouring water into it (not too hot or too cold, but as long as it's not either extreme you'll be fine), leaving the tap running.
- After two or three minutes of rinsing, remove the tank's lid and rinse the film directly for five to 10 minutes.
- Grip the film from both ends where there are no negative images (do not put your fingers on the images themselves) and share the film out to fling off excess water.
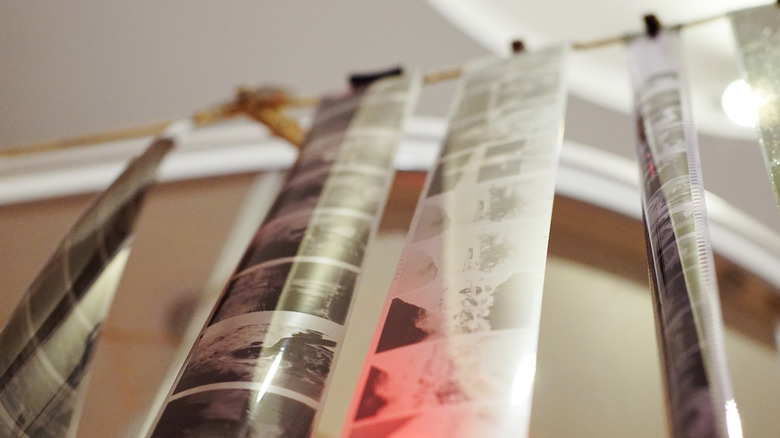
- Attach a clip to each end of the film to prevent curling, then hang the film in your bathroom (or other room that's both moist and relatively dust-free). Choose a location that won't see any unwanted pet or human traffic, as your film will pick up any dust, hair, or other particles quite easily.
- Give your film anywhere from two to five hours to dry.
What you do with your developed film from here is up to you, but if you want to preserve them digitally you'll either need to scan them yourself with a film scanner (a regular photo scanner won't do the trick) or take them to a photo lab that will be able to save them to a CD for you.