You Can Turn Your Old PS2 Into A Linux Computer: Here's How
We may receive a commission on purchases made from links.
If you still own a classic PlayStation 2 game console, it doesn't have to just lay in your closet gathering dust, and there is quite a good chance that you'll be able to turn it into a functioning desktop computer.
After its official release by Sony in the spring of 2000, the PlayStation 2 was such a hit that it became the highest-selling video game console of all time, with sales exceeding 155 million units. Sony's beloved console owes its success to its excellent game library, the revolutionary built-in DVD player feature, the ability to run almost all the PS1 games, and some stellar advertising.
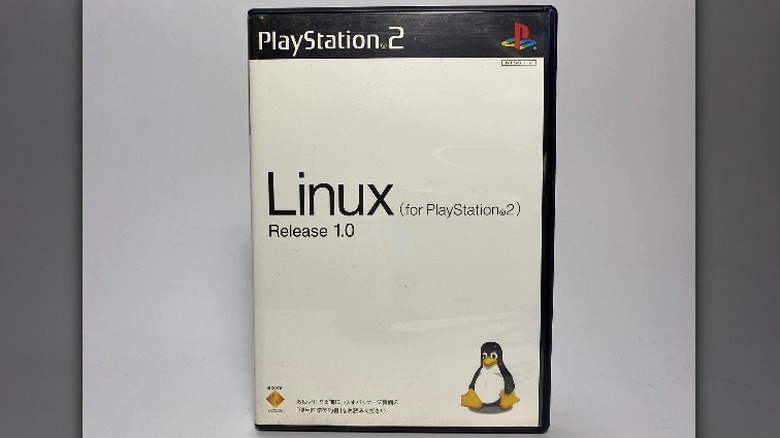
Sony also added a feature that can make a PS2 turn into a PC that runs on the Linux Operating System. They made this official in 2002 by launching a comprehensive package called the "Linux for PlayStation 2" kit. This kit included the Linux Software Installation disks, a 40GB IDE hard drive, an official Sony mouse and keyboard, a Sony PS2 network adaptor, and a special VGA cable to connect to a monitor.
This kit was initially sold for $299, but now that it's no longer in production, it is expensive and rare. The most convenient way forward is to get your hands on the PS2 Linux installation disks and substitute the other components with easy-to-obtain alternatives.
Setting up the hardware
Before looking for the Linux disks, know that your PS2 model and disk regions should match. You need a Japanese install disk for a Japanese PS2, a U.S. disk for a U.S. PS2, and so on.
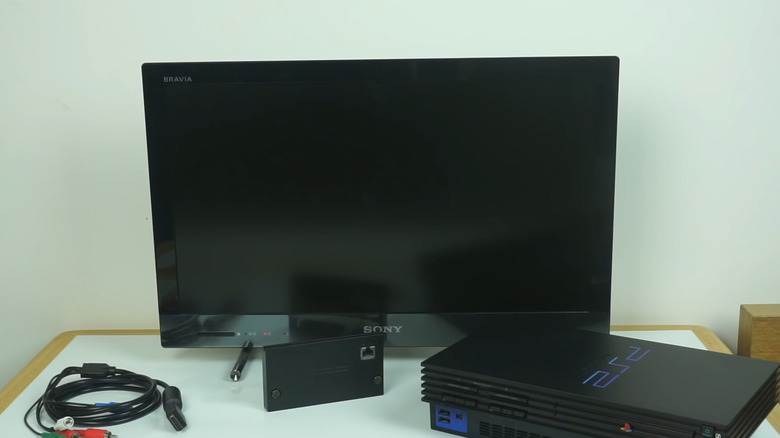
If you've found the disks but can't acquire the full Linux for PS2 kit, you can make do with an HDMI cable and compatible computer monitor, a standard USB keyboard and a mouse, an official Sony PS2 Network adaptor, an official Sony PS2 IDE hard drive, an 8MB PS2 memory card, an Open Source Scan Converter (OSSC), and an HD retrovision component cable.
You can set up the hardware once you have all the necessary peripherals.
-
Install your Sony network adaptor and IDE hard drive into the PS2.
-
Connect your mouse and keyboard to the console using the USB ports located at the front.
-
Use the HD retrovision component cables to connect the PS2 and the OSSC.
-
Use the HDMI cable to connect the OSSC and your computer monitor.
-
Insert your PS2 memory card into your console and turn the PS2 on.
Installing the software
Now that the essential hardware is ready, you can install the Linux software on your PS2.
-
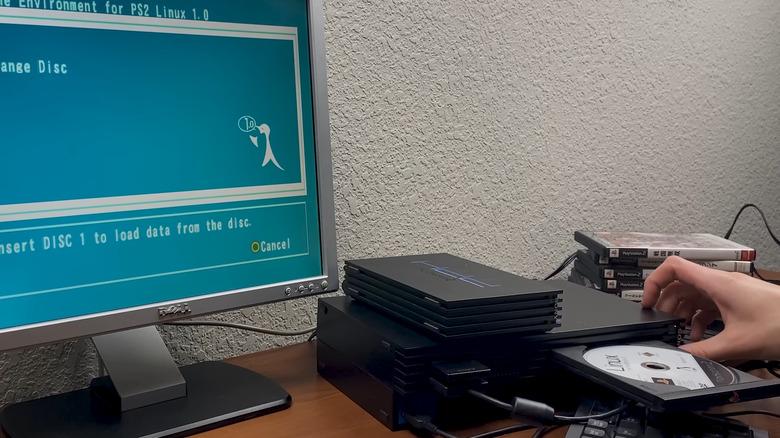
Insert Disk One (Runtime environment) into the PS2.
-
On the next screen, select the "Install" option.
-
Swap out Disk One for Disk Two (Software packages) following the on-screen prompt.
-
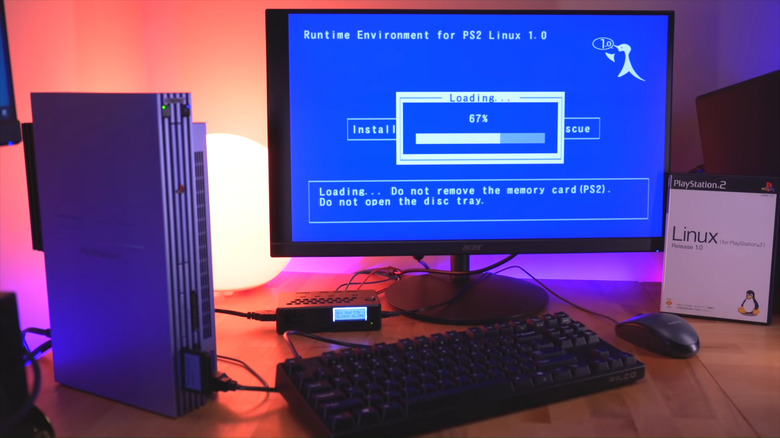
After a short loading process, you must swap disks again.
-
Choose your preferred language for the software installation process and select the keyboard type based on your model (the U.S. option should be selected for standard QWERTY keyboards).
-
Switch the disks yet again and click okay when prompted.
-
Select "Install WindowMaker Workstation" as your Installation type.
-
Choose "Disk Druid" as your hard drive setup tool.
You will now see a screen showing the hard drive partitions. It is essential to set up at least two partitions for Linux: a swap partition and a native partition.
Partitioning and finishing up
Setting up the hard drive is the only complicated part of this installation. A little specialized knowledge regarding Linux installation is required when setting up hard drive partitions, but all you have to do is follow these steps.
-
Select "Add" and choose "Linux swap" as the partition type. Leave every other field as it is and click "OK."
-
Select "Add" again, type a / in the Mount Point field, and choose "Linux native" as the partition type. Select the "Grow to fill HDD?" option and click "OK."
-
Click "OK" on the screen showing the hard drive partitions and on the following prompt (Choose Partitions to Format).
-
Type in your preferred Hostname, after which you can choose network configuration.
-
Now you can choose your time zone and set up a root password. Set up your user account with a simple user ID, name, and password. Keep clicking "OK" as prompted and follow the on-screen windows till the Installation process begins.
-
After installation, you have to switch Disk Two for Disk One for the last time. Press the Reset button on the console. After the console switches on again, select the "Boot" option. Choose "Memory Card" on the next screen.
-
After logging in with your chosen user ID and password, type "startx" and press the enter button.
Congratulations! Your PlayStation 2 is now a fully functioning Linux desktop computer.