How To Clear The Google Drive App Cache On Your Android Phone
Behind the scenes, apps like Google Drive function in similar ways. Each one takes up phone resources once it is downloaded and installed, and the amount of memory and storage space it consumes may even increase when it is actively being used. Every mobile app also produces temporary data that is stored somewhere on the phone so that the next time you try and launch it, it takes lesser time to boot the program and you have a more seamless experience navigating the app.
Every mobile app has its own cache where all temporary data goes and waits until they need to be loaded the next time you try and use the service. For an app like Google Drive, the amount of accumulated temporary data can get stacked up pretty quickly. Normally this shouldn't be an issue, but if you have a limited amount of free space on your smartphone, or if you run into technical glitches with the app itself, then it might be necessary to clear the cache and start using the app with a clean slate.
Deleting a mobile app's temporary cache files is easy to do on an Android phone. You can usually fire up your smartphone's Settings app and head to the app in question's info page and do it from there with a simple tap of a button. For Google Drive, however, you have another method you can try that lets you do that directly through the app itself.
How to clear Google Drive's cache in Android settings
An Android phone's settings and how they are organized into menus will vary depending on the manufacturer. However, most phones provide a search function within the Settings app that makes it easier for you to locate the right setting or button to tap. In order to clear the Google Drive app's cache this way, follow these steps:
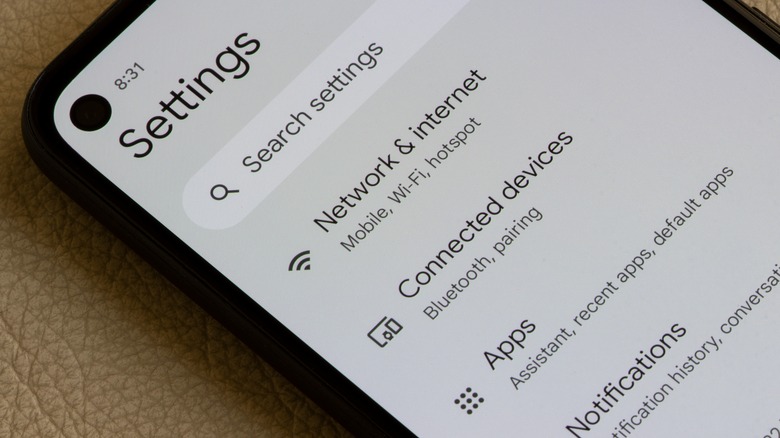
- Launch the Settings app.
- Go to Apps (or something similarly named) and tap the menu option that lets you preview all installed apps into one list. If you can see a search bar on top of the page, use it and look up "apps."
- Scroll down the list and tap on Google Drive. Alternatively, if you see a search bar on the apps list page, look up "Drive" and tap on the correct app icon. You can also pull up the app drawer and search for Google Drive there. Instead of tapping on it, long-press the app icon and choose "App info."
- From the Drive app's info page, tap Storage or "Storage usage." You will see the file size the Google Drive app's cache is currently taking up.
- Tap "Clear cache."
Once you do these steps, Google Drive's cache file size will show 0 bytes.
How to clear Google Drive's cache in the app
The Google Drive app has its own set of settings directly within the app that lets you control data and how it is stored and used. Here's how to clear temporary files this way:
- Launch the Google Drive app.
- If you have multiple Google accounts connected to the app, choose the correct one and provide your login credentials if needed.
- Tap the hamburger icon in the top-left corner of the page.
- Choose Settings.
- Scroll down to the "Documents cache" section and tap "Clear cache."
Even though this method doesn't show you the actual file size of the cache before it is cleared, it is the more ideal way to clear Google Drive's temporary data because it actually removes any saved document's pre-loaded state within the app and essentially treats all files as if they've never been opened before. Not only does this free up a bit of storage space, but it may also get rid of any issues that you may have run into while trying to view any Google Drive file.
While you're in Google Drive's Settings page, it may be worth tapping "Cache size" in the "Documents cache" section and assigning a max file size for the cache. You can pick from a range between 100 MB to 1,000 MB. Furthermore, once Google Drive's app cache is cleared, you may experience some initial slowness the next time you launch it. Temporary data will also start to re-accumulate the more you access files within the app.