How To Get The Best Quality Bluetooth Audio Possible On Mac
Bluetooth audio has improved multifold, but these improvements remain primarily linked (and limited) to mobile devices. While computers also support equally — and often even more — powerful hardware than mobile, Windows or Mac computers rarely utilize the full potential of most Bluetooth headphones or audio devices because high fidelity (Hi-Fi) audio standards are turned off by default. If you don't change these settings, your audio experience can be lackluster, especially if you own a high-end pair of headphones or Bluetooth speakers that serve high-grade audio with a phone or tablet.
Thankfully, if you own a Mac, you can force it to transmit audio signals to your Bluetooth headset or speaker at the highest possible quality settings using official tools such as Terminal and Bluetooth Explorer. The methods may seem intimidating if you're unfamiliar if you're not used to digging into settings on your own, but you do not need any technical expertise to perform them.
Fixing the codec problem
Bluetooth audio quality depends on the codec that sends audio from the source to the speaker or the headphones — and, of course, the product must support high-quality codecs. A Bluetooth codec is a software algorithm that converts audio signals from digital to analog (i.e., converts computer-readable code to sounds that can be perceived by humans) or vice versa.
SBC (or Sub-Band Coding) is a Bluetooth codec with the lowest audio quality and is supported by almost every Bluetooth audio device. MacBooks and other Macs also support Bluetooth codes besides SBC, including AAC (Advance Audio Coding) and aptX, which offer higher-quality audio transmission.
Despite that, most headphones or speakers default to connecting via SBC when paired to a Mac, resulting in sub-par audio that does not represent the actual capability or justify the price of the audio equipment. Fortunately, you can unlock support for these refined Bluetooth codecs by tweaking simple audio settings to enjoy the best sound that your headphones or speakers can output.
How to enable AAC and aptX on Mac using Terminal
Apple's macOS comes preloaded with a command line tool called Terminal and you can use it to tweak settings for Bluetooth codecs on your Mac. To get started, open Terminal from the Applications folder on your Mac, locate it in Launchpad, or simply use macOS's Spotlight Search.
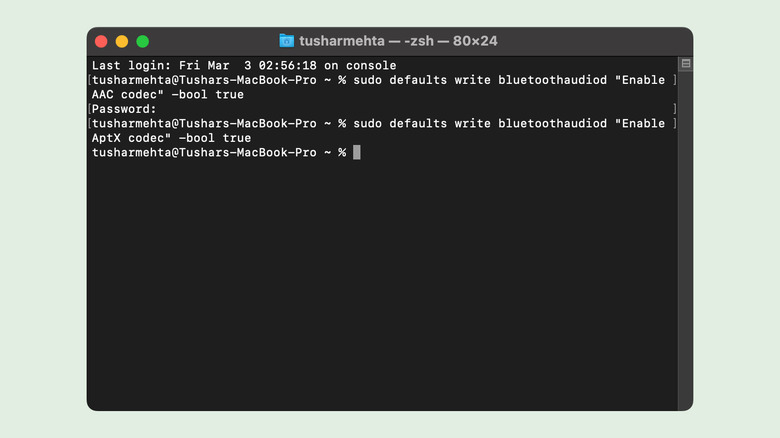
To enable AAC on your Mac using Terminal, copy and paste the following command onto the command line, and then press Enter/Return.
sudo defaults write bluetoothaudiod "Enable AAC codec" -bool true
You will be required to enter your Mac's login password after you enter this command. But when you type the password, asterisks will not appear on the Terminal window as in a standard password field. Therefore, you will need to type your password very carefully and then press Return.
Similarly, you can enable aptX on your Mac by entering the following command onto Terminal and pressing Return:
sudo defaults write bluetoothaudiod "Enable AptX codec" -bool true
Next, restart your Mac to activate these settings. These commands will enable AAC and aptX on your Mac. With that said, a command line utility such as Terminal can be intimidating for some users. This is why an alternative method is to enable these Bluetooth codecs on your Mac simply by installing a program.
Download Apple's Bluetooth Explorer utility instead
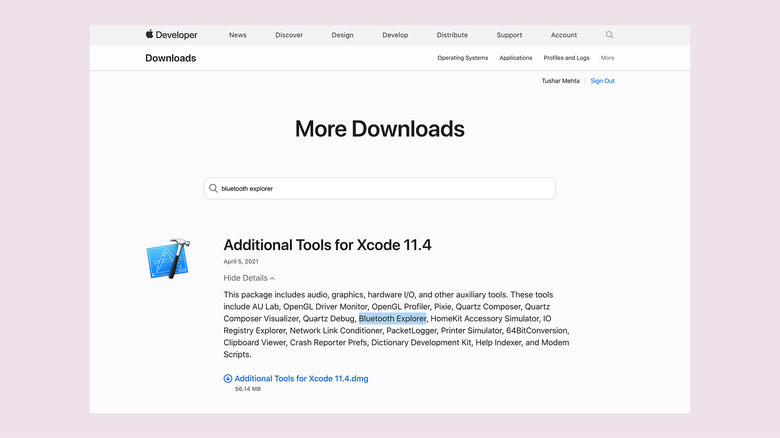
If you are uncomfortable using Terminal to change these settings on your Mac, you can also use a graphical tool called Bluetooth Explorer. To download the tool, visit Apple's Downloads page for developers and sign in with your Apple ID. Next, type "Bluetooth explorer" in the search bar, and this will list numerous utility packages titled "Additional Tools for Xcode" followed by a version number.
Under the package labeled Additional Tools for Xcode 11.4, click on "View Details" and then click on the .dmg file below the package description to download it. Alternatively, you can use this direct link to download the tool, but it will only work if you have signed in to Apple's Developers website with your Apple ID.
Once completed, open the downloaded .dmg file. This will open a drive with a few files and folders within it. Inside this drive, open the folder called "Hardware." In this folder, you will find Bluetooth Explorer; copy and paste it into the Applications folder of your Mac. You can also drag the tool to the folder instead of copying and pasting it. Bluetooth Explorer utility is now successfully installed on your Mac.
How to enable AAC and aptX on Mac using Bluetooth Explorer
You may now close the Additional Tools window and every subsequent folder that opened after it. Then, head over to the Applications folder and open Bluetooth Explorer by double-clicking on its icon. Although an app window does not show up, the app will open, and its icon will appear in the Dock. You will notice the menu bar change when you click on the Bluetooth Explorer's icon in the Dock.
 Tushar Mehta/SlashGear
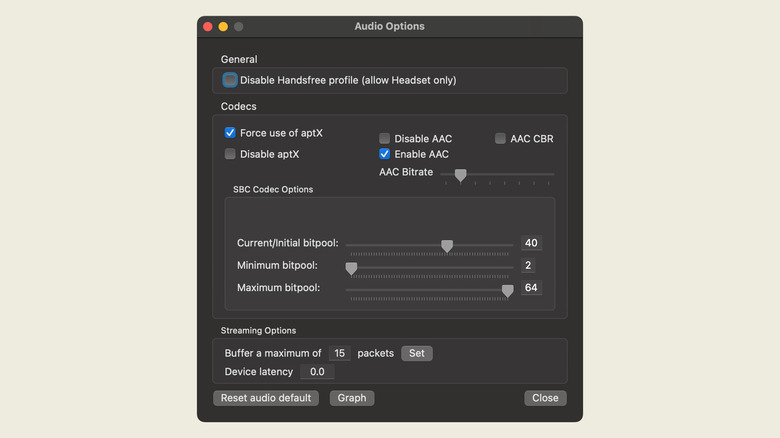
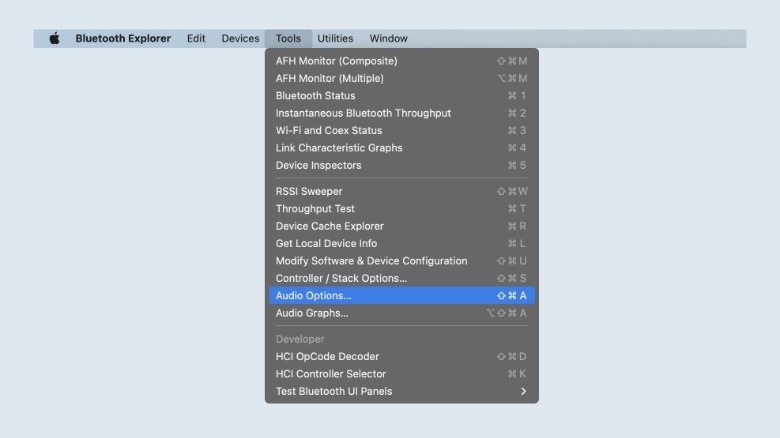
On the menu bar, click on Tools and then on Audio Options or press Command + Shift + A on the keyboard. This will open a window titled Audio Options, where you will see a section called "Codecs." Check the box next to the items "Force use of aptX" and "Enable AAC." Leave "Disable AAC" and "Disable aptX" unticked. Then, click on Close, and then restart your Mac to enforce these settings.
Now, when you connect to a headset or speaker that supports aptX or AAC, your Mac will automatically transmit audio to these devices at the highest possible audio code.