How To Connect Your AirPods To Your MacBook
AirPods have become a ubiquitous accessory for many people, and with their seamless connection to iPhones, they're an excellent choice for listening to music, podcasts, or making phone calls. However, they work just as intuitively with MacBooks and other Apple computers. Fortunately, connecting your AirPods to your MacBook is just as straightforward as other Apple devices, so you'll be able to enjoy the same high-quality audio experience as your iPhone or iPad.
Whether you want to use your AirPods to listen to music, watch videos, or join Zoom calls, AirPods are the perfect companion with your MacBook. Having the freedom to move around your home without needing to remove your headphones is a great way to stay connected to your computer. You can also take advantage of Siri's voice control features as your would with your iPhone. You can also take advantage of other features, such as customizing your AirPods' settings and renaming them if you plan on using the headphones solely with your MacBook.
How to pair your AirPods and MacBook together
Pairing your AirPods with your MacBook is a simple process, but it requires a few steps to get it done. First, ensure that your AirPods have a full charge, as a low battery may cause pairing issues.
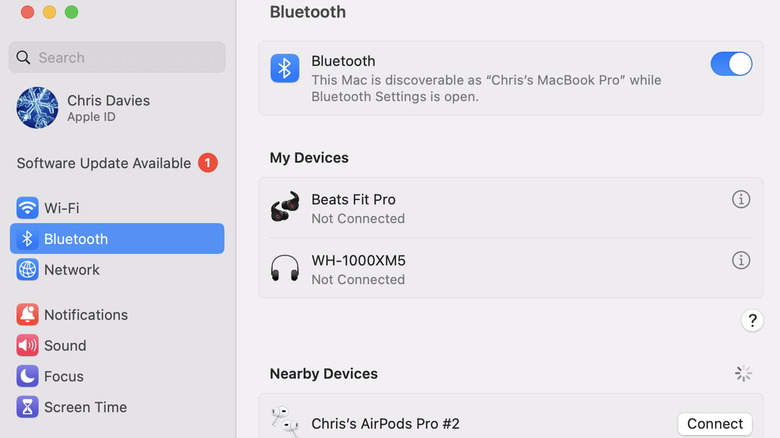
- To connect your AirPods to your MacBook, you'll need to turn on Bluetooth. You can do this by going to System Preferences > Bluetooth and ensuring the "On" box is checked.
- To enter pairing mode, place your AirPods in their charging case and open it. Then, hold the pairing button on the back until the light at the front begins to flash white. This indicates that your AirPods are now discoverable and ready to pair.
- Your MacBook should automatically detect your AirPods and display a notification asking if you want to connect them. If you don't see a message, click on the Bluetooth icon in the menu at the top of your screen. Then, find and select your AirPods from the list of named devices.
- Click "Connect" to pair your AirPods with your MacBook.
To ensure that your AirPods are working correctly, play some music or a video and listen through your AirPods. Your AirPods are successfully paired with your MacBook if you can hear the audio.
It's also important to note that you'll need to have your MacBook running macOS Mojave 10.14.4 or later, according to Apple.
How to modify your AirPods' settings to suit your MacBook

By changing your AirPods' settings, you can make sure they work correctly with your MacBook and personalize them to your liking. Whether you want to use your Bluetooth headphones to help dictate spoken words or use Siri as a personal assistant, there are several ways to ensure you're getting the most from your headphones.
- To modify your AirPods' settings, you need to go to the Bluetooth settings on your MacBook. Click the Control Panel icon in the menu atop your Mac's screen.
- Then, click on the Bluetooth section.
- You'll find Bluetooth Preferences at the bottom of the menu. Click on it.
- Once you're in the Bluetooth Preferences menu, locate your AirPods from the list of options.
- Click the Options button near your AirPods.
By default, double-tapping on your AirPods will activate Siri. However, you can customize your gestures to perform a different action. In the options section, select the action you want to achieve, such as play or pause audio, or skip to the next track.
If you're using your AirPods for video calls or dictation, you can select which AirPod you want to use as the microphone. You can also choose to use both AirPods for stereo sound when on a phone call.
Lastly, if you have multiple pairs of AirPods, you can personalize the name of the ones you use with your MacBook. To do this, double-click on your AirPods in the Bluetooth Preferences menu and select rename.