Settings On Your OLED TV That Are Ruining Your Viewing Experience

OLED TVs are gaining in popularity, with all of the major manufacturers selling at least one model in the U.S. market. The panel technology is well-suited to consuming content as the self-emissive nature of OLED means high contrast levels, per-pixel local dimming, and impressive color accuracy. The drawback is that OLED panels can't get to the same brightness levels as competing panel tech, as they don't employ a separate backlight.
That's not the only potential drawback, but it is one of the only drawbacks that can't be solved by changing some settings on your OLED TV. The manufacturers' default settings might not be the best for your living space. That's because they're set to sell TVs in the showroom, with brightness and color vibrancy cranked to the max. Most of the general recommendations for any TV still hold true for OLED panels, with a few settings specific to OLED. These settings are recommendations, and your personal preferences might be different.
Soap opera effect
Motion smoothing makes your TV-watching look cheap, unbefitting your premium OLED TV. Turn it off and enjoy your OLED's picture quality to the fullest. Every manufacturer calls it a slightly different name, and some need several settings to be turned off before the soap opera effect is banished from your screen.
Hisense calls it MEMC, which stands for Motion Enhancement and Motion Clearness on its OLED TVs running Android TV. To disable it, follow these steps:
-
Press the gear button on your remote, then select Settings.
-
Select Display & Sound.
-
Select Picture, then Advanced Settings.
-
Set the two options for Motion Enhancement and Motion Clearness to Off.
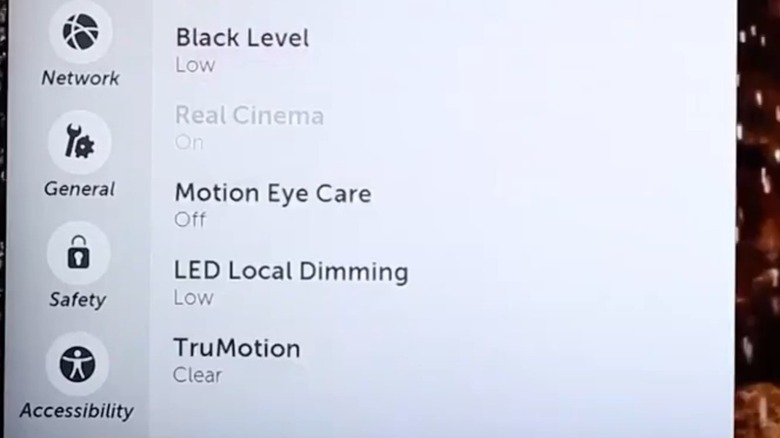
LG calls its motion smoothing TruMotion. To disable it, follow these steps:
-
Press the gear button on your remote to get the on-screen menus up.
-
Select the All Settings icon (three dots), then Picture Mode Settings.
-
Select Picture Options, then select TruMotion to turn it off.
If you are sensitive to judder, you can turn on Real Cinema setting from the Picture Mode Settings menu.
Samsung calls its motion smoothing Auto Motion Plus. To disable it, follow these steps:
-
Press the gear button on your remote, then select All Settings.
-
Select Picture, More Picture Settings, and Picture Clarity Settings.
-
Select Auto Motion Plus to disable it.
Sony calls its motion smoothing MotionFlow. To disable it, follow these steps:
-
Open the Picture Settings menu.
-
Select Advanced Settings.
-
Scroll to MotionFlow and set it to off.
On Vizio sets, motion smoothing is found under Clear Action. To disable it, follow these steps:
-
Press the gear button on your remote.
-
Select Picture, Advanced Picture.
-
Choose Clear Action to turn it off.
Any mode but Filmmaker Mode for movie watching

Did you know that your OLED TV is ruining your movie-watching experience? That's because, by default, it has multiple layers of post-processing that deviate from what the filmmaker intended. Many TVs made in 2020 or later have a new Filmmaker Mode to rectify this, which removes all post-processing so that the content is shown according to the director's vision.
To turn on Filmmaker Mode for Hisense TVs, follow these steps:
-
Press the gear button on your remote, then Settings.
-
Select Display & Sound.
-
Select Picture, then Advanced Settings.
-
Toggle Filmmaker Mode Auto Detection to On.
LG automatically changes the picture settings to Filmmaker Mode when watching some content, like that on Prime Video. You can also set it manually in the menus via these steps:
-
Open Settings and select Picture Menu.
-
Select Picture Mode Settings, then Picture Mode.
-
Select Filmmaker Mode.
-
If it looks too dark, adjust the backlight from Advanced Controls.
Samsung TVs should all have Filmmaker Mode. To enable it, follow these steps:
-
Press the Home button on your remote.
-
Go to All Settings, Picture, Picture Mode.
-
Select Filmmaker mode.
For Visio TVs, you can manually set Filmmaker Mode from the settings:
-
Open Settings and select Picture Options.
-
Select Picture Mode, then select Filmmaker Mode.
Using Filmmaker Mode in a bright room
Filmmaker Mode on your OLED is the best way to watch content as the director intended. When switched on, it disables all post-processing for both SDR and HDR content. That means it keeps the aspect ratio that the film was mastered at, sets the white point to D65, and turns off annoyances like motion smoothing. It also turns off any other enhancements, like color, noise reduction, overscan, and frame rate changes.
Because Filmmaker Mode reduces the brightness of SDR content to show at the reference levels used in mastering, it makes it difficult to watch in bright environments. The lower brightness levels of OLED compound the issue, making this better suited for dark environments. For that reason, unless your TV viewing room is light-controlled, you're better off not using Filmmaker Mode during daylight hours. Set it to off from the same place you enable it, usually in the advanced picture options.
Being in the wrong mode
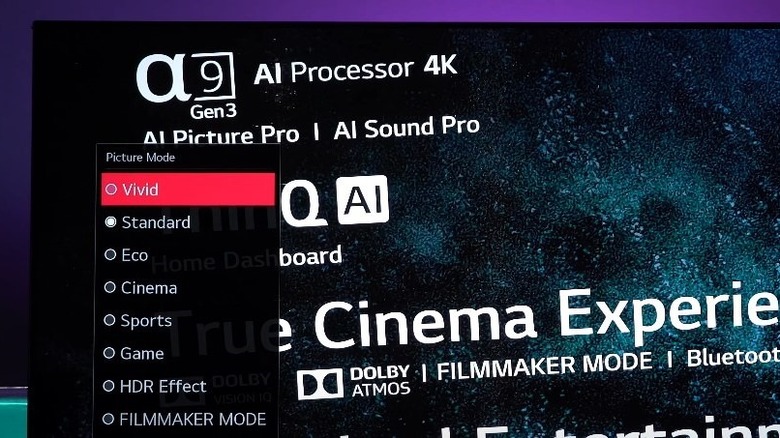
When you first bring your OLED TV home, it'll likely be in Vivid Mode, with the brightness, contrast, sharpness, and color boosted to make it look better in the showroom. That isn't the best mode for home viewing, but ironically, neither is the Home Mode. That's because the Home Mode is tweaked to conform to the Energy Star guidelines for TV power use, so the brightness and other settings will be turned down.
To start tweaking the picture, choose one of the factory picture modes, preferably one that allows for more setting customizations like Theater, Expert, or Professional. You want to avoid Vivid, Dynamic, or any word that sounds exciting — these will be overexaggerated. You can go straight to Filmmaker Mode, although you might also want to increase the brightness level. Modern TVs, like OLED panels, often change their modes based on their detectable content. That's a good thing, making it easier to switch between SDR and HDR content without having to dive into menus. Game Mode will reduce input latency, so your video games will respond to your input faster.
Sharpening settings
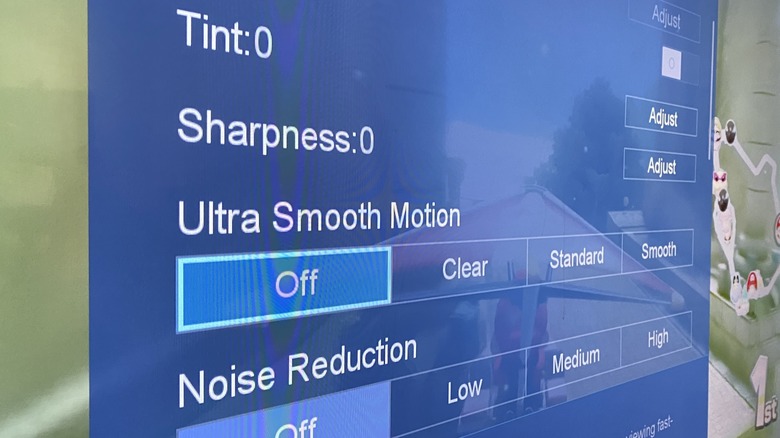
The correct setting for sharpness on most OLED TVs is zero. That's for 4K native content, as it is a 1:1 reproduction. Sharpness doesn't mean your image is going to be sharper. What it does is run edge enhancement on the image on the screen. This masks any blurry sections by introducing a halo effect around on-screen elements. This setting also can cover up fine detail, which isn't what you want on your OLED panel.
Some types of content that are lower than the native 4K resolution of your OLED TV can look slightly blurry as the TV will be upscaling. If so, it's still best to keep the sharpness setting low. Depending on your TV manufacturer, a sharpness setting of zero could be at the left of the control scale or at the midpoint. If changing the sharpness below the midpoint makes the image softer, then you know 50% is the zero setting.
Super resolution
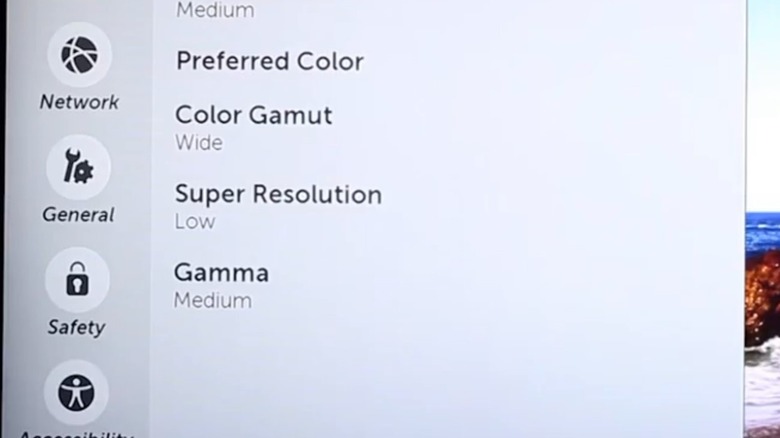
This setting makes low-resolution content better looking through upscaling, removing noise, and other post-processing tools. Turn it off. Most content these days is high enough resolution that you're only going to make the picture seem softer with it turned on. While it might have some benefits if you are watching standard definition or 720p content, the resulting image will introduce blur and possibly even pixelation. If you are watching a lot of lower-resolution content, you can experiment with the varying levels of super-resolution but otherwise, keep it off.
On LG TVs, go to Settings, All Settings, Picture, Clarity, and turn Super Resolution off. Sony calls it Reality Creation; other manufacturers call it Smooth Gradation. Whatever name it uses, you don't want it. Content is mostly high-resolution and high quality now, and the algorithms designed to remove noise, digital compression artifacts, or analog conversion glitches are not really necessary. If the TV has multiple options, turn it to off. You can try differing strengths if watching old DVD content or anything else from the pre-4K era.
Noise reduction settings
You will want to turn noise reduction or any similar setting off, as you don't want post-processing ruining the crisp, clear image that OLED can produce. The idea of noise reduction is good, removing noise from images created from lower-quality sources. That was before HDTV, before everything came as a digital signal, and before 4K and above resolutions. Noise reduction is a holdout from the analog days when your TV signal came in over the air and could be interfered with by multiple environmental occurrences.
Cable TV is digital, and so are streaming services, internet TV, Blu-ray discs, and DVDs; even over-the-air free TV channels are sent as a digital signal these days. All noise reduction does now is blur detail and texture in the video stream you are watching. If you've ever wondered why the video stream from Netflix or any of the popular streaming services seemed unnatural-looking, it could be because you had noise reduction turned on and didn't realize it.
Dynamic Contrast
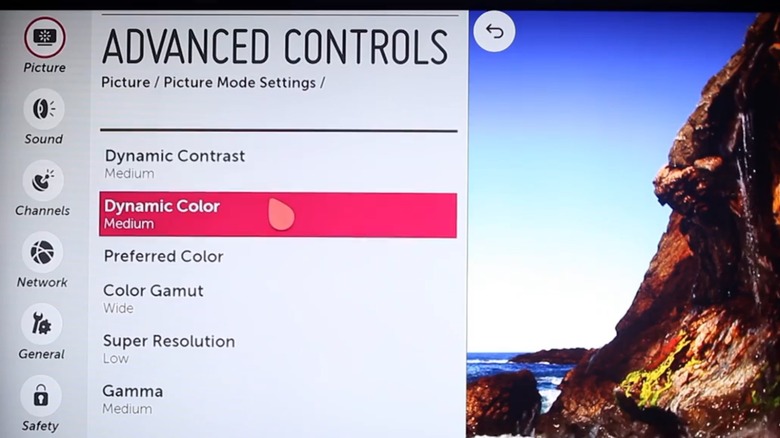
OLED panels are known for their high contrast levels; every pixel can be turned off for deep black levels. That means you don't need Dynamic Contrast to be set. This setting controls the contrast levels of the screen based on what it is displaying at the time. That could end up crushing the black levels or even clipping the highlights. Either of those is terrible for HDR content, and the technology used in OLED means it's not necessary.
For some types of content, like cartoons, it might make a difference as it will make the colors pop. That same effect on human skin will make it look unnatural. Color banding artifacts could also be introduced, making the overall image look worse. While you're turning off this setting, it's worth finding Black Tone, Black Detail, or any related contrast-enhancing settings and turning those off. Let your OLED panel do all the work for you, with its near-infinite contrast levels and fine-control over black levels.
Leaving HDR off

Your OLED TV has fantastic contrast levels due to its ability to show true black levels by turning off individual pixels. Don't limit the content you're watching by having HDR turned off — your eyes will thank you. On LG, for HDR to work properly from external devices, the Ultra HD Deep Color option usually has to be enabled from the Additional Settings menu for the input you are using. This will only affect devices connected via the HDMI port that it was enabled for. For all sources, including inbuilt apps, set the Picture Mode to HDR Effect.
Samsung TVs should have HDR+ enabled by default. To check, open Settings, Picture, and Special Viewing Mode and enable HDR+ Mode. On Vizio TVs, select the HDMI port you are using with the Input Settings button on your remote, and set it to Full UHD Color. That will make that source play in HDR. Inbuilt apps will play HDR automatically if you start playing HDR content. On Sony OLEDs, open Settings, navigate to the TV category, and select External inputs. Set the HDMI signal format to Enhanced format to enable HDR.
ECO Settings
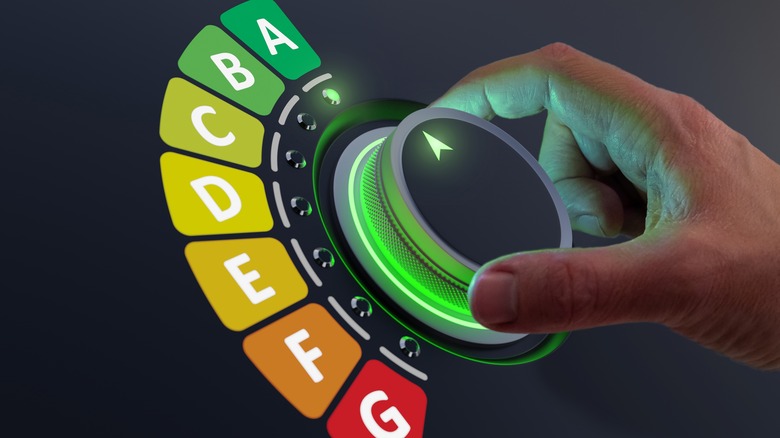
Manufacturers have mandated environmental standards they have to design into their OLED TVs, including energy-efficient modes that limit brightness. With OLED being dimmer overall than any other flat-panel TV type, that spells disaster for your picture quality. Depending on which manufacturer your TV is from, this could be called Eco Mode or Auto Power Saving, or something similar. The energy-efficient settings could also interfere with other picture modes, making all of the adjustments you're making a waste of time.
You'll want to find the Energy Saving menu in your OLED TV and turn any Energy Saving Step, power saving, or similar features off. You'll want to turn off three things for LG OLEDs: Energy Saving, AI Picture, and Eye Comfort Mode. These are found in the OLED Care menu. On Samsung OLED, you want to turn off Brightness Optimization, Motion Lighting, Brightness Reduction, and Adaptive Picture. Vizio OLED TVs come with Eco Mode on by default. To change that, you want Quick Start Mode, found at Settings, System, Power Mode, Quick Start.
Brightness, contrast, and color
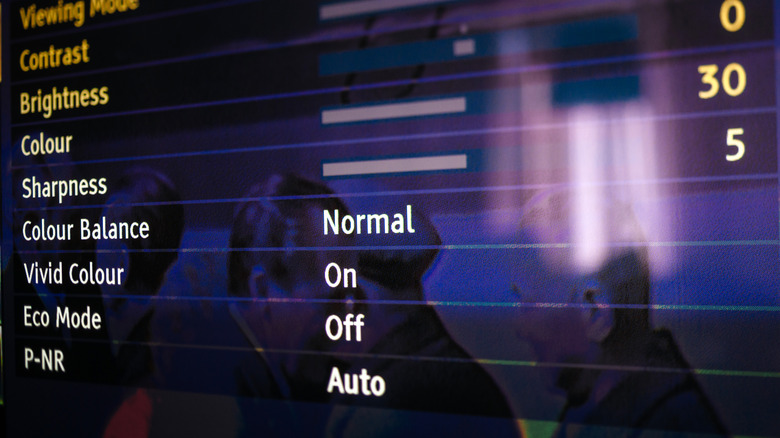
For your OLED TV, LG suggests using the following settings for the three most common viewing situations: natural light, artificial light, and dark room (via LG). Keep in mind that these are suggestions, and your viewing preferences might be different. They provide a good starting point to get the best image quality from your OLED without resorting to professional calibration. For daytime viewing, have the backlight at 100, contrast at 100, brightness at 50, sharpness at 30, color at 70, tint at 0, and color temperature at C50.
That's markedly different from Rtings' suggested settings for the LG C9 OLED. Their testing labs think you should set contrast to 90, sharpness to 0, color to 50, and tint at 0. We'd tend to agree with the experts at Rtings, as 4K TVs and OLED panels don't need sharpness and look worse having it turned on. The other settings can be played around with based on your light levels and personal taste.
Sound settings
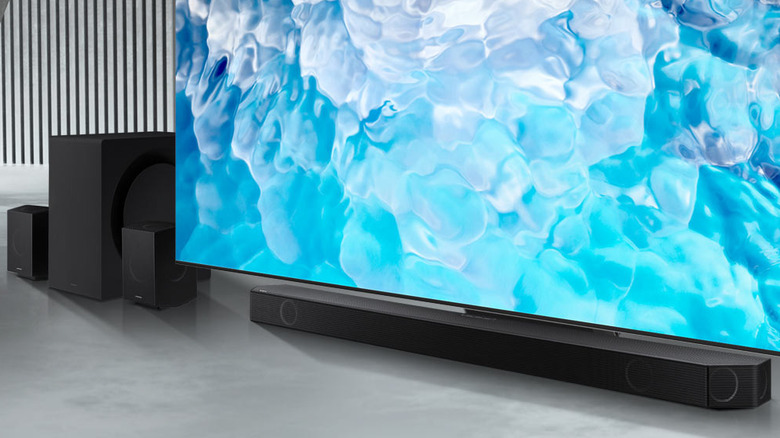
The normal recommendation for TV audio is to buy a soundbar that supports Dolby modes. That's still the case for OLED, even if the internal speakers are capable. You don't have to spend a lot of money here. Almost any soundbar will be better than the internal speakers. OLED TVs are thin, which means less space to fit speakers. Soundbar speakers are larger, which can move more air, leading to better audio performance.
The most important thing to look for is HDMI ARC or eARC support to connect your OLED TV to the soundbar with one HDMI cable. Other features to look for include Dolby Atmos or DTS:X support, the two most common high-end audio codecs for immersive surround sound. Bluetooth is a personal preference if you want to use your soundbar for casting audio from your mobile device. It's also worth checking if your TV manufacturer has its own soundbar range, as they're often designed to work in concert with the inbuilt speakers to deliver better sound, especially for the frequencies that carry speech.
Burn in
OLED has improved at preventing burn-in, but it can still be an issue. The O in OLED stands for organic, and any static image could leave individual pixels unable to change color from the one they get stuck on. Any OLED screen could have this happen to it, from your smartphone, Nintendo Switch OLED, computer monitor, or TV. To combat this irreversible issue, TV manufacturers have devised various ways to prevent OLEDs from displaying the same image for a long time.
The main reason for burn-in is a bright image displayed over time. LG OLED TVs use automatic bright level (ABL), local dimming, and panel refresh routines to stave off burn-in. Sony has screen savers that can be activated and have panel refresh and pixel shift options, so the panel isn't displaying static images on the same pixels. Lower brightness levels on your OLED TV will also help prevent burn-in, whichever brand you own. If your TV has an auto-off option after a certain amount of time, enabling that will also help.