12 Google Docs Shortcuts And Tricks You Need To Know

Google Docs is one of the most popular tools for writing, editing, and managing documents. While Microsoft Word has been the go-to word processor for years, Google Docs is going toe-to-toe with Microsoft by offering unique features that benefit students, working professionals, or the everyday computer user. All you need to start using Google Docs is a Google account, and if you use Gmail, you've already got one!
Because Google Docs — along with all of Google's other tools — is cloud-based, you can sync your documents across all of your devices. So you can start typing on your desktop computer at home, switch to your laptop while you're in class, and even work from your smartphone if you need to.
Being able to switch devices at a moment's notice and keep working on the same document is Google Docs' biggest feature and the one that draws many people to it. However, there are even more shortcuts and tricks within Google Docs that you need to know to ensure you're getting the absolute most out of this awesome tool.
Use your voice to type
When people are writing a long document, they often self-edit as they go, rather than dumping all their thoughts on the page and editing later. This works just fine for a short project, but if you're working on a novel or a term paper for college, it can be simpler to write the first draft and then begin editing after.
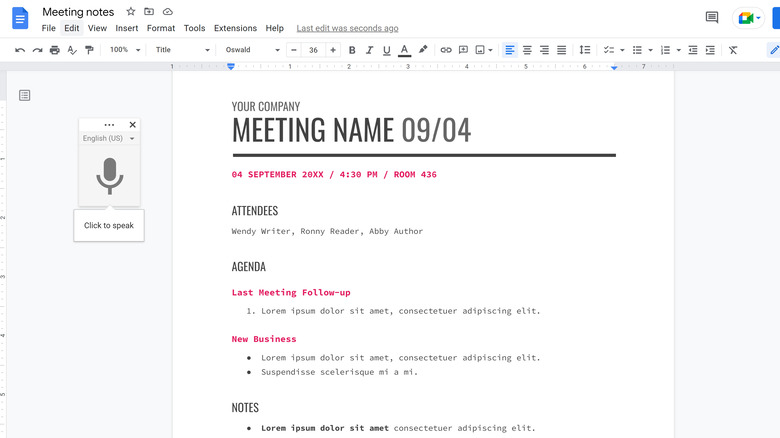
Google Docs has a voice typing feature that allows you to use your device's microphone — or an external microphone — to transcribe text as you speak rather than type using your fingers. By using your voice to get your thoughts out, you're more willing to accept mistakes made in the moment and edit them later on.
To start typing with your voice, you can either use the keyboard shortcut Ctrl + Shift + S or select the Tools section in the main menu and then click on Voice Typing. You can say "period," "comma," "exclamation point," and so on to dictate punctuation, and say "new line" or "new paragraph" to help create a structure while you're speaking.
If you're willing to put in the time to learn the process, you can even use voice commands for advanced editing and formatting in Google Docs. There's a long list of helpful editing commands, the most useful of which include highlighting, cutting, copying, and pasting text to reorganize your thoughts.
Add-ons and Apps Script let you do more
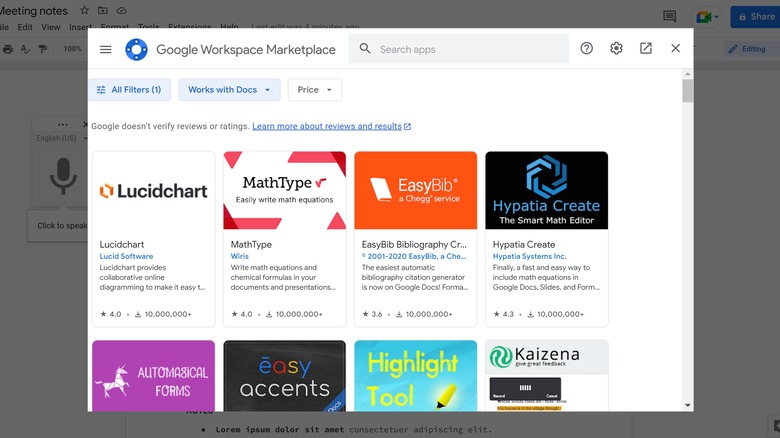
Much like Chrome's extensions, there are a number of add-ons for Google Docs to make your life easier. To browse all the add-ons, you can click on the Extensions section in the main menu, hover over Add-ons, and then select Get add-ons. When you find one that you like, select it and click the blue Install button, and then it will appear in the Extensions section of the main menu.
While the best add-ons for you will be unique to the project you're working on, there are a few popular ones that are generally good for everyone. OneLook Thesaurus acts as an in-document thesaurus to find synonyms without needing to open a new tab. Or if you find yourself writing in another language often, Easy Accents may be useful because it lets you insert accented letters directly from a sidebar while you're typing. You can also find add-ons full of helpful templates, easy access to free photos or clipart, and integrations with other popular services.
For anyone who's more technologically advanced, Google Docs lets you create your own unique add-on via Apps Script. Add custom menus and sidebars, or write your own functions and macros to make Google Docs work exactly how you like it. If you think what you've created could be helpful to others, you can even publish it for anyone to install.
Use helpful keyboard shortcuts

A keyboard shortcut can help you save time by using your keyboard to carry out actions that you would usually use your mouse for. The keyboard shortcut people are probably most familiar with is Ctrl + Z, or the "undo" command. Instead of using your mouse to move your cursor to the undo button in Google Docs, you can simply press the Control key and then the Z letter key simultaneously to undo your last action (you can press it multiple times in a row, too). If you learn enough keyboard shortcuts, you might not end up needing to reach for your mouse much at all.
Anyone who types a lot may also be familiar with the shortcuts to copy and paste text, Ctrl + C and Ctrl + V. The best keyboard shortcuts for you will be unique to how you use Google Docs and which functions you use most often. But here are a few of the most widely used keyboard shortcuts:
-
Ctrl + P automatically opens up the Print menu for whatever screen you currently have open.
-
Ctrl + F lets you search through a document for a specific character or word.
-
Ctrl + B, Ctrl + I, and Ctrl + U will format any text you have highlighted to be bold, italicized, or underlined, respectively.
-
Ctrl + A selects all the text in the document you're currently editing.
Create your own custom text shortcuts
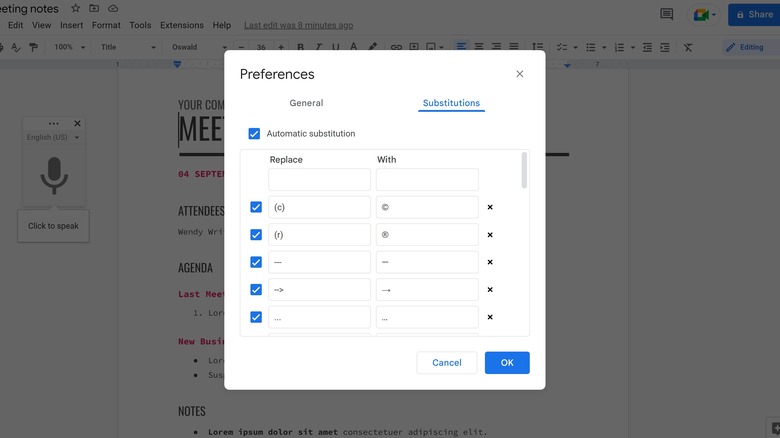
In addition to keyboard shortcuts, you can also create custom text shortcuts to make your Google Docs experience even more productive. To see this, select the Tools section in the main menu and then click on Preferences. This opens up a box in the middle of your screen with two tabs: General and Substitutions.
In the General tab, you can toggle checkboxes on or off for different settings, including automatically capitalizing words, correcting spelling, or detecting links. These can be helpful, too, but what we're looking for is in the Substitutions tab. There, you'll be able to replace a character or word you type with another character or word automatically.
For example, if you found yourself needing the "ñ" character a lot while typing, you could create a shortcut that lets you type (n), and Docs will automatically turn that into "ñ." Or, you can tell Google to replace "—" with an em dash. There are already some suggestions here from Google, like turning (c) into the copyright symbol or condensing a fraction into a single character. It's helpful to go through this list and delete any substitutions you think might get in your way while you're typing.
Let Google help you find the perfect link
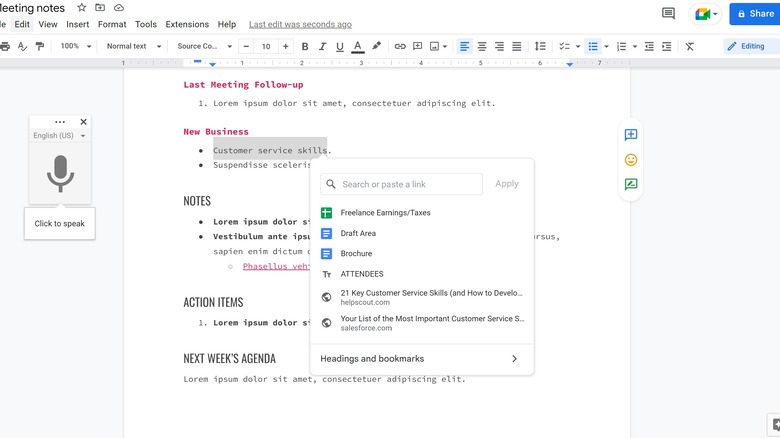
If you need to add a link to your document, Google makes the process incredibly simple. First off, if you paste a link into a document and press the Enter or Space key, it'll automatically turn the link into a clickable hyperlink. If you want to place a hyperlink on a specific word or string of words in your document, you can highlight that text, use the keyboard shortcut Ctrl + K, and paste in the link you want to direct people toward.
What's even more awesome is that Google can find links for you. If you type something like "how to subscribe to Netflix" or "customer service skills," and then use the Ctrl + K keyboard shortcut with those words highlighted, Google will automatically suggest links for you to use. So instead of opening a new tab, performing a Google search for your topic, copying the link, and then pasting it in, you can just let Google do the grunt work for you.
Customize your heading styles
When you're typing up a paper for school, this Google Docs trick may not be as helpful because you're generally working with a single font that's all the same size. But if you're a creative writer working on a novel, or creating an informational document for your company, customizing your heading styles is a game-changer.
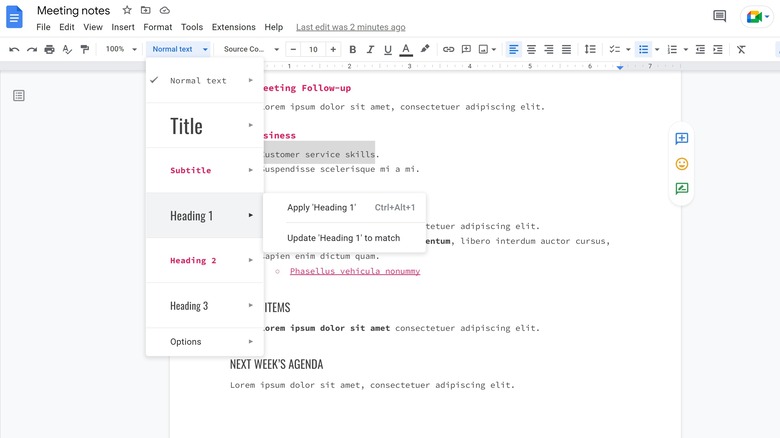
On the Google Docs toolbar, to the left of the font selector, there's a dropdown menu that is set to "Normal text" by default. This is the Headings menu. Clicking the down arrow next to this, you get several other options, including Title, Subtitle, and Headings 1, 2, and 3. You can customize what you want each of these to look like, and then instead of formatting your novel's chapter titles or your presentation's headings manually, you can simply switch from your Normal Text setting to a Title, Subtitle, or Heading setting.
As an example, let's say you want the Title option to be in size 30 Arial font, bolded, and underlined. To set this up, you'd manually format how you want your document's titles to look, highlight that strip of text, hover over Title in the dropdown menu, and then select Update 'Title' to match. Then, whenever you want to add a new title, select the text and use the dropdown to select Title. Google Docs will automatically format the text as you previously specified.
Use headings to organize your Google Docs
Using custom headings throughout your document helps visually organize everything and clearly separate sections, but that's not all they can do. When you use the formatting options under the Headings menu, Google Docs automatically creates a Table of Contents for you to navigate.
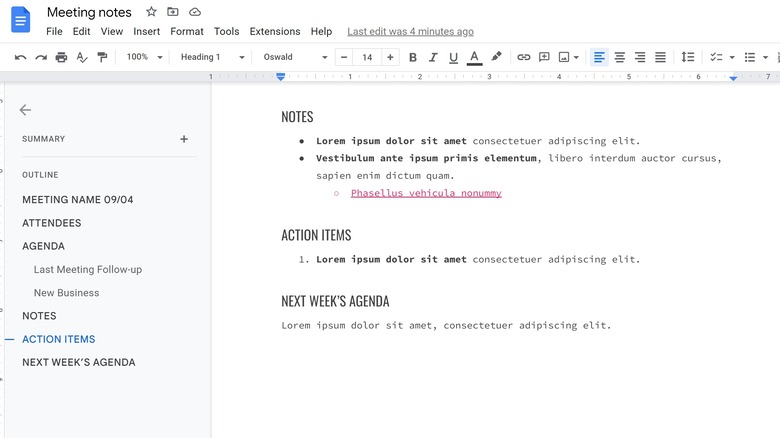
In the upper left corner of your document, underneath the undo and redo buttons, there's a square icon with three horizontal lines. When you click on this, it opens up a document outline sidebar with all of your headings neatly organized and indented in order of Title, Heading 1, Heading 2, and Heading 3. Text using the Subtitle heading doesn't show up in the outline, however. You can click on any of the items in the Table of Contents and it'll take you to that section immediately.
No matter what you're working on in Google Docs, this automatic Table of Contents makes navigating a long project significantly easier. For example, if you're working on a novel with 30 chapters, you can just click on the chapter in the Table of Contents instead of scrolling all the way down to your 30th chapter. Or, if you've created a guide for new employees, headings make it easy to find exactly what they're looking for when they have a specific question.
Building Blocks and Smart Chips make your life easier
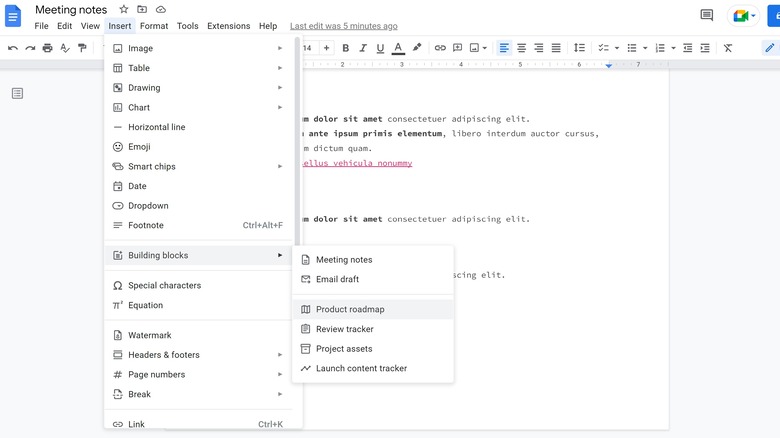
It's possible to create an informative and well-organized document with just plain text, but if you want your document to be more interactive, check out Building Blocks and Smart Chips. To access both of these features, click on the Insert section in the main menu and then locate Smart Chips or Building Blocks.
The Building Blocks currently available include Meeting Notes, Email Draft, Project Roadmap, Review Tracker, Project Assets, and Launch Content Tracker. All of these Building Blocks work well for companies that need to keep things on track and want everything to be in a single document so that all the info they need is easy to find.
Smart Chips allow you to integrate information from other Google services into your Doc, like an important meeting date from your Google Calendar, map directions to an event, or files from Sheets, Slides, or another Google Docs file. After you insert a Smart Chip into your document, you can hover over it or click on it to see more information, and then you can click again to open whatever link is attached.
Access your revision history
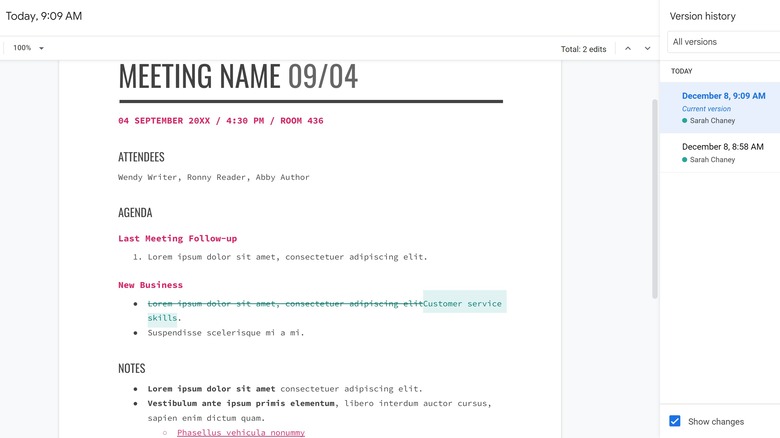
One of the greatest features of Google Docs is that it constantly saves everything, as long as you're online. You can easily go back to see something you previously wrote since your work is automatically saved and stored. While it may seem silly to ever want to look back at a first draft or an old design, it can be incredibly helpful. To see a document's previous versions, go to the File section in the main menu, select Version history, and then See version history.
Simply looking at an old version of your document doesn't automatically revert everything back to that version. You have to specifically click a blue button at the top that says Restore this version if you want to replace your current version with an old one. This means that you can browse through previous versions to find old ideas you've forgotten about or compare an old design or outline to your current one.
This feature is especially helpful if you have multiple people working within one document. You can see exactly who made changes, when they were made, and what exactly was changed.
Make the word count always visible
Google Docs has long had the ability to show you a word count for your document, but you had to reach it by clicking multiple buttons every time or remembering the Ctrl + Shift + C keyboard shortcut. It wasn't until 2019 that Google Docs finally added a real-time word count feature. And boy, oh boy, people were happy about it.
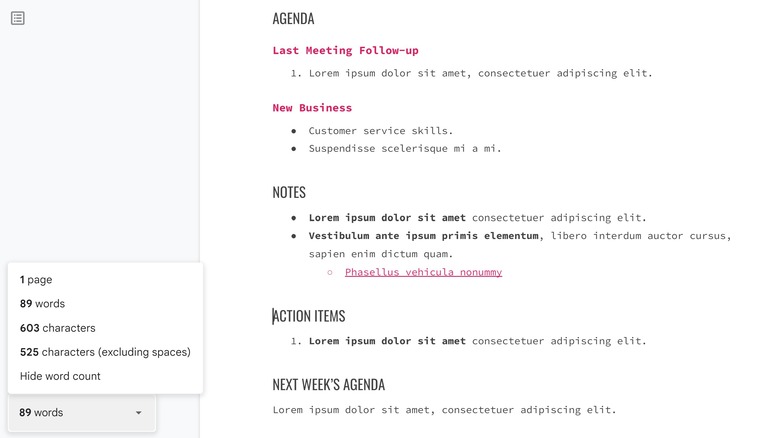
Seeing an ongoing word count is especially helpful for students and writers, but many people like to see the word count to gauge how much text they've put down. To keep your word count on display, head to the Tools section of the main menu, select Word Count from the dropdown menu, and then check the box that reads Display word count while typing. Then, you'll see your document's total word count in the bottom left corner. If you highlight a section of the text, you'll see the word count for just the highlighted portion of the document.
Unfortunately, when you refresh the page, you'll lose the word count display. You can easily add it back at the start of your next writing session, but hopefully, Google will make this a more permanent feature in the future.
Insert a handwritten signature
If you're using Google Docs, gone are the days when you had to print a document, physically sign it, and then scan it (or fax it if you were truly old school) to send it back to whoever needed it. Other word processors might keep things retro, but with Google Docs, you can draw your signature and insert it right away as an image.
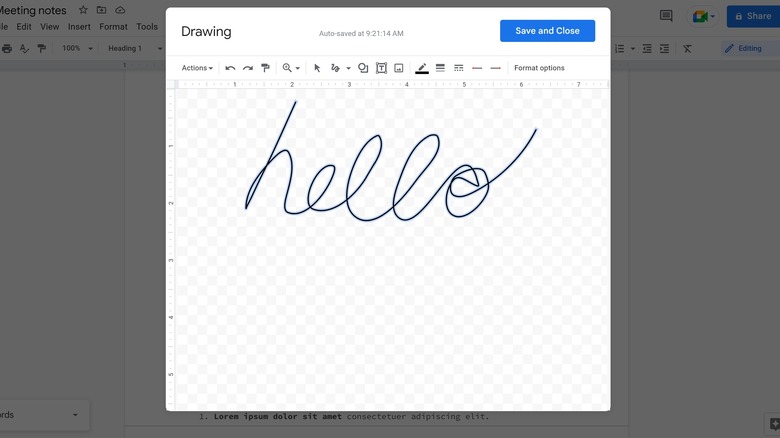
This feature really only works well if you have a touchscreen device that allows you to draw your signature with your finger. While it still might not look the prettiest, it'll look better than if you try to write your signature using your mouse or your trackpad.
After clicking on the Insert section in the main menu, hover over Drawing in the dropdown menu and then select New to open up your drawing board. In the drawing board window, click on the Line menu and select Scribble at the bottom. Draw your best signature, click the blue Save and Close button, and you're good to go!
Access special characters easily
Have you ever performed a Google search for a special symbol, like the degree symbol or an em dash, just so you can copy and paste it into your document? Well, with Google Docs, there's no need to do this. You can find all the special characters you need directly in Google Docs, and then you don't have to worry about copying any weird formatting from a random page.
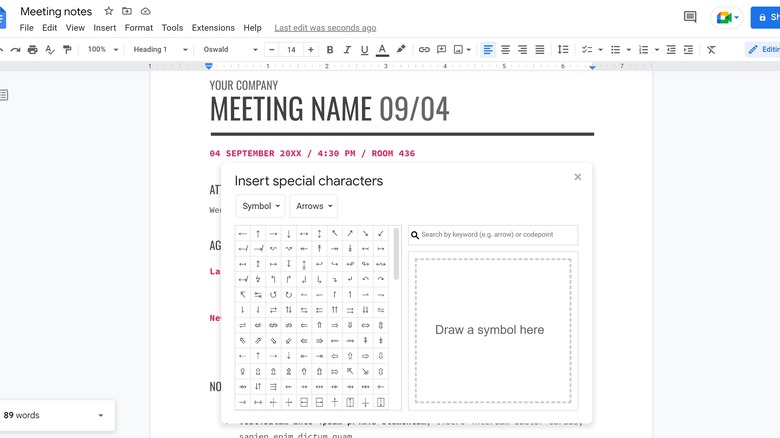
To see all the special characters Google Docs has to offer, click on the Insert section in the main menu and then select Special Characters from the dropdown menu. There are checkmarks, special letters or symbols from other languages, arrows, shapes, and so much more. However, if you frequently use letters and symbols from another language, using a Google Docs add-on like Easy Accents might be more helpful.
While you can certainly browse through the hundreds of symbols until you find what you're looking for, Google Docs makes your life easier with an integrated search bar. For example, you can type the word "degree" in the search bar and the first two special characters that pop up are ℃ and ℉.