3 Raspberry Pi Tricks To Get The Most Out Of Your Pi Project
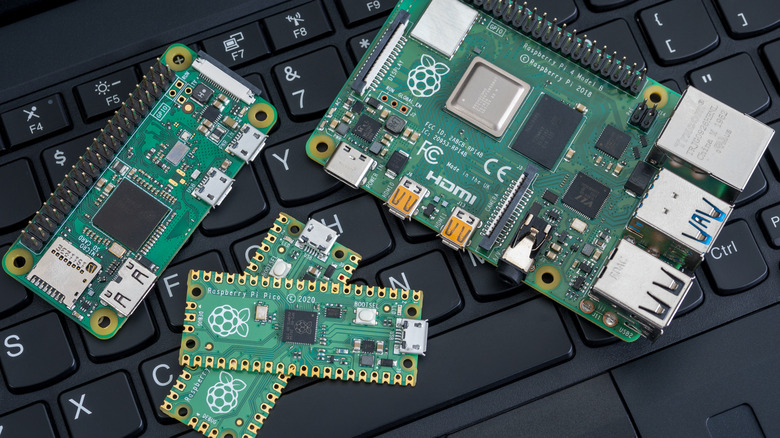
The Raspberry Pi has taken over the DIY tech world since the release of its first-generation board. In fact, it has become such a massive hit with hobbyists and professional developers that according to the Raspberry Pi Foundation's 2020 Annual Review, the Foundation has sold a total of 37.4 million units since its inception. This comes as no surprise given how flexible the board is when it comes to developing DIY projects. Users can make something as simple as an automatic light switch to something as complex as a motion-triggered Raspberry Pi security camera.
With the world of possibilities, the Raspberry Pi offers, you'll probably want to start trying out different projects and testing how far your board can take you. However, to really have an enjoyable developing experience, you should know how to make the most out of your Raspberry Pi. Here, we've covered three of the top tips and tricks you should keep in mind while making your next DIY masterpiece.
Shut down safely using the GPIO

It's never a good idea to shut down your Raspberry Pi just by unplugging the power source. Although you've probably already done this when your board freezes, shutting the board down this way could result in a corrupted microSD card. Fortunately, there is a safer way to shut your Raspberry Pi down when you don't have a monitor or remote access: via GPIO shutdown. Here's how you can set this up (via GitHub):
- Open the terminal on your Raspberry Pi (either via SSH or a graphical interface).
- Edit the /boot/config.txt by typing sudo nano /boot/config.txt on your terminal.
- Inside the file, add this line: dtoverlay=gpio-shutdown,gpio_pin=3,active_low=1,gpio_pull=up
- Hit Ctrl+X and press Y to save the file.
- Shut down your board and remove the power.
- Connect a button to your Raspberry Pi's Pin 5 and 6 (GPIO3 and GND).
- Boot up your board and try pushing the button. It should shut down safely. Press the button again to power up the board.
Use terminal commands to monitor the board's temperature
Like any other electronic device, your Raspberry Pi can only operate at a certain temperature range before it overheats. According to the Raspberry Pi documentation, the board's temperature limit is at 85°C for all models. Once it reaches this limit, its performance will drop as the CPU starts throttling. Your microSD card can also be damaged by overheating.
More often than not, you'll run into this issue when running some performance-hungry code or programs on your board (or keeping the board somewhere with poor ventilation). In cases like these, it's always important to monitor your Raspberry Pi's temperature to help you know when to shut down the system to prevent damage. Here's how you can do so:
- Open your board's terminal (via SSH or graphical interface).
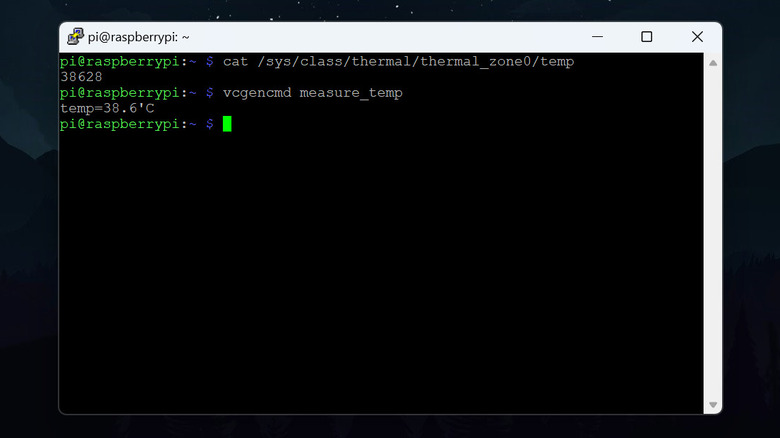
- Type cat /sys/class/thermal/thermal_zone0/temp to get your CPU's temperature.
- Divide the value by 1000 to convert it to degrees Celsius.
- Type vcgencmd measure_temp to get the GPU temperature (via Raspberry Pi).
Enable SSH for remote access
When tinkering with your Raspberry Pi projects, there will often be times when having a monitor connected to your board is inconvenient and unnecessary. You might be turning your Raspberry Pi into a weather station or making a smart human-following robot. Neither project would need a display to fully function, and having one would only make things too bulky to be portable.
However, without a monitor, how do you control your board? This is where the handy SSH feature comes into play. The Secure Shell (SSH) protocol lets you access the Raspberry Pi command line from a remote PC as long as both devices are connected to the same network (via Raspberry Pi). Here's how you can enable this tool from the command line:
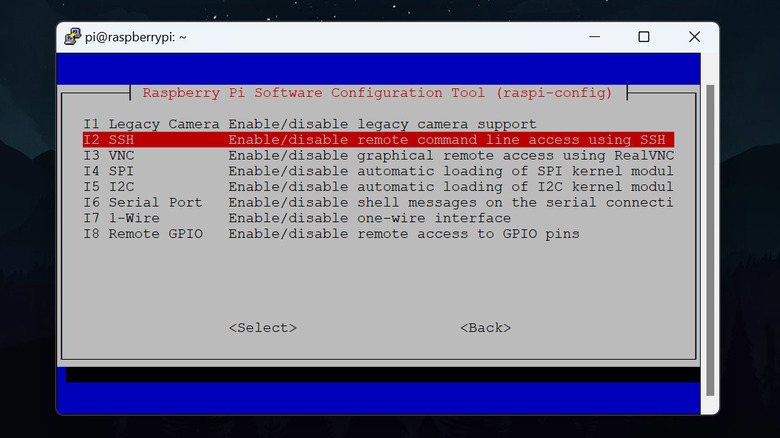
- Open the terminal window.
- Type sudo raspi-config.
- Go to Interfacing Options.
- Select SSH.
- Hit Yes.
- Choose OK.
- Select Finish.
If you haven't installed the Raspberry Pi OS on your microSD card yet, you can also enable SSH using the Raspberry Pi Imager's advanced options (via Raspberry Pi). Simply click the gear icon on the app before writing the image.