How To Use Your Laptop As A Monitor For A Raspberry Pi
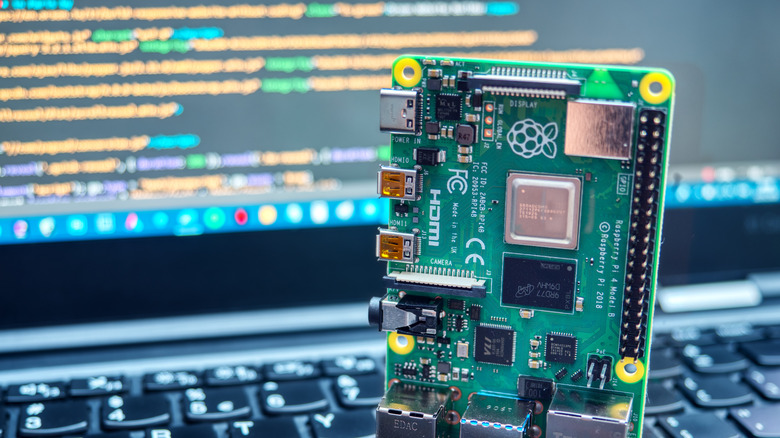
As one of the most inexpensive and easily accessible single-board computers on the market today, the Raspberry Pi has surely become a favorite among tech and DIY hobbyists. In fact, it has such a massive online community that you can find tons of Raspberry Pi-based projects to do, from a basic weather station to a silly fart detector. Almost any tech project you can think of can be done with a Raspberry Pi and probably already has a tutorial somewhere on the internet.
Another major draw of this board is how easy it is to set it up. All you need is the microSD card to load the Raspberry Pi OS, an HDMI monitor, a keyboard, and a mouse. But what if you don't have a monitor to spare? Don't fret because you can also use your Windows or Mac laptop as your Raspberry Pi monitor using the board's VNC feature.
Step 1: Set up the Raspberry Pi for headless connection

Before setting up your Raspberry Pi for headless connection, you need to have an ethernet cable and at least a 16GB microSD card (with SD card reader) on hand. After connecting these two items to your Windows or Mac computer, proceed with the following steps (via Raspberry Pi):
1. Download and install the latest version of the Raspberry Pi Imager for your OS. This is the official graphical SD card writing tool developed to make it easy to flash the Raspberry Pi OS to the microSD card.
2. Launch the Raspberry Pi Imager.
3. Click on "Choose OS."
4. Select the top-most result to install the latest version of the Raspberry Pi OS.
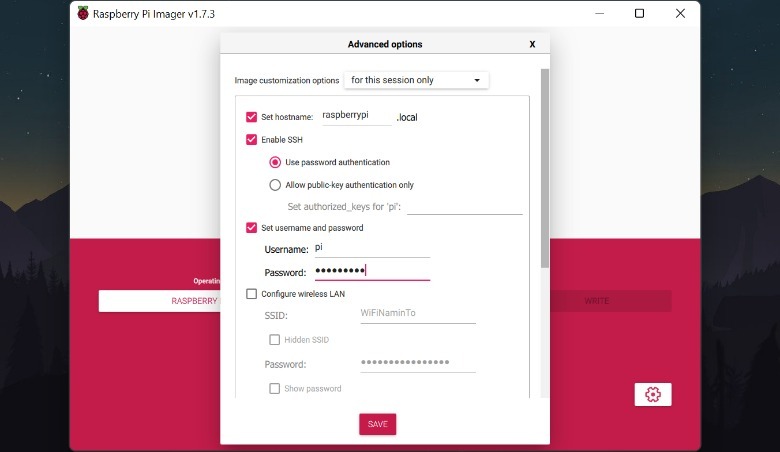
5. Click on the gear icon on the bottom right.
6. Mark the checkbox for "Set hostname." You can change the hostname here, but for simplicity purposes, we'll leave it as "raspberrypi."
7. Mark the checkbox for "Enable SSH." SSH allows your computer to access your board's command line remotely (via Raspberry Pi). Make sure that "Use password authentication" is selected.
8. Enter a password for your Raspberry Pi in the Password field.
9. Click on Save.
 SlashGear
10. Click on "Choose Storage."
11. Select your microSD card from the list.
12. Click on Write.
13. In the warning pop-up, select Yes to confirm that you want to erase the data from the microSD card.
14. Wait for the flashing process to complete.
Step 2: Log in to the Raspberry Pi from your laptop
After the flashing process finishes, insert the microSD card into your Raspberry Pi. Then, connect your board to the ethernet cable already connected to your laptop. Afterward, power it up using a recommended supply. Raspberry Pi recommends a 5.1V 3A power supply unit for Raspberry Pi 4 models.
You can now log in to the Raspberry Pi from your laptop. This step will differ for Windows and Mac users. If you're on a Windows device, here's what you need to do:
1. Download and install PuTTY. This will be used to connect your Windows device to the board's console.
2. Download and install VNC Viewer. This app will display your board's desktop environment on the Windows device.
Afterward, you can connect your board to the ethernet cable already connected to your Windows computer. Then, power up the Raspberry Pi using a 5V 2A source. From here, continue with the following steps:
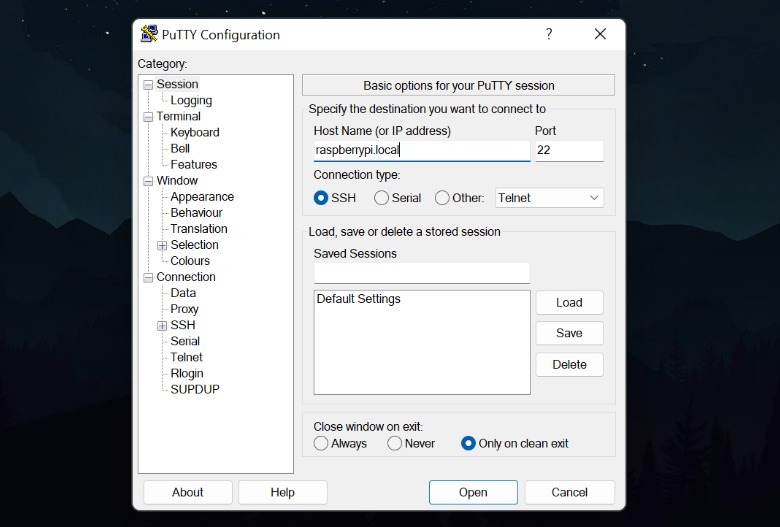
1. Launch PuTTY.
2. Under "Host Name (or IP address)," type "raspberrypi.local" (without the quotes).
3. Under "Connection type," ensure that SSH is selected.
4. Click the Open button.
 SlashGear
5. If a PuTTY Security Alert pops up, select Accept.
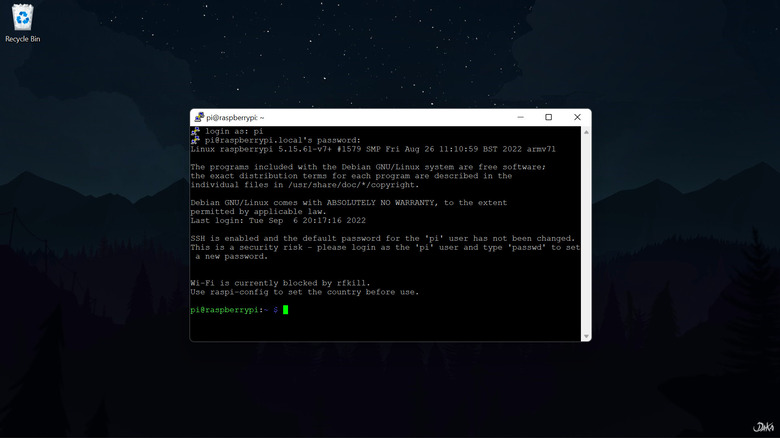
6. In the console window, type "pi" after "login as."
7. Enter the password you created earlier. You should be able to log in to the Raspberry Pi successfully.
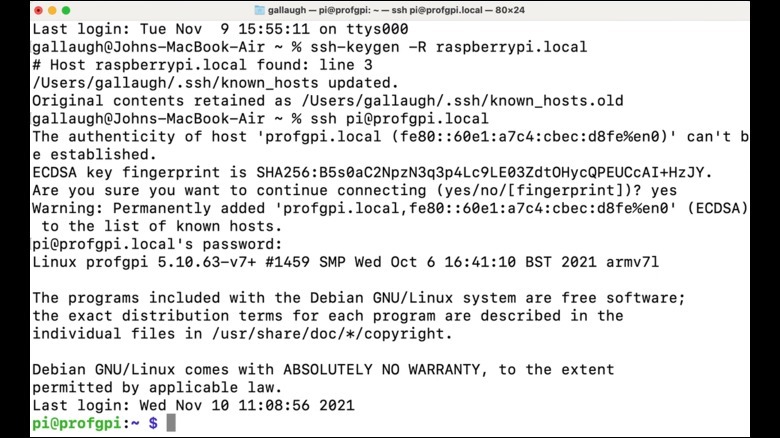
Meanwhile, if you're using a Mac device, these are the steps to follow:
1. Open your terminal.
2. Type "ssh-keygen -R raspberrypi.local" (without quotes) to generate an SSH key for your Raspberry Pi. This will allow your Mac to connect to the board. If you see any warnings, simply ignore them.
3. Type "ssh pi@raspberrypi.local" (without quotes) to log in to your board.
4. Type "yes" to continue connecting to the Raspberry Pi.
5. Enter the password you previously set. You should be able to log in with no issues.
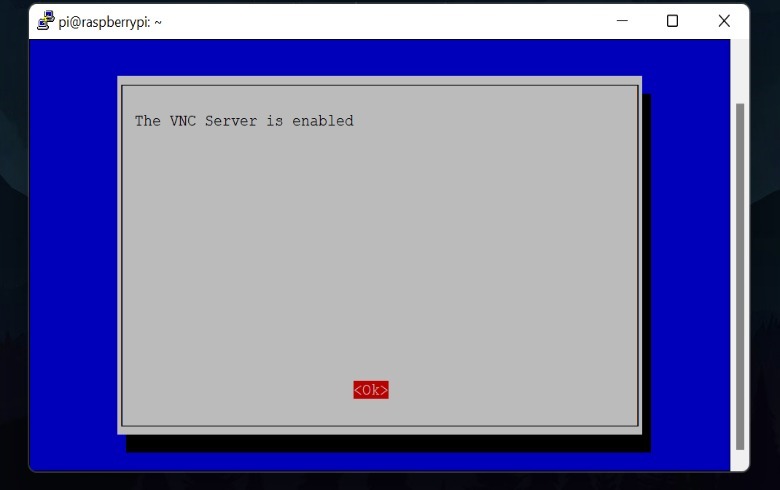
Step 3: Turn on the Raspberry Pi VNC Server
While logged in to the Raspberry Pi, you can enable its built-in VNC Server. The VNC Server allows your laptop to remotely access your Raspberry Pi's desktop environment. Here's how you can turn it on (via Raspberry Pi).
1. In the console window, run "sudo raspi-config" (without quotes). This will launch the configuration tool.
2. Navigate to Interface Options using your keyboard's arrow keys and hit Enter.
3. Go to VNC and hit Enter.
4. Select Yes to confirm that you want to enable the VNC Server.
5. Hit OK to return to the homepage.
 SlashGear
6. Navigate to System Options.
7. Open "Boot/Auto Login."
8. Go to Desktop Autologin and hit Enter. This option will boot the Raspberry Pi board to its desktop environment and will automatically log you in as the pi user.
9. Move to the Finish button at the bottom to apply the changes.
10. Reboot the board by selecting Yes. This will disconnect you from the board.
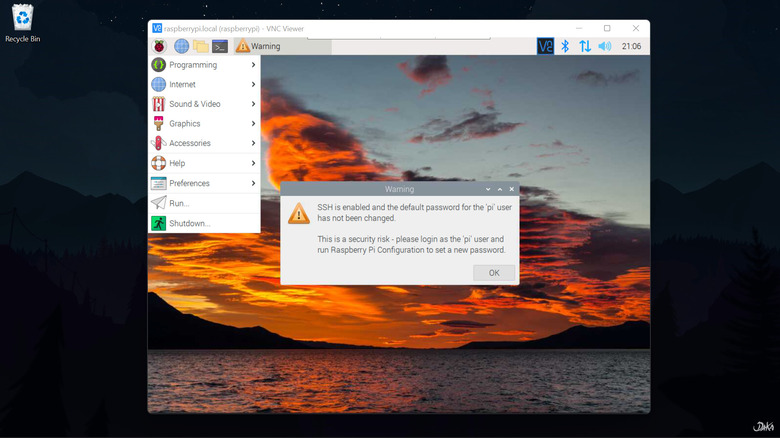
Step 4: Access the Raspberry Pi desktop environment using VNC Viewer
While waiting for your Raspberry Pi to finish booting, download and install the VNC Viewer on your laptop. This app will display the board's desktop environment on your Windows or Mac.
Once the Raspberry Pi finishes booting (when the green indicator light disappears), you can connect to the VNC Viewer.
- Launch the VNC Viewer.
- Click on "Use VNC Viewer without signing in."
- In the search bar, type "raspberrypi.local" (without quotes). Then, hit Enter.
- In the Identity Check pop-up, click on Continue to connect to the Raspberry Pi board.
- Enter your username (pi) and password in the respective fields. Then, click OK.
If you're on a Windows device, you can immediately see the Raspberry Pi desktop environment and be able to use it right away. However, on a Mac, you need to configure additional settings.
1. In the pop-up, click Give access.
2. In the Accessibility Access pop-up, select "Open System Preferences."
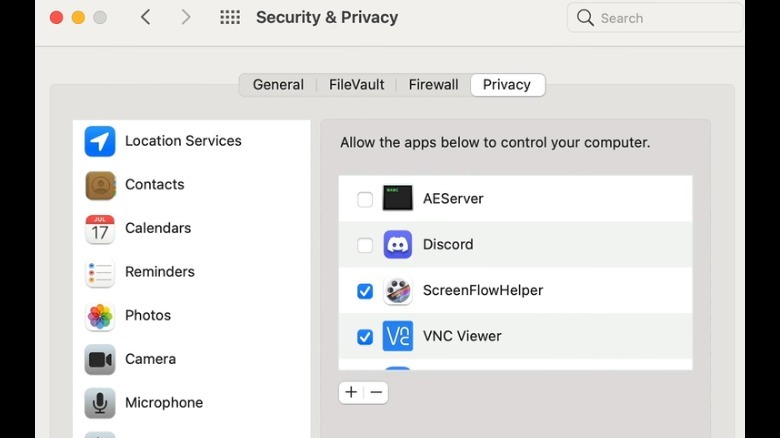
3. Click on the padlock icon in the bottom-left corner of the Security & Privacy window.
4. Type your laptop's password when prompted. Then, click Unlock.
5. In the Privacy tab, mark the checkbox for VNC Viewer. Then, close the window.
You'll now be able to use the Raspberry Pi desktop environment with ease. Feel free to connect to your Wi-Fi network and update your Raspberry Pi as needed.