SlashGear Review - NZXT Sentry LX
When you're overclocking, or even just have a higher-end gaming rig, you probably like to know just how hot things are getting inside your case. More so with overclocking, as you tend to run the risk of pushing your components a little to far and frying them due to the excessive heat. Usually your motherboard will come with a nice hardware monitoring utility, but I don't generally like those, as they take up valuable real estate on my desktop. Not to mention you can't always check temps during a gaming session without minimizing your screen. I prefer hardware gauges, such as the new Sentry LX from NZXT, which I have had the pleasure of using.
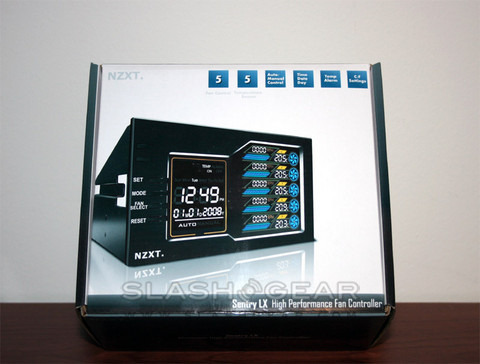
So pulling out the Sentry LX, we can see that it has a rather large LCD screen, which will take up two of your 3.5" drive bays. Since it tracks 5 temp probes and can control up to 5 fans, bigger is certainly better in this case. For testing purposes, I figured that the NZXT Tempest would be an appropriate case. The Sentry LX almost seems like it was made just for the "Airflow King" since it can handle almost all of its 6 fans.
When you're putting in the Sentry, you'll notice that there are a ton of cables. You've got 5 temp probes and 5 3-pin fan connectors (not to mention the molex power cable) which can seem a a bit overwhelming. Well every one of those cables is useful (and well labeled), and each is more than long enough to reach every corner of your case, so buck up and bust out those awesome cable management skills.

Normally I would install temp probes on the CPU, GPU and my main HDD first, however, since the Sentry also controls my case fans I thought I'd change things up. The Sentry has auto and manual modes for controlling the fans. When in auto, it will adjust the fans according to the temp readings from the closest probe. Since I can't control my CPU or GPU fans, it's a little bit harder to do. I ended up putting one probe on the back side of my GPU (which still gets a good reading), one on my hard drive (there's a fan directly in front of it) and the other three I placed strategically throughout the case.
After everything was installed, I fired up my system and was greeted with a beautiful LCD readout of temperatures, fan speeds and the date/time. Setting the clock was a breeze, and without even touching any buttons, the system sorted out my temperatures and adjusted the fan speeds accordingly. I could then manually select an individual fan to control (the rest would stay in auto mode) or I could manually set each fan to the speeds I liked. Being the lazy person I am, I left it in auto and was pleased with the results.

One thing I will note about the LCD is that it can be difficult to read from certain angles. Like many LCD screens, it doesn't look the best from high angles, though just leaning back in my desk chair is enough to distinctly read the numbers. One thing I would do differently is to move my optical drive down, and put the Sentry in the first two bays. This would likely take care of the viewing issue.
Overall, I loved the Sentry LX. Enthusiasts will love the control it gives you over the fans to not only keep your system running cool, but to also keep it quiet. Many times your fans are spinning up much faster than what is necessary, so slowing them down can cut down on noise considerably. Your best bet as far as temp probe placement goes is to actually place one on the GPU and another on the CPU. Due to the amount of control that the Sentry LX gives you, you'll just want to manually set the fans associated with those two probes, which will allow you to keep it partially on auto (or some of you may not even have 5 fans, so you wouldn't need these extra connections).

The Sentry LX is going to set you back $59.99, which I think is more than reasonable for what you're getting. You'll be hard pressed to find a similar piece of equipment for a better price.