The Privacy Settings You Need To Change After Installing Windows 11
Data privacy has become a buzzword in recent years as more people grow increasingly concerned about where their data is being used and how they can keep their activities more private. Although it's impossible to protect all of your data completely in today's connected world, Windows 11 gives you the option to choose which information to send to Microsoft and which is kept out of the tech giant's hands.
In comparison with Windows 10, the newest version of the OS puts a greater emphasis on privacy. Microsoft's Vice President for OS Security and Enterprise David Weston shared on Twitter that the company added a new privacy feature that helps users check when apps access sensitive devices like your camera and microphone. Apart from this new feature, there are also several other settings in Windows 11 that you should check out and consider disabling if you want to maintain as much privacy as possible.
Change your camera and mic permissions
Unless you have malicious software hiding on your computer, you probably won't need to worry about someone spying on you using your device's microphone and camera. However, it's always a good idea to turn off your apps' access to this hardware so they won't be able to use them in the background without your knowledge.
To manage which apps can use your mic and camera, follow these steps (via Microsoft):
- Open the Settings app.
- Go to Privacy & security.
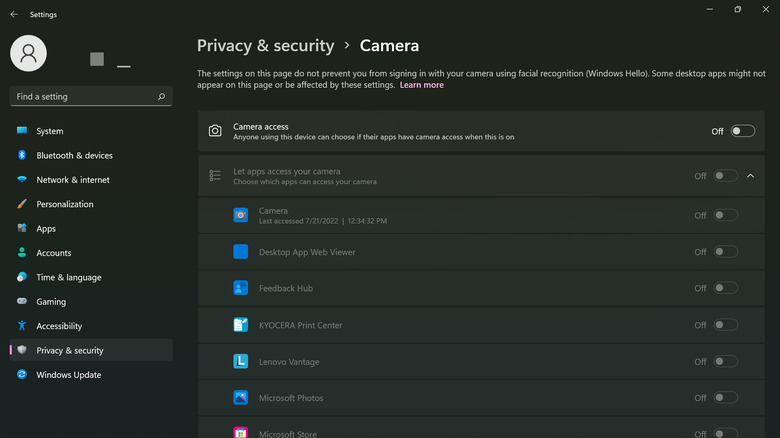
- To manage camera access, click on Camera under "App permissions."
- Turn off the toggle for "Camera access."
- (Optional) If you want to allow certain apps to use your camera, keep the "Camera access" setting turned on and select the apps from the list.
- To manage microphone access, click on Microphone under "App permissions."
- Switch off the toggle for "Microphone access."
- (Optional) To let selected apps use the mic, keep "Microphone access" on and turn off unnecessary apps in the list.
Keep in mind that entirely disabling the microphone and camera will be a hassle if you regularly participate in voice and video calls, as you'll need to re-enable them before every session.
Clear and disable activity history
Activity history is essentially Windows' way of tracking everything you do on your PC, from what websites you hang out on to what you do in your apps. Microsoft uses this data to personalize your experience on Windows and give you suggestions that are relevant and useful to you as a user, the company explains on its website.
While by default, this data is only stored on your computer locally, it can be synced to the cloud in some cases if you decide to sign in to your Microsoft account. If you're uncomfortable about Windows monitoring your every move on the PC, you can easily disable this setting.
To turn off activity history and delete any collected data, do the following:
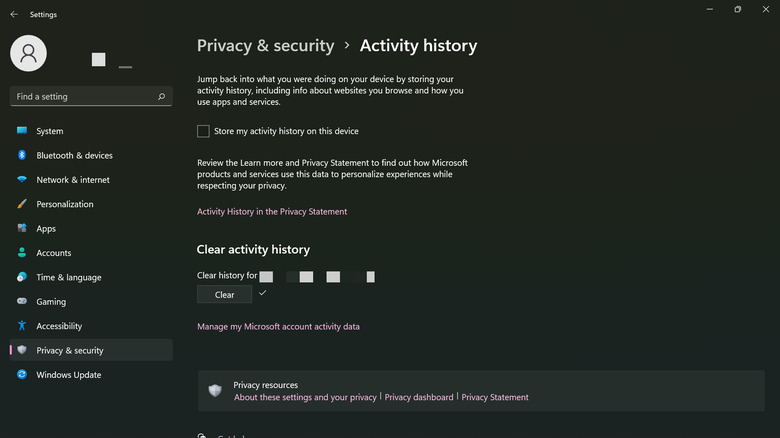
- In the Settings app, navigate to "Privacy & security."
- Select "Activity history" under "Windows permissions."
- Unmark the checkbox for "Store my activity history on this device."
- Click on the Clear button under "Clear activity history."
Disable location services
Arguably one of the most sensitive pieces of information you have to protect when using electronic devices is your location, and others can learn a lot about you based on where you regularly travel. In Windows' case, this setting is turned on by default for certain reasons, such as to give you correct directions to a destination of your choice or suggest nearby restaurants and hotels. This is also particularly useful for finding your device in case you misplace it. The good news is that Microsoft removes any identifying data before sending the location to the cloud.
However, if you still prefer not to give location permission to your computer apps, you can easily disable access with only a few clicks. Here's how you can do it (via Microsoft):
- Open the Settings app.
- Go to the "Privacy & security" tab.
- Scroll down to the "App permissions" section.
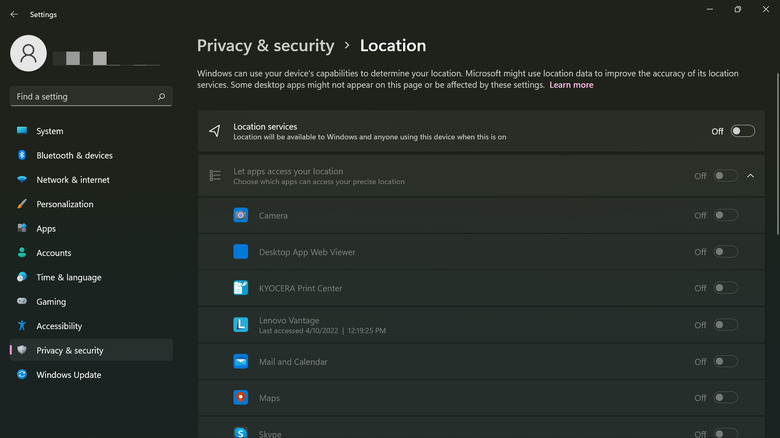
- Select Location.
- Toggle off the Location services.
- (Optional) If you want to grant access to select apps, turn on Location services and pick the individual apps from the list.
Switch off sending optional diagnostic data
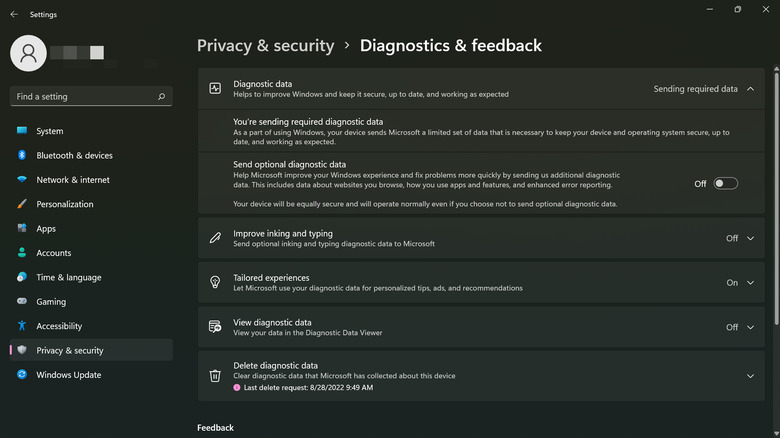
Diagnostic data is anything that has to do with your device, such as how you use it, what its capabilities are, and whether it functions as intended. In Windows 11, there are two types of diagnostic data you need to take note of: required and optional. The required diagnostic data is used to keep your computer running as smoothly and as efficiently as possible. This is always sent to the cloud so Microsoft developers can know how to troubleshoot any issues or what upgrades to send your way.
On the other hand, the optional diagnostic data is used for improving apps and services to give you a better experience. This data is typically comprised of app activity and browsing history. To prevent your computer from sending optional diagnostic data to Microsoft, here's what you need to do (via Microsoft):
- In your Settings app, go to "Privacy & security."
- Select "Diagnostics & feedback" under Windows permissions.
- Expand the Diagnostic data menu.
- Turn off "Send optional diagnostic data."
- Expand the "Delete diagnostic data" menu.
- Click on the Delete button to clear any diagnostic data collected.
Note that if your computer is managed by a third party, such as your work or school, Microsoft says you may not be able to access these settings and delete that data yourself — Windows may say that some settings are hidden instead. In that case, you'll need to reach out to the person who manages the devices to see whether they are willing to change the settings for you.
Turn off personalized ads
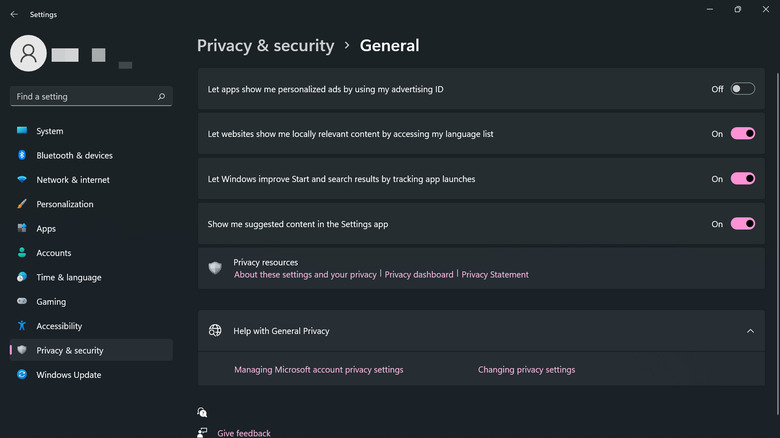
Windows 11 sends relevant ads and recommendations your way by using something called an Advertising ID; it's unique to every user and functions pretty much like how websites use cookies to offer you ads that match your interests. Although turning off the Advertising ID does not reduce the frequency and amount of ads you see on your device, it is still worth disabling to increase your privacy. Here's what you need to do (via Microsoft):
- Launch the Settings app.
- Open the "Privacy & security" tab.
- Choose General under "Windows permissions."
- Turn off the toggle button for "Let apps show me personalized ads by using my advertising ID."
These settings are only a few of the handful of privacy checks you need to do on your Windows 11 device. There are several more options you can disable under the "Privacy & security" tabs in the Settings app. However, you don't necessarily need to switch off everything; only disable the ones that don't meet your needs and usage as you see fit.