8 Best Uses For Old Flat-Screen TVs
When televisions were first invented, they were an expensive status symbol. Such is the case with almost any new technology. Even as recent as a generation or two ago, you wouldn't expect to find more than a single TV in the average home, proudly displayed in the living room where the family could gather around and watch programming together. Recent data suggests that today, there's an average of 2.3 television sets per household (via Nielsen).
All of which is to say, buying a new television has become an increasingly common affair. With large, feature-rich sets as affordable as they have become, you might be considering an upgrade. If so, you're likely to find yourself with a spare flat screen on your hands, and nothing to do with it.
Recycling your old tech can be a hassle — but a necessary one, considering the toxic materials they house — and it's always better to give something a second life if you can. After all, if you paid for it, you might as well get as much utility out of your old set as possible. Just because a television was designed for a specific use doesn't mean that's all it can do. With a little creativity, or at least the ability to follow directions, there's a place in your life for that old flat-screen TV.
Second Monitor for Your Computer

These days, there's not a whole lot of difference between modern (and even not-so-modern) flat-screen TVs and computer monitors. For all intents and purposes, they're more or less the same thing, just intended for different primary uses. The biggest difference you're likely to find between your TV and a dedicated computer monitor is the inputs. Your TV likely has some additional RCA ports you probably won't need.
With just a few minutes and, potentially, an accessory or two, you can hook up your old TV to your computer, and upgrade your existing monitor to something larger, or add it as a second display. If you're lucky, you already have everything you'll need to get started. Provided your computer uses HDMI outputs, simply connecting your TV with an HDMI cable and powering it on should do the trick. Some computers, however, utilize a display port instead of HDMI. They look pretty similar, but the shapes are different. No matter how hard you try to cram an HDMI cable in the port, it won't fit. If that's the case, you'll need a simple HDMI adapter to convert the signal.
If your computer happens to use DVI, even with an adapter, you'll pick up video but not audio, and you'll need a separate set of cables to send the audio signal (via Gadget Review). Once you're connected, make sure your TV is switched to the correct input, and you're off to the races.
Smart Mirror
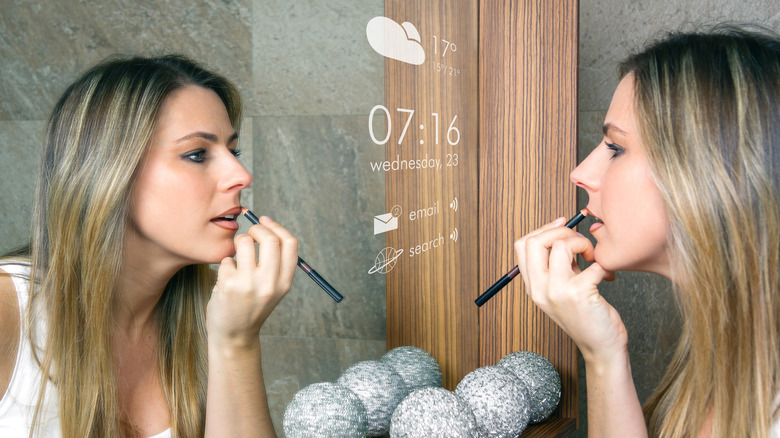
Smart mirrors are incredibly cool, bringing all of your digital feeds right into your bathroom, but they aren't cheap. Depending on the size and features, you're looking at an investment of several hundred dollars on the low end, and over $1,000 on the high end.
It's much more affordable to make one yourself, especially if you already have a TV just waiting to be integrated. Two Way Mirrors has a comprehensive guide on how to make your own mirror TV, with plenty of different options depending on the materials you have on hand, your budget, and your woodworking skills, but the basic premise is relatively simple.
The main component, aside from the television, is a semi-transparent reflective material. Simply slapping your TV behind your existing bathroom mirror won't achieve the effect we're looking for. You want a two-way mirror that will let light come through from behind. Mirror film applied to glass could do the trick. It's affordable, but it won't look as nice, and likely won't stand up over time.
The technology here is pretty minimal, as the mirror does most of the work. When the TV is off, it will look like an ordinary mirror. When the TV is on, you'll be able to see the picture through it. From there, it's just a matter of figuring out what information you want displayed. Hooking up a Chromecast is a simple solution, or you can use a Raspberry Pi to customize your display.
Daylight Panel

If you're willing to almost completely disassemble your TV, you can transform it into an impressive daylight light source that looks, at first glance, as if you're peering at a distant sky from a considerable distance.
The secret ingredients are the layers of technology inside your television, which transform the backlight into a well-distributed light panel. The first thing you're going to need is a screwdriver to dismantle the television. Removing the screws at the back should give you access to the interior. Once inside, you'll want to get rid of any internal gadgetry you can pry loose. Be careful while you're doing this to avoid electric shock from any components which may be holding a residual charge. It might even be a good idea to let the TV sit for a while after it has been unplugged. Once you've removed everything, you'll be left with just the display panel.
Prying that open will reveal a many-layered sandwich made of a Fresnel lens, reflectors, and diffusion panels. Behind them, you'll find the backlight. Those layers take the backlight and spread it out. They also serve to make the light source appear as though it's further away (via DIY Perks).
Powering the backlight could be a challenge, depending on how it's laid out, so DIY Perks recommends replacing it with a common strip of LED lights. Once that's done, you'll replace one of the diffusion layers, and the Fresnel layer, and box it up again. Job done.
Digital Dashboard

Just because your TV was intended for viewing movies and television shows, doesn't mean you can't use it to display just about whatever you want. If you're going to toss it out anyway, you might as well transform it into an effective dashboard for displaying any important information you might need at hand.
The process of transforming your old flat screen into a digital dashboard can be as simple or as involved as you want. For an example of a more complicated dashboard, but one which looks pretty cool, check out this tutorial from Thomas Sanladerer.
You can mount the TV however you like, either in landscape or portrait orientation. It can work either way, but tipping it 90 degrees makes for a particularly affecting viewing experience, and may work better with viewing some applications. The real brains of the operation is a Raspberry Pi, which does all the heavy lifting of grabbing your data, and sending it to the TV screen. Connecting your Pi to your TV is as simple as taping or mounting it to the back, and running a cable. Before that, however, you're going to have to install some software. Luckily, the Raspberry Pi community has done most of the work for you, and you can find a suitable guide here.
If you've done everything correctly, the Raspberry Pi can pull information from your calendar, notifications, weather, and more, and display it right on the screen.
Futuristic Transparent Display
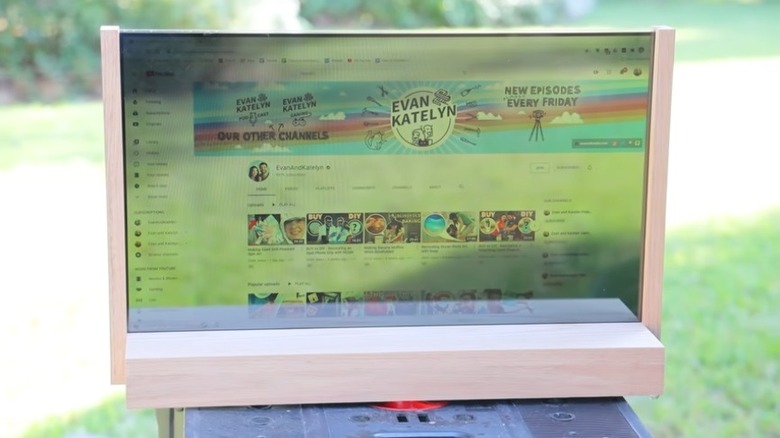
Countless science fiction movies and series have promised phones or video displays that are transparent, allowing the user to see the world beyond them, through the screen. We're not sure how practical a transparent display actually is, but it is certainly cool.
YouTubers Evan and Katelyn did the hard work of figuring out how to make a transparent display happen by stripping down the components of an old TV. You can watch the entire process, but we'll break down the basics. Fair warning: This project requires even more breakdown than the daylight panel, and there's a considerable risk something will break in the process. You were going to throw the TV away anyway, so it's worth a shot. Right?
In this case, the TV works by having a light layer that passes through a liquid crystal display to color it. As before, there are also filters that diffract the light and provide anti-glare. You'll dismantle your television, careful not to ruin any of the electronics so that you can reassemble your modified display when you're done. The goal is to isolate the display without any of the housing, so you can see through it to the world beyond. Doing just that, and putting it into a new frame sandwiched between protective glass, will do the job. But as you'll see in the video, soaking the anti-glare filter with wet paper towels and removing it will improve the picture.
LCD Curtains
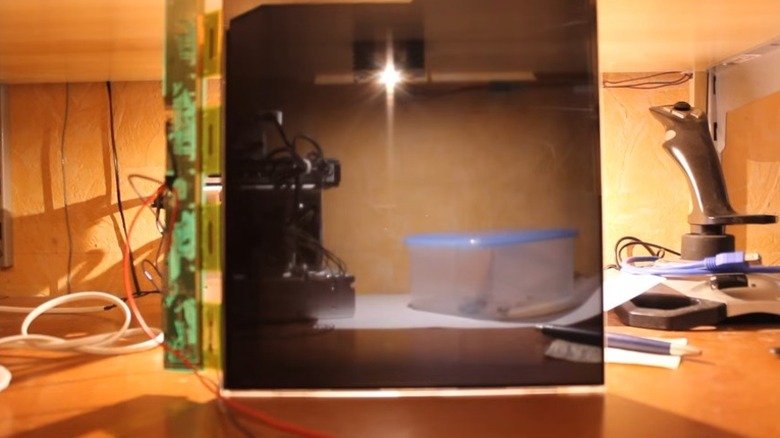
This works on a similar principle as the above-mentioned transparent display. Your screen wants to provide a picture, but needs something to tell it what to display. When powered off, you see an opaque black screen, but that's due, at least in part, to the casing behind the display.
When the backing is removed, even without the anti-glare filter removed, your screen is partially transparent. When it receives a signal, that transparency can be replaced with an image. In theory, that means you can control, to some degree, the amount of light passing through it and reaching your eye.
Artem Litvinovich at RibbonFarm used the inherent characteristics of an LCD screen to create electronically controlled curtains to cover a window. Much like some of the other projects on this list, the process involves stripping your TV down, and isolating the LCD panel. From there, you'll have to identify which pins control the transparency and opacity of the screen (via Hackaday).
When powered down, the display will remain transparent (or at least partially transparent), and allow light through. When given power, it will go dark, and block out most of the light. You can control the level of opacity by controlling the amount of voltage sent to the panel. There you have it, digital curtains with the touch of a button.
Upgrade It to a Smart TV
Depending on how old your TV is, you might be upgrading to finally take advantage of the smart features modern television has to offer when connected to the web. Your old flat screen doesn't even have to be that old to have missed the smart TV wave: The first modern smart TVs only came out in 2007 (via Smarter Home Guide).
Many modern TVs come with internet connectivity, and a suite of streaming apps built in, but there are other ways to raise the IQ of your old set.
Moving your old set into another room (or even the garage or bathroom, we won't judge you) means having your entertainment wherever you go. All you need is a way to make it as smart as your new TV. There are a couple of ways to pull this off, depending on how much disposable income you have leftover after your new purchase, and what you might already have lying around (via Gadgets360).
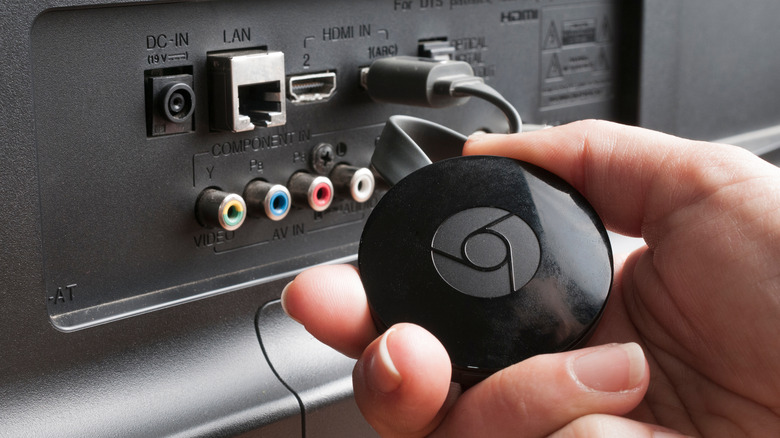
If you've got an old game console or laptop you're no longer using, stringing those up to the TV with an HDMI cable can give you access to online content with nearly limitless features. Otherwise, there are a number of small dongles including Google's Chromecast, Apple TV, and Roku which serve the same purpose by connecting to the internet, and delivering streaming content to your TV. All you need is the appropriate USB or HDMI input for the device you choose.
The Ultimate Retro Gaming Station
So far, we've discussed a number of creative ways to breathe new life into an aging TV set, but sometimes the best thing you can do is go back to basics. Your old TV might best serve you by acting as a dedicated gaming station for video games that are even older.
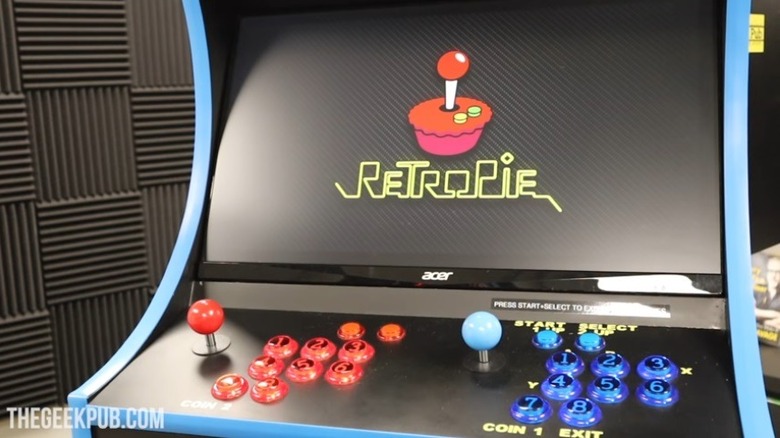
Instead of taking up space in a landfill, it could act as your own personal portal to every video game universe from the Atari to the Nintendo 64, and beyond. Once again, for this build, we'll be relying on the seemingly endless capabilities of a Raspberry Pi. Running RetroPie on your system can transform your TV, or any display connected to the Raspberry Pi, into the ultimate retro game emulator, allowing you to play your own library of game ROMs.
This guide from Make Use Of walks you through how to mount your Raspberry Pi inside your old TV's shell, and while that's objectively more streamlined, it isn't wholly necessary to achieve the desired effect. Placing your Pi nearby and attached with an HDMI cord is just as good, and will leave you continued access to the components in the event you ever need to get your hands on them again. Easy, elegant, effective. Happy gaming.