How To Turn Photos Into GIFs Using Photoshop
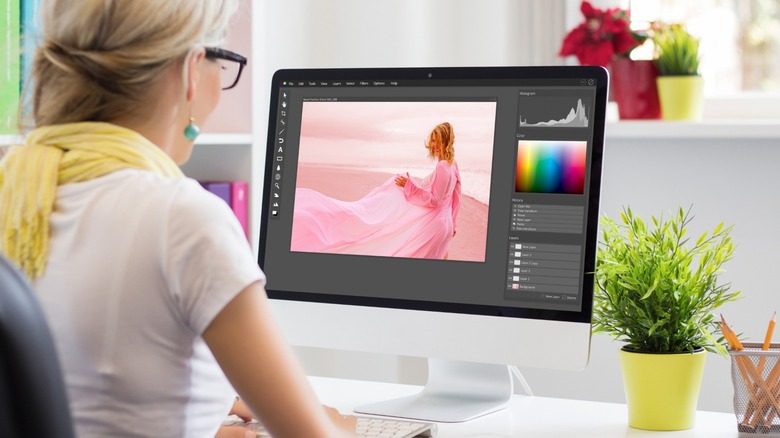
Photoshop is often thought of as a tool for manipulating still images. But this robust, sophisticated app can also handle animation. You can create animated GIFs and tweak them to your heart's content in a few simple steps. Once you learn the technique, making GIFs in Photoshop is ridiculously quick and easy. Photoshop has an array of tools that allow you to design banner ads, create GIFs from timelapse footage, and turn still images into animated GIFs.
Animated GIF files are made of a sequence of still images (or frames) brought to life when they're played one after the other. Photoshop does just that with a photo stack of your choice. The animation is smoother when you're using more photos and gets choppier with fewer frames.
You can edit each frame, customize the dimensions, add text, and pick how many times your GIF loops. Today we're running down the most simple step-by-step instructions for making a GIF out of a stack of images.
Load your frames

Before you begin, you'll need the full desktop version of Photoshop. The free Photoshop for Web lacks animation tools. Photoshop features a dedicated script to load multiple images as layers. Once imported, all files will be stacked onto the layer panel. You'll begin by preparing to load images into the stack first.
- Start by creating a new Photoshop document with your desired dimensions and resolution.
- To load your sequence of still images, navigate to File, Scripts, then Load Files into Stack.
- When the Load Layers window pops up, click Browse, select your image files, and click Open.
- Click OK to load all images into layers.
 SlashGear
The images should have the same resolution and dimensions. If you're using images from different sources, you can manipulate and resize individual images as you see fit. Once the stack is ready, you'll begin creating a timeline.
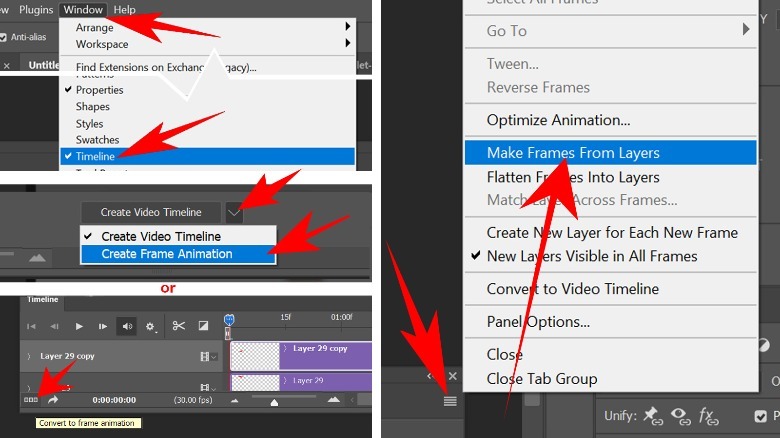
- Go to Window, Timeline to reveal the Timeline panel.
- Click the arrow icon next to the Create Video Timeline button and select Create Frame Animation.
- When the button changes to Create Frame Animation, click it.*
- Select all layers in the layer panel.
- Click the four-bar button in the corner of the Timeline panel.
- Click Make Frames from Layers to convert each layer into an animation frame.
- Click the small play button to preview the animation.
*If when you reveal the Timeline panel, there is no Create Video Timeline button, you may need to click the button in the lower left of the Timeline panel. This button (the one with the three squares) will Convert to frame animation. Continue to step 4 above.
Looping and exporting the GIF in Photoshop
By default, the delay between each frame is set to zero seconds. But you can shift-click to select all frames and click the downward-facing arrow to change the duration. The Timeline panel also lets you customize the loop count. It loops forever by default. Click the Forever button next to the player controls and choose however many times you want the GIF to loop before it halts to a still image. The presets can loop it once, three times, or forever, and Other lets you enter a custom number.
When you're finished, you'll need to export the GIF to your computer. We'll use a preset already available in Photoshop to optimize the animation and file size of the GIF (via Adobe).
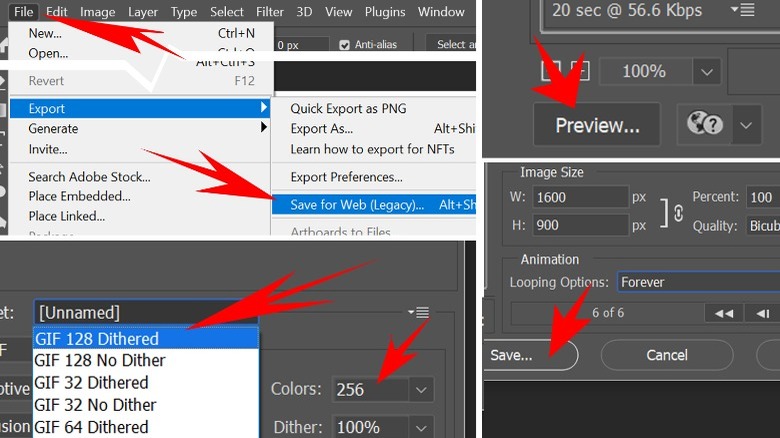
- Go to File, Export, and Save for Web (Legacy) to pull up the Save for Web window.
- From the Preset drop-down menu, select GIF 128 Dithered. Enter 256 for the Colors.
- You can also change the image size or the loop count.
- Press the Preview button on the bottom left to see what your GIF looks like inside a browser window.
- Click Save and choose a folder and name for your newly created GIF.
Once the GIF file is saved, the Save for Web window will automatically close. Your GIF is now ready for use.