How To Use A Makita Track Saw With Guide Rails
Cutting long, straight lines across wood or making "rip" cuts with a circular saw is much more challenging than you imagine. Following a crisp line marking the cut through the saw's baseplate notch can quickly go from accurate to awful, costing you time, materials, and money. Not to mention that according to Army Safety, there are more than 40,000 circular saw accidents every year.
Those in the construction trade can develop the ability to pull off perfect rip cuts after years of practice, but weekend warriors might need help to accomplish straight lines. Of course, you could always opt for a table saw, which includes a built-in rip fence. But table saws aren't inexpensive, with prices starting at $129 and going upwards of $20,400.
Fortunately, another option is the Makita 6-1/2 inch Plunge Circular Saw Kit, which includes a 55-inch guide rail. When used correctly, this guide rail ensures that those lengthy cuts are precise and straight. That will come in handy while building custom shelves, for example. But how does the guide rail work, and what else might you need for the best cuts?
How to prepare the guide rail for cutting
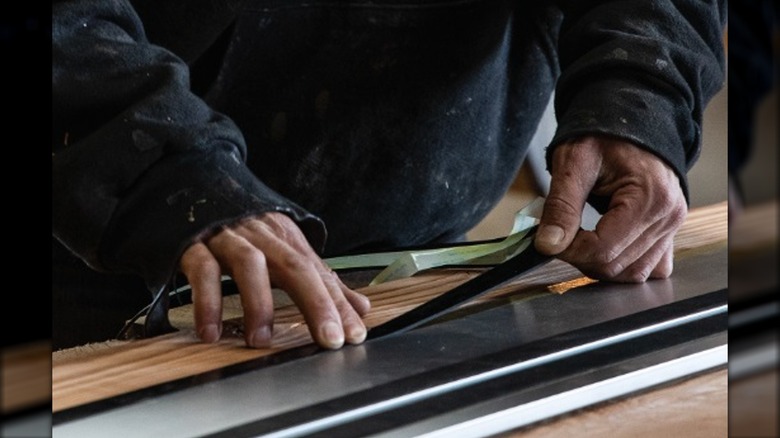
The guide rail, one of several Makita tools you'll want for DIY carpentry projects, comes equipped with rubber strips along the bottom that help prevent sliding. However, you'll need to ensure your cutting surface is debris-free before placing the rail down. You will want the side with the splinter guard (a small rubber strip along the edge) placed at the cut. The splinter guard helps create a cleaner cut by pressing down along the edge during cutting, keeping the fibers of wood from pulling away from the material. One way to ensure a clean cut through tough material is a fresh blade. You can check out our saw blade buyer's guide to help you choose the best option for your project.
If you would prefer to anchor down the guide rail, accessories such as Makita clamps are available. These clamps hook to the underside of the guide rail and pivot so an adjustable knob can tightly press against the bottom of a work table. Clamps ensure the rail doesn't move during the cut and are especially useful when ripping through thicker wood.
How to attach the saw to the guide rail

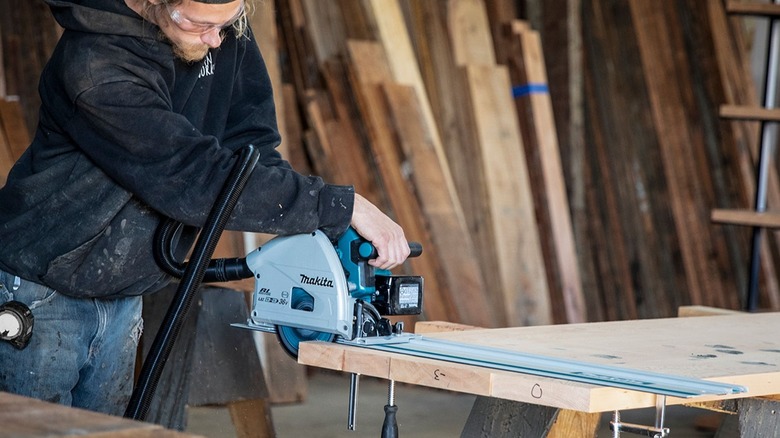
You might expect that positioning a circular saw on the guide rail would involve several obtuse steps that will have your nose buried in the instruction manual. But actually, it's fairly simple as there is a raised notch on the guide rail that the saw's baseplate fits snuggly into. Once you set the saw into the guide rail, it should slide freely across. There are knobs that can fine-tune the fit on the guide rail, and you'll want to set those for an optimum balance between a secure fit while also ensuring they're not too tight so the saw moves smoothly down the track.
Once the saw is placed into the specially formed track, a lock lever keeps the saw firmly on the aluminum guide, preventing slipping or unnecessary movement. This anti-tip lock is especially useful when performing a beveled cut at an angle and is activated by a small slide latch on the baseplate. When the latch is engaged, it pushes a connected metal disc under the baseplate into a nook on the rail, keeping the saw steady.
How to make straight cuts longer than 55-inches
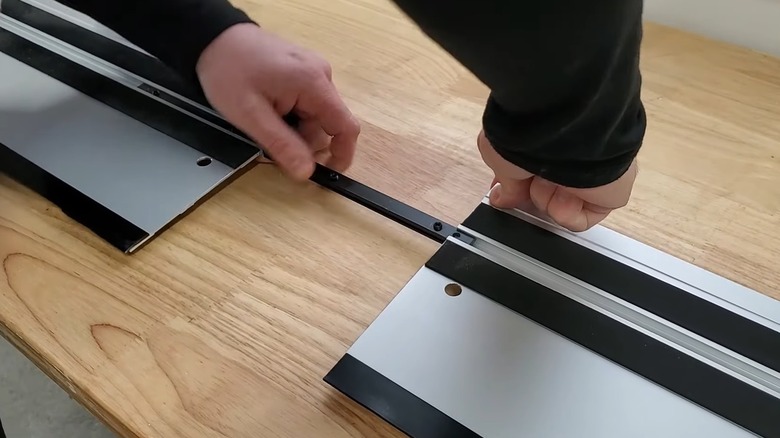
So, you've positioned your guide rail on the material you wish to cut and lowered your saw into the guide, but you realize the cut is much longer than the length of the rail. You can attempt to make partial cuts, then move the rail and saw forward, attempting to line up with your previous cut. But, this can be problematic as even a small difference in the two cuts will be noticeable. Fortunately, there is a way you can attach two 55-inch guide rails together so you'll be able to make even longer rips across building materials.
The Makita Guide Rail Connector Kit makes it possible to connect multiple guide rails with two flat steel rods that are installed underneath within a groove. You place the two steel rods together, and there are bumpouts on one rod that fit snugly into the other one. Then, slide them halfway into the end of one guide rail and the other half into the end of another rail. The connectors also feature holes and come packed with hex screws so that you can utilize an Allen wrench to tighten the rods to each guide rail for extra stability.