Here's How To Record Your iPhone's Screen
Whether you saw a funny Instagram Reel that you want to share with your best friend or want to record a short step-by-step tutorial teaching someone how to use their iPhone as a hotspot, you've probably needed to record your iPhone's screen at some point. While there are tons of third-party apps available on the App Store that you can use to record your iPhone's screen, what if we told you that there's a built-in iOS feature that allows you to do the same?
As long as your iPhone is updated to iOS 11 or later, you no longer need to rely on third-party apps anymore. Keep in mind that while the built-in screen recording tool can record everything that appears on your screen including notifications, the tool can not record DRM-protected apps. For instance, Netflix uses DRM, which means that you can't use the Screen Recording tool to record your favorite movies and shows. So, whether you're a first-time iPhone user looking for tips and tricks or have been using Apple devices for a while now yet rely on third-party apps, we'll show you two different ways to record your iPhone's screen.
Using your iPhone
By default, an iPhone's Control Center has several useful tools added like Wi-Fi, Airplane Mode, Bluetooth, and Volume and Brightness controls. However, you can customize your Control Center to reduce the number of times you have to open the Settings app to perform basic options. To record your iPhone's screen using iOS's built-in feature, you must add it to your Control Center by following the steps below:
-
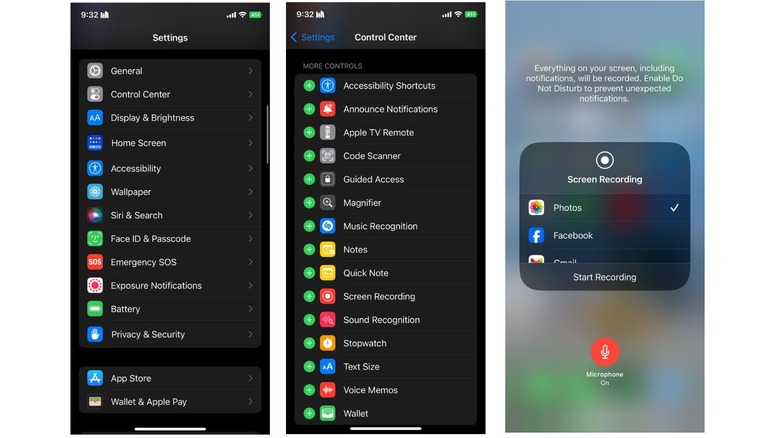
Open the Settings app on your iPhone.
-
Tap Control Center.
-
Scroll down until you find Screen Recording under the More Controls section.
-
Tap the green plus (+) icon next to Screen Recording, and it'll automatically move to the Included Controls section.
To record your iPhone's screen, access the Control Center. If you have a model older than the iPhone X, you can access the Control Center by swiping up from the bottom of the screen. For devices above the iPhone X, all you need to do is swipe down from the top-right corner of your screen.
Now, you should see a Screen Recording icon. Tap it and a three-second countdown will begin. While screen recordings do record internal audio by default, external audio isn't recorded. So, if you'd like to record a voiceover to go along with your screen recording, long-press the Screen Recording icon and tap the Microphone button. Now, every time you begin a screen recording, external audio will be captured.
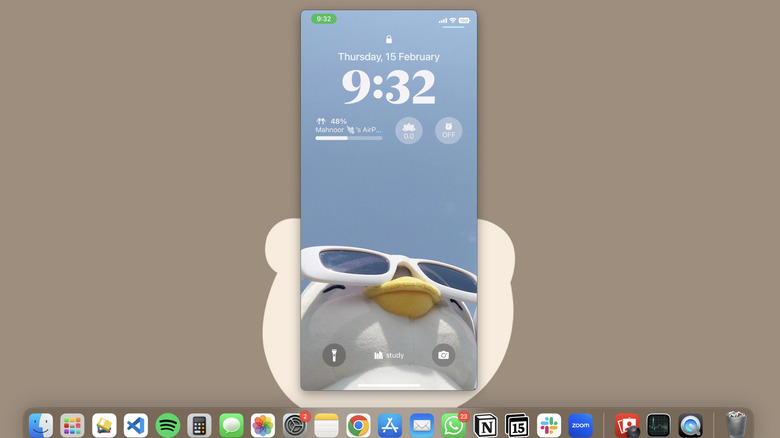
Once you've recorded your screen, you can stop by going to the Control Center and tapping the Screen Recording button once again or by tapping the red status bar at the top of the screen or the Dynamic Island. You can access your recording by heading to the Photos app.
Using your Mac
Another way to record your iPhone's screen is using your Mac with your iPhone's charging cable. Here's what you need to do:
-
Connect your iPhone to your Mac using a Lightning or USB-C cable.
-
If you're connecting your iPhone to your Mac for the first time, grant your iPhone permission to allow your Mac to view your files. To do so, simply tap Trust when the pop-up appears.
-
Click the Launchpad icon on your Mac's Dock and open QuickTime Player. Unless you've moved your apps around, you should find it in the Other folder by default.
-
Click File in the menu bar and select New Movie Recording from the dropdown. A new window "Movie Recording" will open automatically.
-
Click the arrow icon next to the recording button and select your iPhone's name under the Screen section.
-
Once you turn your phone on, you should see your iPhone's screen on the window. If you'd like to record your iPhone's internal audio as you record, click the arrow and select your iPhone's name under the Microphone section. You can also record external audio using your Mac's Microphone or a microphone by selecting it under the Microphone section.
-
To start recording, click the Recording button in the middle of the screen.
-
Once your screen recording is complete, click the Recording button to end it.
-
Click File in the menu bar and select Save from the dropdown.
-
Name your recording by typing it next to Export As.
-
Finally, click the Save button.