How To Use Windows Photos' Magic Eraser Tool With Generative-AI

After countless tries, you've finally hit the jackpot and nailed that perfect selfie on the beach. But as you zoom into the photo, you spot an obnoxious passerby in the background, completely ruining your masterpiece. So what do you do? Sure, you can try striking that same pose again, but there's no guarantee you'll get the exact lighting and angle as the original picture. The second best route is to simply edit the intrusion out. However, that typically means you'll be turning to Photoshop or one of the Photoshop alternatives to edit your image. These apps aren't really as affordable or user-friendly as you'd like, and if you're new to advanced photo editing tools, you'll likely end up with an even worse picture.
But there's some good news for Windows users. You won't have to shell out some cash or spend ages learning complex software. Microsoft has recently introduced a convenient and easy-to-use eraser tool called Generative Erase within the built-in Photos app. Here's an overview of what this feature is and how you can start using it on your PC.
Set up your PC to use the Generative Erase feature

Windows' Generative Erase feature is essentially an object eraser tool that incorporates generative AI capabilities. Instead of simply fading or blurring the unwanted objects and often leaving behind a noticeable mark, Generative Erase removes them seamlessly and fills in the background in a way that looks more natural with the rest of the image. Generative Erase is designed to work well for both small blemishes and big obstructions.
As of this writing, this feature is exclusive to participants in the Windows Insider Program. If you're not already a member but want to try out Generative Erase, here's how you can set up your PC:
- Sign up for the program on Microsoft's website.
- Follow the registration process to become a part of the program.
- After registration, download and install the Insider build on your PC.
- With your PC running the Insider build, check whether you're also using an updated version of the Photos app. To do so:
- Go to Settings > Apps > Installed apps.
- Scroll down to Photos.
- Click the three-dot menu next to it.
- Select Advanced options.
- Under Specifications, check the version number. At least 2024.11020.21001.0 is required.
- If your version of the Photos app is outdated, update it by doing the following:
- Launch the Microsoft Store.
- Look up Microsoft Photos.
- Open the app's details page.
- Click on the Update button to get the latest version.
Once you have Photos ready, you can now start using the Generative Erase feature to edit your pictures.
Using the Generative Erase on the Photos app
Here's how to use the newly launched Generative Erase feature on your Windows computer:
1. Open the photo you want to edit in the Photos app.
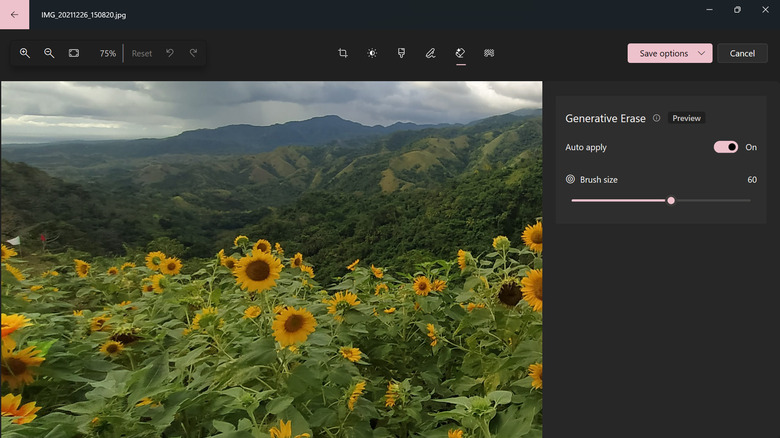
2. Click the Edit option (picture and pen icon) at the top.
3. Select the Erase tool (eraser with sparkle icon).
4. To erase a single object from the image:
 Marinel Sigue/SlashGear
a. Keep the "Auto apply" option on.
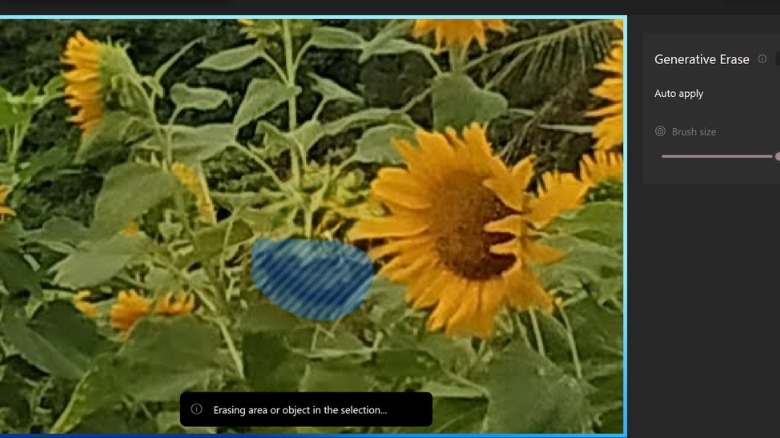
b. (Optional) Zoom into the area you're interested in to make it easier for you to precisely erase the unwanted object.
c. Adjust the brush size to your liking.
d. Brush over the object you want to remove. As soon as you lift the brush, the image will automatically be processed, removing the area you covered.
5. To erase multiple, separate objects on the image:
 Marinel Sigue/SlashGear
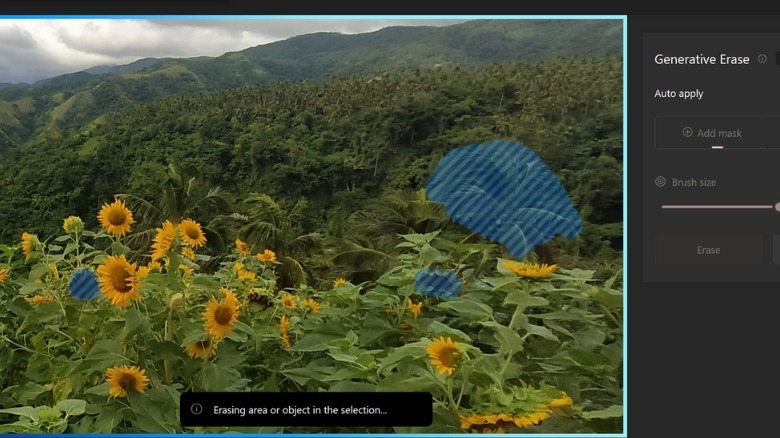
a. Turn off the "Auto apply" option.
b. Make sure you have "Add mask" selected.
c. Change the brush size as needed.
d. Use the brush to cover the separate objects you need to erase.
e. If you want to deselect an object, click on the "Remove mask" option on the side panel. Then, brush over the object again to remove the selection.
f. Hit the Erase button to proceed with the image processing.
6. (Optional) Use the other editing tools on the Photos app to enhance your picture.
7. Once you're done editing, press the Save options button at the upper right.
8. Choose "Save as copy" to keep both the original and the edited images or "Save" to replace the original image with the edited one.