5 Easy DIY Tech Projects Any Beginner Can Tackle
With technology advancing at an ever-accelerating rate, the gadgets and innovations you come across daily can often feel like they've jumped straight out of a science fiction movie. For instance, you can now talk with ChatGPT in your Mercedez-Benz and get a flying security camera to keep an eye on your home.
As a new DIY tech enthusiast, you likely won't be creating such ambitious and cutting-edge devices right off the bat. However, it's still quite a challenge to pick a weekend project to do when the sea of DIY tech options all look overly complex and require a level of expertise beyond what you currently have. But the reality is that there's a host of projects that are perfectly suited for noobs like you. Whether you're interested in coding, single-board computers, or electronics, here are five beginner-friendly DIY tech projects you can start with the next time you're in your workshop.
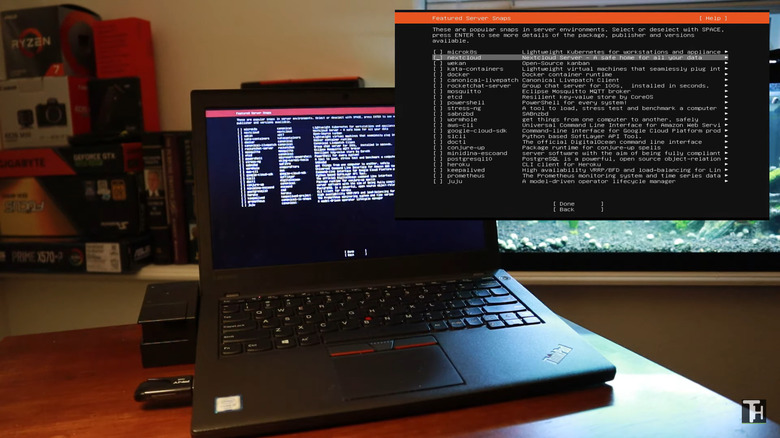
Media server out of old computer
There are only so many photos, videos, and music your primary computer and phone can hold. So, when one device runs out of space, you normally just transfer the files to another device. This is all fine and dandy until the moment you need those files, and you're forced to fetch the other device to access them. This back-and-forth can get tiring quickly.
So what can you do instead? Make a home media server using an old computer. A home media server is essentially a remote storage unit hosted on a dedicated computer connected to your home network. Any of your other connected devices can remotely access the files on this server, eliminating the need to come physically close to the storage device or rely on Bluetooth and flash drives for file transfers.
The project involves repurposing an old laptop into a server running Ubuntu alongside Plex, a popular private media-sharing platform. Plex allows easy access to your files from the comfort of your home and while on the go. There's zero coding required for this setup, as you'll mainly just install and configure the system. But you'll need to be familiar with some basic terminal commands.
Raspberry Pi timelapse camera
When it comes to timelapse photography, you can find various cameras with a timelapse feature; even your smartphone has this functionality. But there are some situations, such as capturing the sunset by the beach or documenting the long and winding process of 3D printing a dragon toy, when it isn't wise to leave your pricey action camera or phone out for an extended period. Setting up a dedicated timelapse camera might be your best bet in these cases.
The Raspberry Pi timelapse camera is as standard as it can get: it shoots videos at resolutions of 1920 x 1080 using a PiCamera v3 wide (one of the best Pi cameras for this application). However, it does come with standout features, one of which is automation. You can configure it to render the timelapse video automatically, saving you the hassle of manually compiling photos into a video. All captured content is then neatly organized into a specified folder on the Raspberry Pi, which you can access over the network from your PC.
The program codes are written in Python and can be a bit daunting for beginner coders. But the good news is that there's no need to tweak the code to adjust the camera settings. Instead, the project uses an editable text file for configuration. This is where you can set parameters such as start and end times, shooting intervals in seconds, the number of days for consecutive shooting, output video FPS, and even enable features like HDR, autofocus, and auto-deletion of old pictures. To create the project, you'll need a Raspberry Pi 4B, a PiCamera v3 wide, and a mini Pi TFT screen.
Trash-Bot
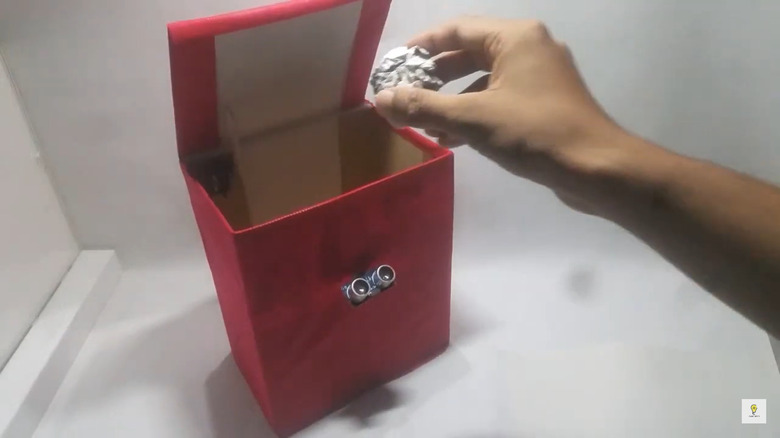
Touchless trash cans on the market can easily go for $80 and more. If you don't feel like shelling out that much for a bin but still want to transform your house into a smart home, building your own automated garbage can is a more budget-friendly alternative. The Trash-Bot is powered by an Arduino UNO board (the most expensive of the components at around $27) and uses only two other main components: an ultrasonic sensor and a servo, totaling about $40.
This DIY project's premise is simple. The ultrasonic sensor scans for any object within a range of 1.6 feet. Once you place some garbage close to the bin, the sensor sends a signal to the microcontroller to rotate the servo to 50 degrees, opening the lid. The lid is kept open for three seconds (just in case you have more things to toss) before the servo is rewound to 160 degrees to shut the lid.
While the project does require some C/C++ programming knowledge, the code is relatively short, with just 30 lines and basic functions — nothing too intimidating, even for beginners. Another plus of this DIY project is that it's made out of recycled cardboard boxes. That means you can customize the size to your needs without scaling up the cost (unlike commercial trash bins that become more expensive the bigger they get).
Smartphone-controlled LED strip

Your room could always use a bit of color and illumination, and remote-controlled LED strips are a great way to go about that. However, controlling these lights can sometimes be inconvenient because you don't want to get up and get the remote, or you lose the remote completely. That's why a smartphone-controlled LED strip light is more your style.
The project taps into the power of WLED, an open-source software designed to control NeoPixel (WS2812B, WS2811, SK6812) and SPI-based (WS2801 and APA102) LEDs over the network. It comes complete with a mobile app, where you can change the strip's color and apply an effect from a whole arsenal of options like Rainbow Runner, Aurora, and Wipe. Even cooler, you can link the LED strip with Alexa for voice commands, and if you already have Home Assistant set up, you can integrate the project with that, too.
The best part is that this is a no-coding project — all you have to do is set up the software in the ESP32 microcontroller board and configure the WLED app on your phone, and you're good to go. For the hardware requirements, you'd need the ESP32 board with a micro USB cable, a W2812B LED strip light, a 12V power supply for the LED strip, a 5V power supply for the ESP32, and a DC power connector.
Handheld game console
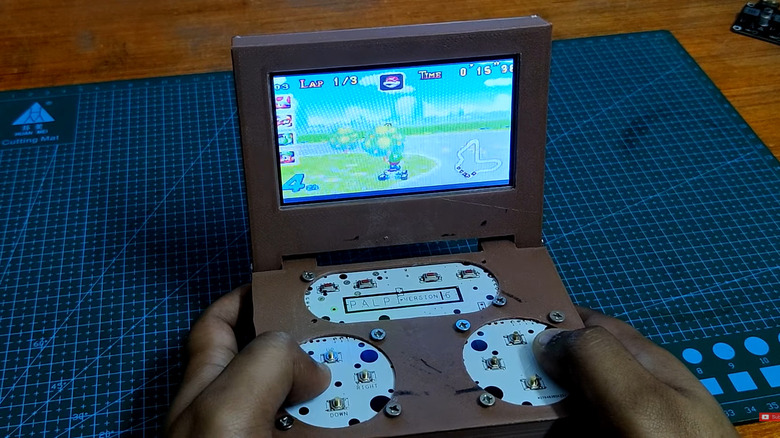
Chances are, you have a game or two on your phone to pass the time during lunch break or while on the train home. But mobile gaming on your smartphone isn't always the best form of entertainment, especially when many games require an internet connection or your phone's battery drains quickly because it's also your device for everything else. A practical workaround to this problem is to create a handheld console for your gaming needs.
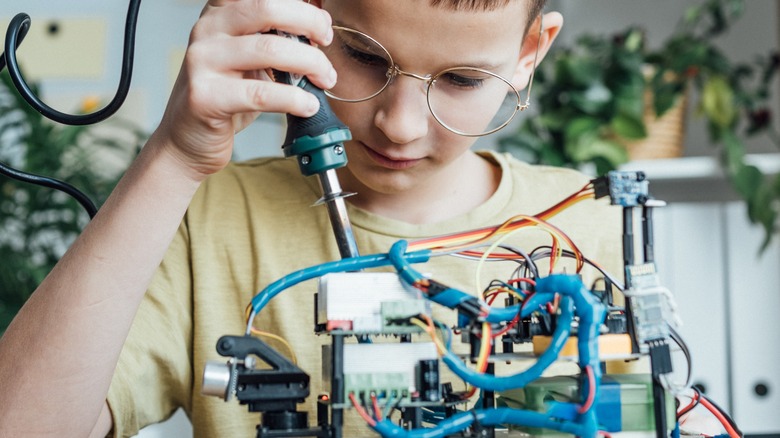
The PALPi v6 is a compact gaming console you can bring anywhere. Two 3.7V Li-ion batteries power it, and it runs on a Raspberry Pi Zero with Recalbox OS installed. This operating system comes pre-loaded with classic games but also allows for adding custom ROMs to personalize your gaming experience. The console's design is a nod to the iconic Gameboy Advanced (GBA) with its folded structure. You can game on it whether it's folded or not.
The bulk of the project-making process is assembling the electronic components, including IC, capacitor, resistor, and buttons, and assembling the primary components into the container. That said, the project is great for practicing your soldering skills. Software-wise, the only thing you need to do is install the OS (and your custom ROMs if you have any).