5 Tools That Will Come In Handy When Installing A TV Mount
There are a lot of great reasons to mount your TV. It clears off space on your entertainment stand, it allows you to position the height of the screen exactly where you want it without having to place an unstable pile of books underneath the base, and it just looks cool. There are even special mounts that can pivot and rotate so you can adjust your viewing angles to get your TV positioned exactly how you want it.
Putting in a TV mount does involve a little bit of DIY, however. You can always pay an exorbitant fee to have one professionally installed. Still, it's a simple enough process that anyone comfortable handling a drill and a few hand tools should be able to manage it. But while the task itself isn't overly challenging, having a list of the supplies you'll need is always handy to get the job done. You probably have most of these tools lying around the house already, but some of them might require a quick trip to your local hardware store. In any case, it's best to make sure that you have everything you need before you settle in to start your project. Here are the five tools that will definitely come in handy when installing a TV mount.
Stud finder
One of the first things you want to do when you're getting ready to mount your television is to find the best place to put it. You want the TV to look good wherever you decide to hang it, but you also want to make sure that the mount is structurally sound. A hole in the wall and a shattered TV aren't exactly peak aesthetics.
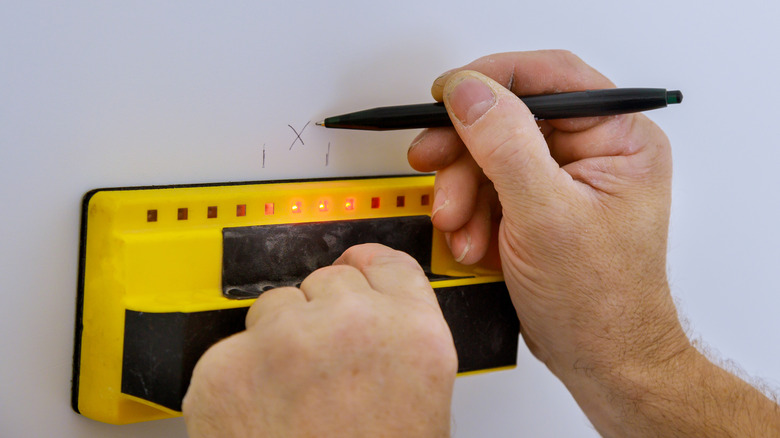
To mount your TV securely, you'll need to know where your studs are. Studs are the wooden posts that are hidden behind your walls. They are usually spaced around 16 inches apart, but the spacing might differ in certain homes. There are a few methods for finding them, but one of the easiest is to use a stud finder. You'll want to attach at least part of the TV mount by driving screws directly into the stud if possible, especially when dealing with larger, heavier televisions. This is much more secure than using drywall screws on the gaps between the studs.
A couple of different types are available, and most are pretty cheap. There are magnetic stud finders that search for the nails or screws that hold drywall to the studs, and then there are electric ones that light up and beep when they detect the change in density behind the drywall. Both are useful, though the magnetic ones are known to be a bit more precise. None of them are particularly helpful when mounting into brick, wood paneling, or concrete, however.
Tape measurer
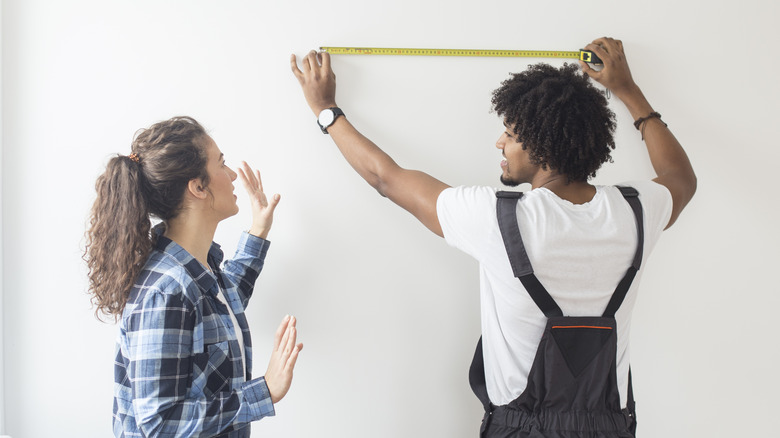
So, you've picked out the spot on your wall where you want to install your TV. You can close your eyes and practically picture movie night on the levitating flat screen. But before you break out the rig and fasteners, you should measure to ensure everything goes exactly where you want it. That's where the humble tape measurer comes in.
You may want to measure the distance from the edges of the walls to find the perfect center, or else you might want to measure to find the center point over a hearth if that's where you're mounting your TV (though there are a few reasons why you probably shouldn't). But no matter where you decide to mount it, you'll want to measure to find the exact height where you will be placing your screws.
Attempting to eyeball it is a surefire way to end up with a TV that is crooked and off-center. Proper and meticulous measuring will help to keep your television balanced and symmetrical with the décor in the room. A tape measurer will also be immensely helpful when it comes time to line up and mark the distance between the tapped screw holes in the mount where you will be placing the mounting fasteners. It may be simple, but it's an essential tool.
Level
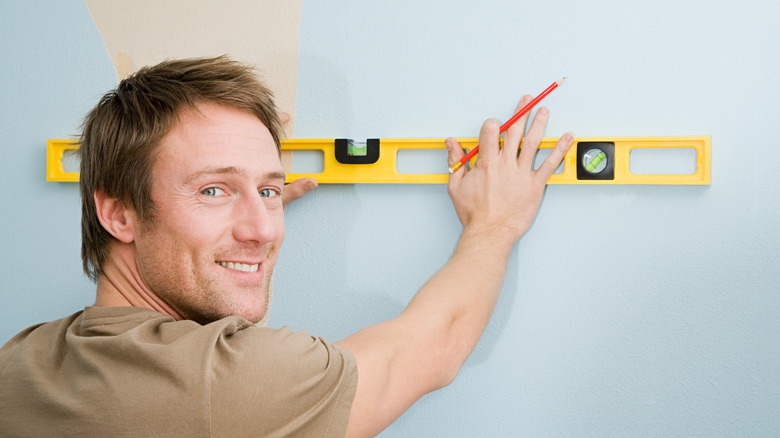
Once you have the location for your TV mount all picked out and marked, you'll want to double-check that it's perfectly level. To do this, you'll need — you guessed it — a level.
Levels are extremely affordable devices that should be an essential part of any home tool kit. The way they work is simple. There is a glass tube full of neon-colored liquid on the level's side. This tube has two black lines going around it and an air bubble inside the liquid. Line up the level's frame across two parallel points you will be drilling to attach the TV mount. If the bubble floats in the center between the two black lines, then the points are level. If not, you may have to remeasure until you get points that are.
If you wish to simplify this a bit, you can also hold the level along the top of the frame itself while pressing it against the wall to make sure that it's level. You can then simply use a pencil to mark the locations of the drill points. This method saves time and hassle by taking a lot of the measuring out of lining up your marks, but it's tricky to do by yourself. It helps to have an extra set of hands to hold everything in place while you mark the drill points.
Drill
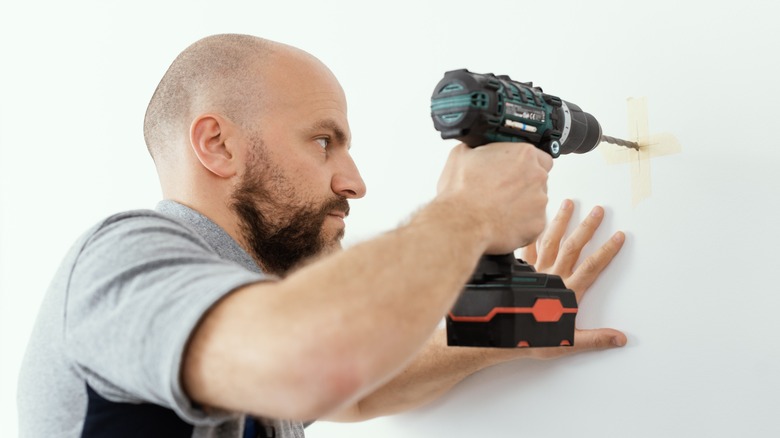
So now everything is measured, leveled, and ready to go. It's finally time to drill. A good power drill is another tool that's good to have in any household, but it's absolutely essential when mounting a TV. If you don't already have one, look at some of the options from the best cordless drill brands, like DeWalt, Milwaukee, Makita, and Ryobi, and choose the one that you think has the best features and fits your budget.
You're also going to need a drill bit set. The instructions for your TV mount should tell you what size bits you'll need to install it. There should be a recommendation for a smaller-sized bit that you will use when drilling directly into the studs if you've managed to find one and line it up with at least one part of the tapped holes on the mount's chassis. For any part of the mount that is just over drywall, you'll need to use a larger bit to drill a hole that fits the drywall screws, which should have been included in your kit. These can then be installed using a Phillips head bit.
Those who are mounting their TV in brick or concrete will need to separately purchase carbide-tipped masonry drill bits and concrete screws. The chisel-like tips and wings on these bits are the only ones designed for taking on these much more solid surfaces. Some of you may also opt to invest in an impact drill or hammer drill, as these tools may help you more easily bore into the brick or concrete.
Socket wrench set
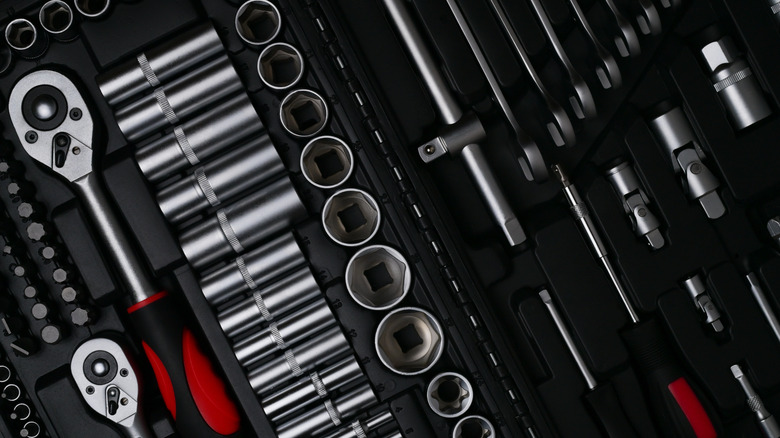
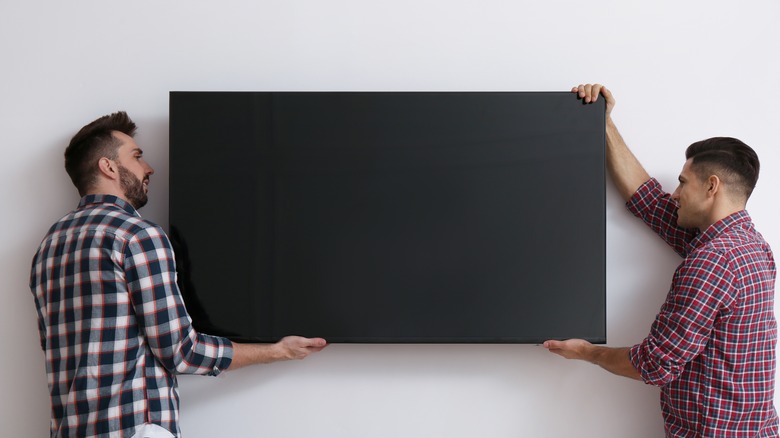
Once the mount is fully attached to your wall, it's time to install your TV. This is usually fastened using bolts–and when you have bolts, you need a socket wrench to tighten them. You might be able to make do with an adjustable wrench if you already have one, but it can be difficult to fit them in the narrow grooves and recesses often found on electronics. Sockets are narrower and often easier to work with in these gaps. Most sets also come with a decent-sized collection of sockets, so you should be able to find one that includes the socket size you need without too much trouble.
You don't want to over-tighten your bolts when you're installing them, however. Tightening them too much can strip the threading and make the fasteners less secure. The best practice is to get them as tight as you can with your fingers and then simply add a quarter turn with the ratchet. Otherwise, you can simply rotate them until you encounter moderate resistance, being careful not to force the bolt too far. This will ensure that your television is snuggly fastened to the chassis and shouldn't be falling anytime soon.
With that done, all that's left is to run a few cables, hide the wires, pop some batteries into the remote, and enjoy your newly mounted TV.