3 Settings You Need To Change After Updating To iOS 17.3

Apple has started the rollout of the iOS 17.3 update, and it is now reaching out to all compatible iPhones globally. The update introduces a handful of new features, some of which need to be enabled manually while others are available to use from the get-go. Among them are new Unity wallpapers celebrating Black History Month, improvements to the Crash Detection system on the iPhone 15 and 14 series, and native support for AirPlay casting to TVs in select partner hotel chains.
The more notable additions are collaborative playlists in Apple Music, complete with support for leaving emoji reactions on these playlists. Another convenient addition is that the AppleCare & Warranty dashboard on your phone will now show the warranty coverage status of all Apple devices signed in to the same Apple account. If you've already installed iOS 17. 3 update, here are some of the new tools that you should enable on your iPhone.
Protecting data on your lost iPhone
Apple has implemented a new security feature called Stolen Device Protection to enhance the protection of your iPhone. It ensures that even if someone gains access to your passcode and steals your iPhone, they will be unable to cause significant harm. Once activated, it mandates the use of Face ID for sensitive tasks like resetting Apple ID passwords and accessing locally saved passwords. By doing so, Apple ensures that only the original owner of the device can access their confidential Apple account information by verifying their identity through facial scan or fingerprint verification.
The primary objective here is to minimize the potential risks associated with unauthorized access to an iPhone's passcode and tampered Apple ID credentials. Furthermore, this feature introduces a location-sensitive delay for changing Apple ID credentials. Consequently, if someone attempts to modify your Apple ID password, they will be required to wait for a specific period of time. During this interval, you have the option to track your device using the FindMy network, remotely erase your iCloud content, and even file a lost device insurance claim with Apple.
Follow this path to activate it: Settings > Face ID & Passcode > Stolen Device Protection.
Open your playlists to friends and family
Another cool feature that iOS 17.3 introduces is the ability to create collaborative playlists. As the name suggests, you can create playlists and then invite friends and family members who can also add tracks of their own choice and even leave emoji reactions. You can also take an existing playlist and enable collaboration for it. This feature is only available for Apple Music subscribers, both standalone and in the form of bundle deals such as Apple One.
Here are the settings you need to change to enable playlist collaboration on Apple Music:
- Open the Apple Music app on your iPhone.
- At the bottom of the screen, tap the Library option and select Playlists on the next page.
- Select the playlist for which you want to enable collaboration or create a new one.
- On the playlist page, tap the three-button menu button in the top-right corner of the screen and select Collaborate.
- On the pop-up window that appears at the bottom of the screen, tap on the pill-shaped Start Collaborating button.
Control your music listening partners

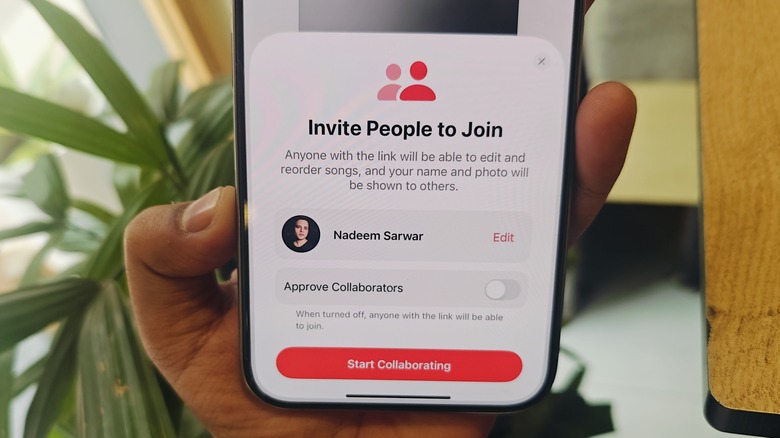
Once you have enabled the collaborative playlist feature in Apple Music, you can start sending invites to other people in your circle. Also, you no longer have to dig into the menu options to add new collaborators.
All you need to do is tap on the sharing button (the round icon with the silhouette of two humans) at the top of the playlist page. To share collaboration invites, you can generate a unique QR code or send invite links from the many options available in the Share Sheet, just like any other URL on your phone. AirDrop, message, mail, cloud drive, notes, or social media — all the usual sharing options are available.
However, if you want only familiar faces to join the playlist and make contributions, you should enable the link approval feature. When you are about to send playlist collaboration links, you will see an Approve Collaborators toggle. Flick it till you see the green color appear, indicating that it has been enabled. Your collaborative playlist on Apple Music will now only add new members after you've personally approved each request to join.