Can You Build A Drone From A Raspberry Pi?
We may receive a commission on purchases made from links.
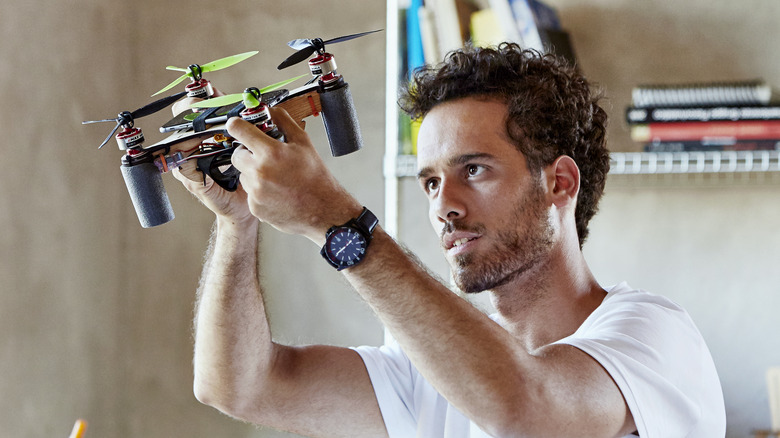
Embarking on the journey of building a drone is not just a DIY adventure; it's a chance to tailor your flying gadget according to your preferences. While the must-have parts list isn't exhaustive, grasping the importance of key components is crucial. If you're thinking about taking your drone game to the next level, consider throwing a Raspberry Pi into the mix.
Individually, drones and Raspberry Pis are cool, but combining them creates a powerful flying computer. With a Raspberry Pi on board, your drone gains substantial computing power, unlocking possibilities like AI integration. Now, your drone isn't just airborne; it's flying smart. However, it's vital to understand that building a drone from a Raspberry Pi isn't for the faint of heart due to its difficulty — even for someone tech-savvy.
Nonetheless, if you are up for the task, we'll walk you through the essential components for building your drone, guide you through the computational aspects of a computer-controlled drone, and top it off with a few inspiring project examples.
Raspberry Pi
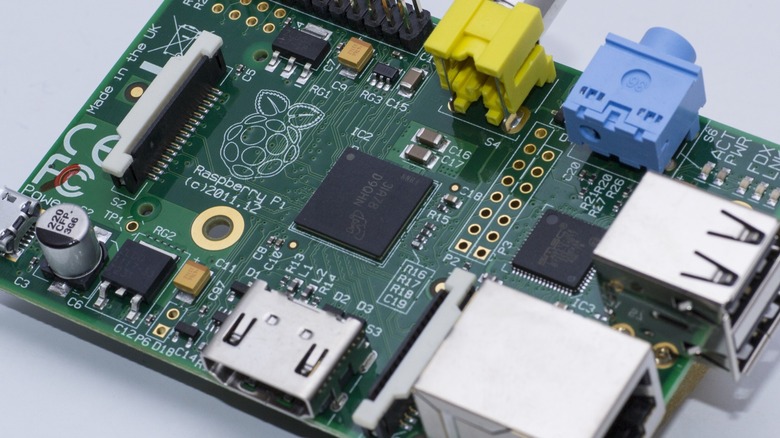
In your drone configuration, the Raspberry Pi serves as the central processing unit, adeptly managing data processing tasks. Choosing a Model B Raspberry Pi is advantageous due to its integrated Wi-Fi feature, which facilitates communication with the ground even during mid-flight. Alternatively, for a more streamlined design, consider combining a Pi Zero with the PXFmini flight controller, which also comes with Wi-Fi capabilities.
Beyond fundamental operations, incorporating a Raspberry Pi enhances your drone control capabilities through software. The majority of drone interactions are carried out using Python, a widely adopted programming language for Raspberry Pi. While a fundamental understanding of Python is necessary for creating customized functionalities, replicating open-source projects demands less expertise.
Python's proficiency spans the field of artificial intelligence, where crucial libraries such as TensorFlow, Scikit-learn, and Keras heavily depend on it. This adaptability enables effective management and training of drones powered by Raspberry Pi.
The functionality of your drone is predominantly influenced by the software it employs. It has the capacity to be programmed for tasks like mapping terrains or autonomously maintaining precise positioning. Real-world applications of such capabilities encompass delivering emergency supplies, managing rescues, mapping forest fires, and predicting weather conditions. The Raspberry Pi plays a pivotal role in enabling these operations by processing input data and generating outputs for the flight controller, a subject we will explore in more detail shortly.
Flight controller
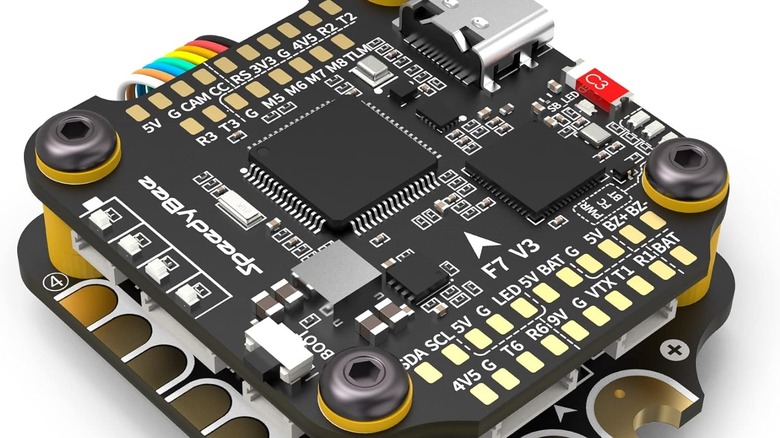
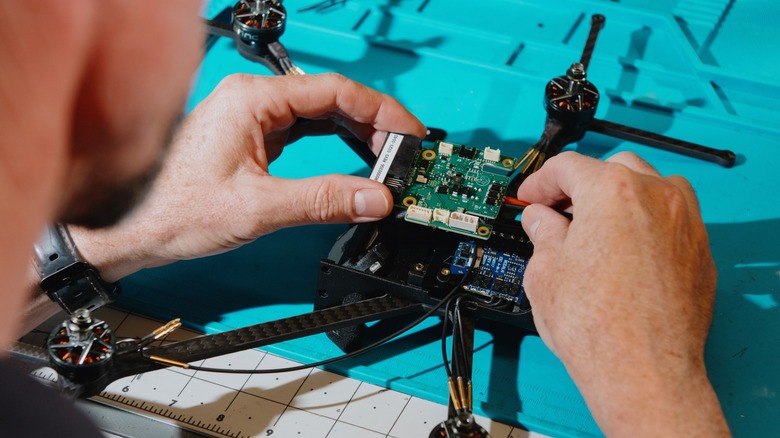
Within the domain of drone electronics, the flight controller emerges as a pivotal element, serving as the vital link connecting the Raspberry Pi to the remaining hardware of the drone. All connections must be directed through this central hardware piece to establish effective communication between the Raspberry Pi and the diverse electrical components.
While the Raspberry Pi enhances the flight controller's functionality, it's crucial to acknowledge that the controller is capable of functioning independently of the Pi, a common occurrence in consumer drones. The flight controller employs a control algorithm referred to as Proportional Integral Derivative (PID), responsible for computing the power distribution to the motors, thereby controlling the drone's direction.
Diverse varieties of flight controllers are available, all essentially fulfilling the same purpose. Despite the existence of well-documented controllers, it's worth noting that any flight controller can suffice, as their primary function is to provide inputs to the Pi and outputs to the electronic speed controllers and other components.
Let's look at a few options that you can consider based on your experience level and budget:
- PIXHAWK is an excellent choice for beginner drone builders, offering robust documentation and a large user base.
- NAVIO 2, while slightly less beginner-friendly than PIXHAWK, offers enhanced functionality for more experienced pilots. It demands a bit more proficiency in programming and experimentation.
- PXFMINI, designed for Raspberry Pi Zero, is a budget-friendly option for beginners. Though discontinued and now may be harder to find, it still serves its purpose, providing an economical choice for setting up a drone.
Electronic speed controller (ESC) and GPS module
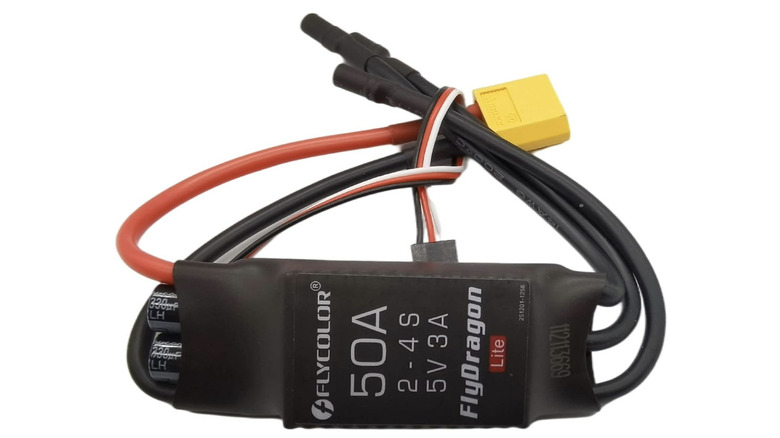
The ESC plays a vital role in overseeing the speed and power of the motors responsible for propelling the propellers. This is achieved by regulating the electric flow to each of the four motors, effectively managing their output. Since each motor necessitates individual control, an octocopter requires eight ESCs, while a quadcopter requires four.
By connecting to the flight controller, the ESC receives instructions on adjusting the power for each motor. It is crucial to utilize ESCs compatible with DShot, a protocol facilitating communication between the flight and speed controllers.
Now, the question arises: How can you monitor your drone's location?
Including a GPS module is not mandatory, but it proves to be a beneficial element offering insight into the drone's whereabouts. The GPS module establishes the drone's coordinates by linking with four satellites. It communicates this information to the speed controller through the telemetry module (which will be explored in detail later). Despite being an optional feature, it holds the capability to activate a home function, mitigating the potential hazard of losing your drone.
While GPS is typically dependable, its performance might be affected by atmospheric conditions such as cloud cover. Clouds can impact signal transmission since communication with space is influenced by these conditions.
Power source (Battery)
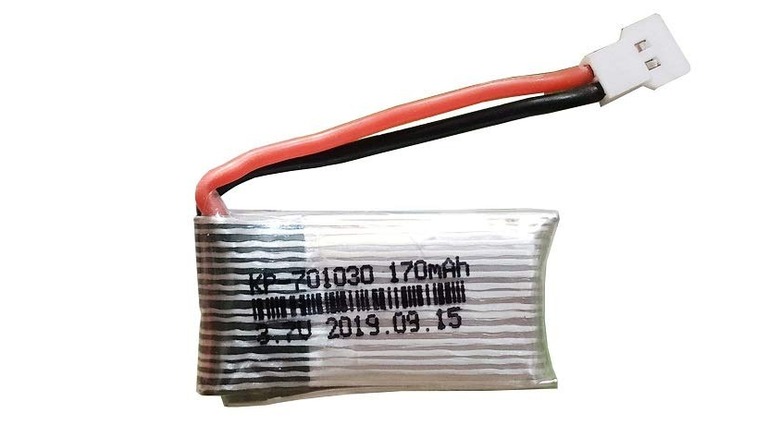
The drone's energy source, commonly known as the battery, plays a pivotal role in sustaining its various functions, providing convenient and portable power. When choosing a power source, the primary considerations revolve around finding the right balance between weight and power. Initially, the cell count in a battery affects its weight, power output, and voltage. Increasing the number of cells can boost speed and flight duration, but the additional weight from these cells may counteract these benefits.
Capacity, which measures the energy stored in the battery, is another critical factor. Larger batteries offer increased capacity but come with the trade-off of added weight, potentially restricting the drone's flight time. The type of battery is also significant, with Lithium Polymer (LiPo) being a popular choice due to its cost-effectiveness and favorable weight-to-capacity ratio. While alternatives like lithium-ion, nickel-cadmium, and fuel cells exist, LiPo is generally preferred unless specific applications dictate otherwise.
Discovering the optimal battery involves striking a balance — avoiding excess weight that hinders flight while ensuring it is not too small to limit the drone's operational range. The battery's weight impacts the power demands on the motors, influencing overall power consumption. Compatibility between the battery and the power distribution board is crucial, and LiPo batteries necessitate dedicated LiPo chargers for effective voltage management. Ultimately, the battery emerges as the most critical component of a drone, powering all hardware functionalities.
Power distribution board (PDB) and telemetry module
To utilize energy from the battery, a power distribution board (PDB) is essential. This board plays a crucial role in gauging the battery voltage and distributing it to connection points that interface with various components. This eliminates the necessity for intricate soldering of resistors and wires.
Furthermore, the PDB often incorporates an automatic power regulation feature for the flight controller and camera through a voltage regulator. When choosing a PDB, it is essential to verify that it provides the appropriate voltage outputs for your camera, especially if it operates on 5V (common) or 12V (in some cases). This ensures smooth integration and proper power supply to all connected elements.
Utilizing a telemetry module empowers the drone to send information to the ground, delivering important details like the best landing times, battery status, and positional data. Employing a telemetry module exclusively is crucial when both the transmitter and receiver are compatible.
In numerous instances, when your remote includes a telemetry module, it can additionally notify you when the signal strength starts to diminish. This functionality brings considerable benefits to a proficient drone, delivering instant information and improving overall command and awareness throughout the flight.
Remote control and camera
We've discussed how the Raspberry Pi connects with hardware; now, let's delve into human interaction with the drone. As the drone lacks autonomy (in several cases), it relies on a remote control for guidance. This setup involves a transmitter and a receiver. The transmitter, located in the ground-based remote control, communicates with the drone, acting as the receiver. Each channel on the transmitter, operating at specific frequencies, dictates movement in a specific direction.
An ideal controller should have at least four channels, with five or more channels being even better. Consideration should be given to the receiver's size, as an excessively bulky receiver can impede the drone's takeoff. Additionally, the receiver, equipped with an antenna (which may be a loose wire, though less reliable), requires careful consideration to ensure optimal performance during drone operation.
Cameras offer users a distinct video feed, providing a glimpse into their drones' viewpoints. A camera may be basic or mounted on a gimbal to serve as a first-person view camera (FPV), commonly found on advanced drones. While plug-and-play FPV cameras are available, mastering them might pose a challenge for beginners.
Accompanying the camera is the video transmitter (VTX), but many flight controllers include a built-in one. If you desire an upgraded version compared to the stock option, you can always install it later. This flexibility allows users to enhance their drone's camera capabilities according to their preferences.
Drone frame and propellers
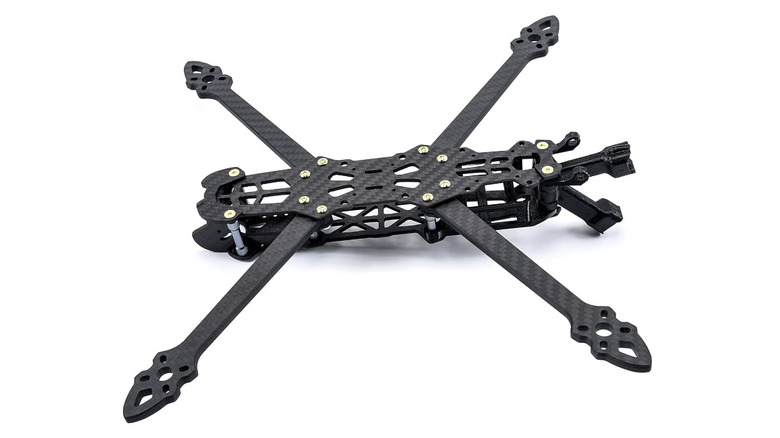
The structural foundation of your drone — the frame — houses and secures all components. While readymade frames are available, some enthusiasts prefer crafting customized frames at home, often utilizing 3D printing. When selecting a purchased frame, consider weight, strength, and durability factors. A sturdy, lightweight frame is essential for crash resistance, with carbon fiber composites favored for their high tensile strength. Size is a crucial factor influencing component accommodation and power requirements. Larger frames support bigger components but entail higher power and cost. Reduced-sized frames result in agile and adaptable drones, but this comes at the cost of reduced storage capacity.
Tailor the drone's purpose; for instance, racing drones benefit from added weight for increased momentum. The center of gravity affects flight smoothness — lower for stability, higher for responsiveness. Select a frame aligning with your build without restricting functionality. Ensure component cross-compatibility before committing to a frame for a seamless and efficient drone design.
Propellers play a crucial role in a drone's function, converting rotational motion into forward thrust. Their size is intimately tied to the frame, ensuring effective weight accommodation for optimal performance. Precise matching propeller size to frame specifications is vital for a drone's stability and efficiency, underscoring the importance of meticulous selection.
Recommended propeller sizes vary depending on frame dimensions and arm thickness. For example, a 95-millimeter frame pairs well with a 2-inch propeller and 2.5-millimeter arm thickness, while a 220-millimeter frame benefits from a 5-inch propeller and 4-millimeter arm thickness. Larger frames exceeding 300-millimeter are advised to use 7-inch propellers with 4-millimeter arm thickness for peak performance. While three-blade propellers are common for efficiency, smaller drones often choose two-blade propellers coupled with high-speed motors.
Motors
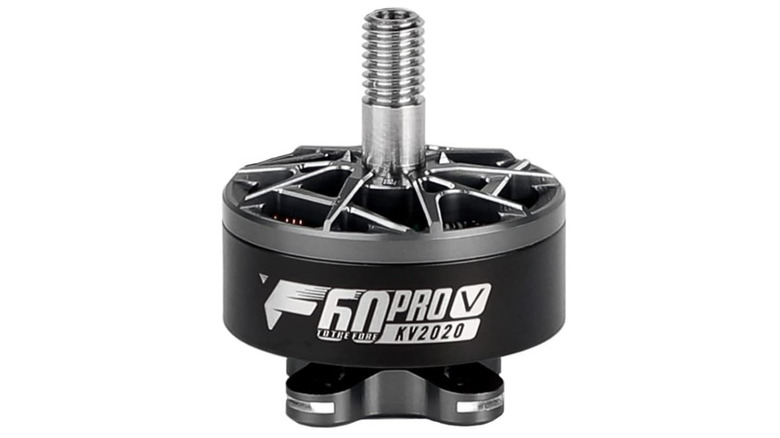
Drones come to life through the propulsion provided by motors. Brushless motors, commonly used in drones, are characterized by their stator diameter and magnet height. Higher values in these parameters enhance motor torque, accelerating movement for improved agility and responsiveness.
Another essential metric is the thrust-to-weight ratio, which gauges motor performance relative to the overall drone. For mini quadcopters, a recommended 10:1 thrust ratio ensures superior performance. Beginners can initiate with a more manageable 2:1 ratio, delivering sufficient thrust for basic drone operation. Familiarity with these motor metrics is vital for tailoring the drone's performance to desired levels, whether for advanced maneuvers or entry-level exploration.
The recommended motor specifications based on propeller size are detailed as follows: 2-inch propeller pairs well with a motor featuring an 11mm stator diameter, 3-6-millimeter magnet height, 4,000-8,000 KW, and a 6-12 A ESC. As propeller size increases, specifications adjust accordingly. For example, a 7-inch propeller requires a motor with a 30+ millimeter stator diameter, 6+ millimeter magnet height, 1,800-2,300 KW, and a 30+ A ESC. These recommendations guide drone builders in selecting motors and ESCs that align with propeller size, ensuring optimal performance and compatibility.
In summary, let's examine a few established instances of Raspberry Pi drones:
- The Pixhawk Raspberry Pi Drone, crafted by The Drone Dojo, incorporates Raspberry Pi 3B and a Pixhawk PX4 flight controller.
- The Drone Pi, created by reglisse44, utilizes Raspberry Pi 2B and the Multiwii flight controller as its central components.
- Dimitriy's creation, the RPi2 + Emlid Navio 2 Copter Build, features Raspberry Pi 2B and Emlid Navio 2 as its core units.