4 Unexpected Uses For Old Vinyl Records

We may receive a commission on purchases made from links.
As physical media continues to make its long overdue comeback, old record players and vinyl records have become the preferred method for many music lovers to get down. But if you believe it's time for physical media to die and are looking to move full-on into the digital age, you might be trying to figure out what to do with all your old records. Likewise, you might have inherited a trove of vinyl discs from your dad or cool uncle that are too beat up to play.
If you're in either category, you should know there are plenty of landing spots for your old vinyl. If you're wise, you'll first try to offload your stacks of wax at a record store, a used book shop, or even an online market. But if you count yourself a creative spirit, you might be interested in finding a way to repurpose some of the more damaged discs in your record collection. Luckily, there are numerous ways you can turn that crusty old wax into a fresh artifact for your home or office.
At this point in the action, we'll implore you not to undertake the following upcycling projects with records in good condition. Because even if those albums don't mean anything to you, playable records can and always should find a forever home before they become art projects. With that said, here's a look at four unexpected uses for your old vinyl records.
Make a wall clock
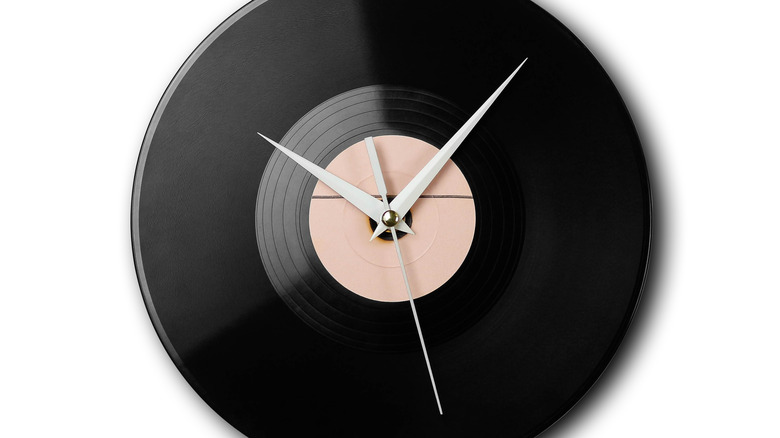
Fashioning a wall clock is one of the cooler things you can do with an old record. It also ranks among the easiest upcycling options you'll come across. All you need is a clock kit — like those found in many craft stores — and one old record. With those items in hand, follow these instructions:
- Remove the nut and washer from the clock kit.
- Next, insert the point of the clock mechanism into the spindle hole of the record. If the hole isn't big enough, try enlarging it by spinning the sharp end of a scissor inside.
- Put the washer on the exposed end of the clock mechanism and screw the nut tight to the record.
- Install the hour hand on top of the clock side of the record, then add the minute hand and seconds hand (if one is included).
- Tighten the clock hands down with the included nut.
- Install the battery in the clock mechanism, set the correct time, and turn the clock on.
If you want, paint numbers directly onto the vinyl to note the hours and minutes. You can even mark them using old guitar picks or other artifacts. If you really want to take your vinyl wall clock to the next level you can even paint a mural on the record itself. It's entirely up to you.
Turn your old vinyl into a bowl or flower planter
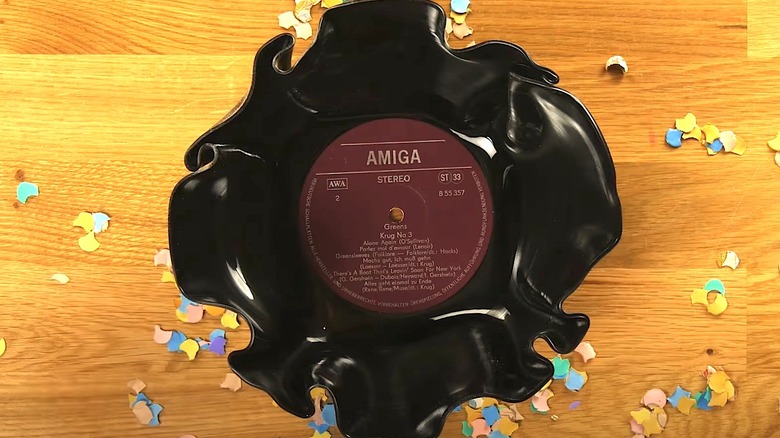
If you're not into making a clock, you can easily fashion a bowl from old vinyl records using your oven. You will, however, need a few other items on hand, including a cookie sheet, an oven-safe bowl, oven mitts, and rubber gloves. Once you've checked those items off the list, follow these steps:
- Preheat your oven to 212 degrees F (100 degrees C). Too much heat may cause your melting record to release toxic fumes as it is made from polyvinyl chloride (aka PVC). You shouldn't need to go any hotter than 392 degrees F (200 degrees C), and patience is generally safer than higher temperatures.
- Place your oven-safe bowl upside down on your cookie sheet.
- Place the record on top of the upside-down bowl, centering the label on the flat edge.
- Put the cookie sheet in the oven.
- Allow the record to soften and droop around the bowl. This should take around 8 to 10 minutes.
- Once the record is pliable, remove the cookie sheet using your oven mitts.
- Put on your rubber gloves and place the record inside the bowl.
- Mold the softened record into a bowl shape, leaving the edges wavy. If the record hardens before you're done, pop it back in the oven to re-soften the vinyl.
- After the record is molded to your liking, let it cool and set for about 10 minutes.
A finished bowl should never be used as a serving dish for hot items as toxins may be released from the warm vinyl. Just FYI — those bowls can indeed be used as flower planters. In fact, you'll find you can fold that wax into anything from a wine holder to a bookend.
Record label coasters jazz up any coffee table

Now that you've got that oven warm, you might be interested to know it can also help you make vinyl coasters. To make that transition, you'll need a cookie sheet, grease-proof wax paper, oven mitts, rubber gloves, a felt sheet, glue sandpaper, strong scissors, and two books. After assembling those tools, follow these steps:
- Preheat your oven to 392 degrees F (200 degrees C). Again, temperature is important due to the aforementioned health risks involved with heating vinyl.
- Place wax paper on the cookie sheet, then place the record on top of the wax paper.
- Put the cookie sheet in the oven and heat the record until it's soft and pliable. This should take about 8 to 10 minutes.
- Use oven mitts to remove the cookie sheet.
- Put rubber gloves on before handling the record. Then, use scissors to cut from the outside of the record in, cutting in a circle around the record label. Reheat the record as necessary throughout this process.
- Place the cutout label between two books and let it cool to ensure there is no warping.
- Once cool, use sandpaper to smooth out any rough edges.
- Using the cutout label as a guide, cut a piece of felt in the same shape.
- Glue the felt to the bottom of the label and let it dry.
Congrats, you've now got a snazzy new coaster to protect your coffee table. You can repeat this process to make as many coasters as you need.
Old records can be used as wall art
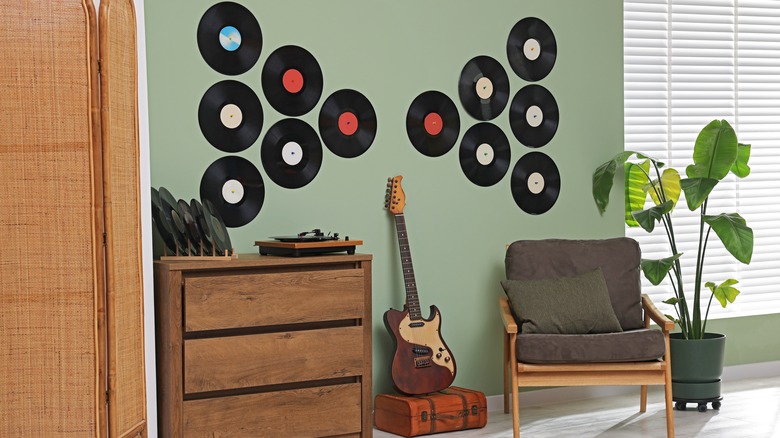
If warming and molding your old vinyl records seems too crafty for you, don't worry — you can re-purpose those old vinyl records into wall art with no heating, molding, cutting, or gluing. All you need is a pencil, a ruler, a few thumbtacks, and your own imagination.
The last part of that equation is the most important, as you'll use your imagination to fashion a wall pattern for your old records. After charting out the pattern, follow these steps:
- Mark each hanging location on your wall by using a pencil to mark inside the record's spindle hole. Utilize your ruler to ensure precise spacing between each record.
- Take a thumb tack and punch a hole where each pencil mark is.
- Hold the record on the wall, with the spindle aligned over the punched-out hole.
- Push a tack into the hole to hang the record.
Congrats — you've successfully hung a record on your wall. Use the rest of the tacks to fill out the pattern you've mapped out, then sit back and admire your work. Rest assured that visitors to your space will dig it as well.