6 Essential Metal Working Tools For Beginners
If you've taken a few metalworking classes or have a long-standing interest in the practice, you may be wondering what it takes to set up shop at home. While it may seem like a daunting task, assembling the things you need for an at-home metal shop is simple. We've narrowed it down to just six things you need to get together if you want to have a good go at tackling this hobby.
Below is a list of tools and equipment that should be enough to tackle pretty much any home metalwork project. These are all "essentials" if you want to get the most out of metalworking, so while you may be able to take on some limited projects without everything on our list, you may be somewhat restricted. Cost is obviously a major factor, and while there's nothing "industrial" in our roundup, some pieces of kit can set you back a few hundred dollars.
However, there are plenty of used tools available at knockdown prices if you know where to look. We'd suggest scouring auction sites, classifieds, and estate sales to snag some bargains. With that being said, tools can be dangerous. So, thoroughly inspect anything you buy used, and walk away if it has signs of obvious damage.
We used our own metalworking experience to assemble this list, including some time spent as a professional plater. This is also just a starting point — you can add plenty of other equipment to your shop as time goes on.
Personal protective equipment
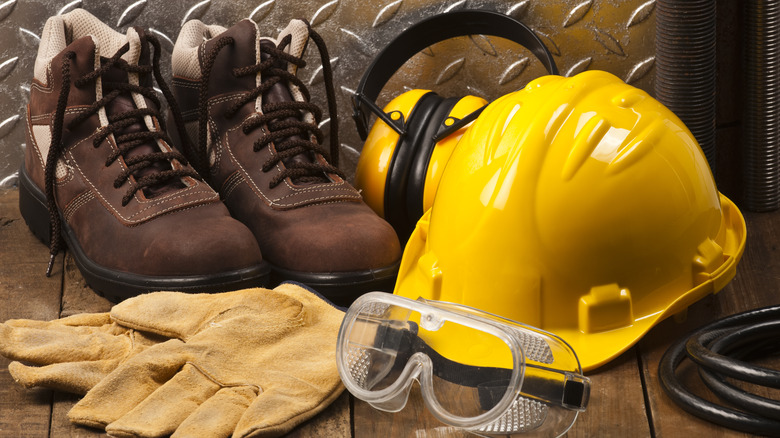
Personal protective equipment (PPE) isn't the most exciting stuff in the world, but it's essential. This isn't one tool but a whole set of equipment that will help keep you safe from injury while you're working on metal. Metalwork is dangerous, but care and decent protective equipment can minimize the chances of you getting maimed or killed while pursuing your hobby.
As your tool collection grows, you'll likely need additional safety equipment to go with it. But getting a full range of basic safety equipment should be everyone's starting point. As a stray spark, piece of swarf, or hunk of metal can easily blind you, eye protection is vital. You should make sure it's properly graded. Look for goggles and glasses marked Grade F or EN166 to ensure you can grind, saw, and hammer in them. Goggles tend to be stronger and offer protection on the sides, too — but they are less comfortable than glasses. If you get both, you can have the glasses on for general use and switch to the goggles when performing riskier tasks.
Welding gauntlets offer some protection from cuts and will insulate your hands against hot metal. A proper pair of safety boots can mean the difference between a dropped piece of steel making a clang and breaking your foot. Sparks are a common side effect of metalwork and will set your clothing on fire. So, some flame-resistant coveralls will protect you from both dirt and immolation. Loud noise is also common when working on metal, so consider ear defenders or at least ear plugs. Finally, there's a lot of metal dust and vapors you shouldn't really be breathing in, so an N95 mask is recommended at the very least.
Marking and measuring tools
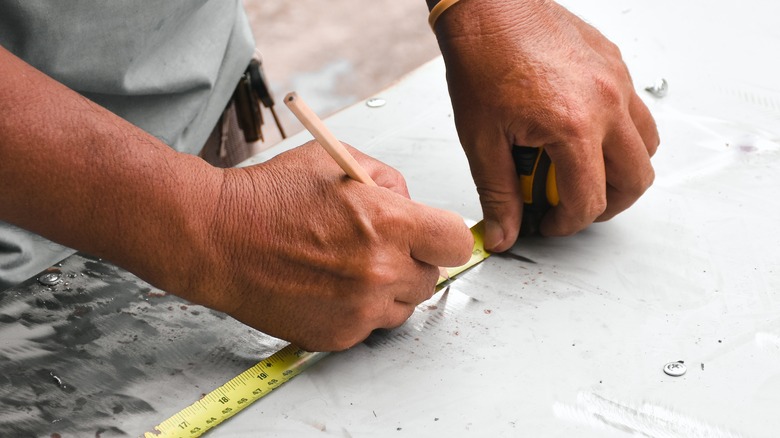
Metalwork can be very forgiving. If something is a little off, you may be able to correct it with a hammer, grinder, or welding set. But you're better off just not making mistakes in the first place. Property measuring and marking can help minimize mistakes and make building whatever you're building a lot easier in the long run. It can also save you a lot of money.
If you take time to plan and mark a piece of metal out properly, you'll get the most out of it. Metal will be one of your main expenses once your tools are in place. On the measuring side, a good quality tape measure, a set of engineer's squares, a divider caliper, a flat ruler, and a spirit level should really help you measure things. You shouldn't underestimate the usefulness of a ball of string, either.
As for marking, a scriber is a great way to scratch precise marks on a piece of metal. Cheaper scribers are made from steel, but one tipped with a hard material like tungsten carbide is recommended. It's only slightly more expensive, will last a lot longer, and is a lot easier to use. Engineers flat French chalk is another popular way to mark up steel. It can be sharpened so it has a fine, flat edge and will produce small, accurate markings if needed.
A larger square, such as a roofer's square, and a chalk line are handy if you want to bulk out your measuring and marking kit. Magnets and clamps are also handy to keep things together until you can get a few tack welds in place.
An anvil and forge
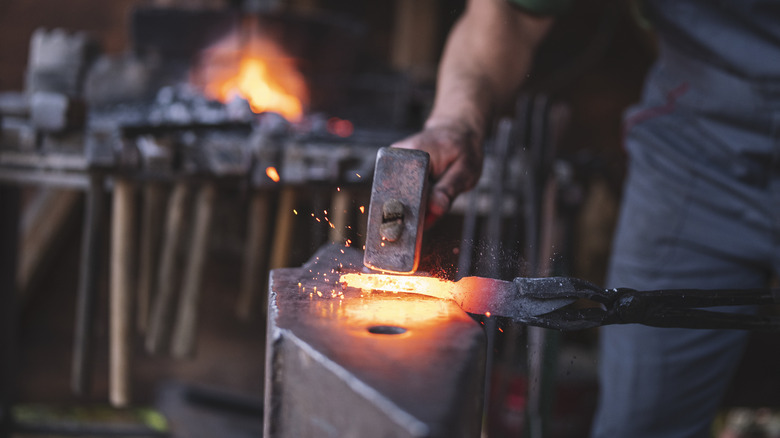
It may seem a touch medieval, but a good, old-fashioned hammer and anvil is one of the most useful pairs of metalworking tools you can get. An anvil is an ideal platform for hammering out and shaping steel. You can complete entire projects using just an anvil, hammer, and a heat source. You can even make most of your own metalworking tools on one.
Anvils also have a couple of parts you can use to cut, bend, or shape metal. They come in a variety of weights and sizes and can range from something small enough to fit on a workbench to huge examples that probably weigh more than you. Used anvils can be found online for as little as a few hundred dollars, but moving them may require some help.
Your anvil will require a couple of accessories. A two-pound hammer is a good, versatile choice. It's heavy enough to work the metal but still light enough to control. You may also want a way to heat your metal. The simplest way to do this is with a propane torch. Alternatively, a small forge isn't actually hard to build if you want to go that route. Some fire bricks, insulation, and a little time are all you need to construct a small propane or coal forge. Said construction could even be your first project. Small forges can also be purchased should you want to save some effort.
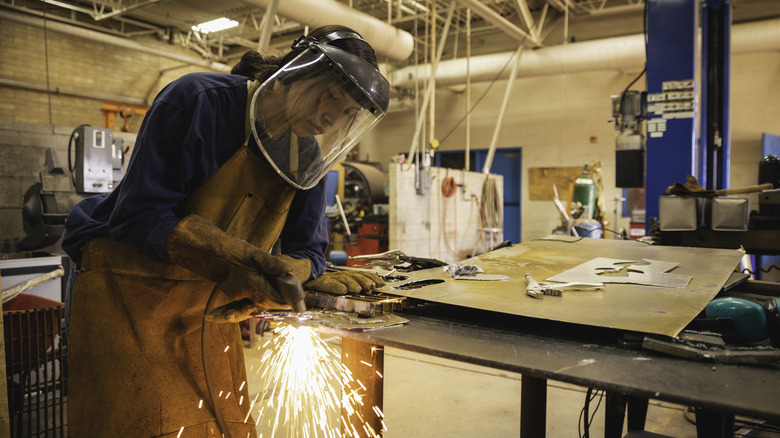
An angle grinder
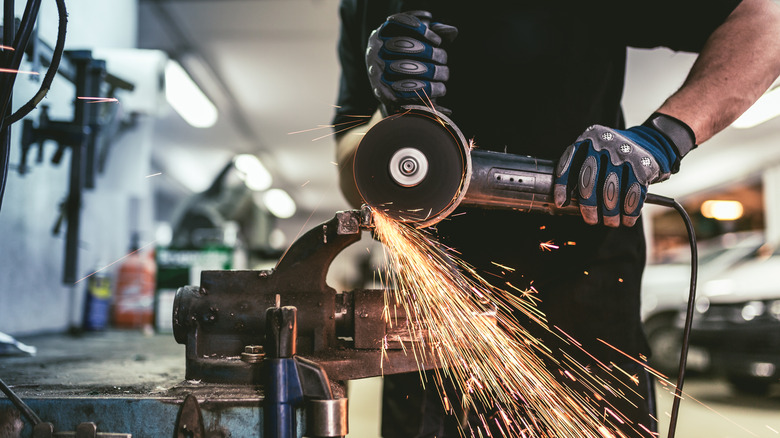
A lot of cutting, smoothing, and polishing metal is involved in your new hobby. You can spend an eternity achieving this with a hacksaw and a set of files — or you can just buy a 4.5-inch angle grinder like Makita's X-Lock. Grinders around the four-inch mark are versatile and easy to handle. If you buy the correct disks, you can cut, grind, and polish with ease. They're relatively cheap, with that Makita example costing just $77 new, and will open up a lot of possibilities. The grinder is also a pre-requisite to some other tools like the welding set. Good welds should be prepped, and a small grinder is great for this prep work.
Larger grinders are likely overkill for at-home metalwork and take a little strength and experience to handle properly. With that being said, the four-inch grinder is still a serious tool and needs to be treated with respect. Make sure to use the correct disk for the correct purpose — grinding wheels won't cut very well, and if you grind with a cutting disk, it may shatter and embed itself in you. Be aware of the stream of sparks your grinder is shooting out, or you may set yourself on fire. Let the tool do the work; don't force it through something. And be aware of where you're cutting, so you don't go through the wire or yourself.
A welding set
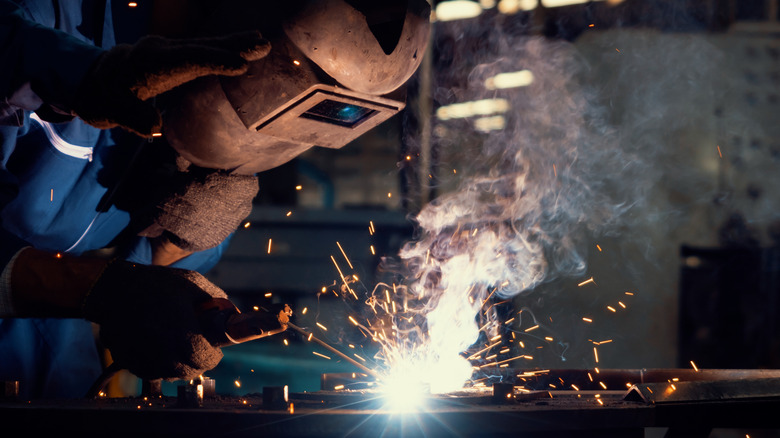
If you're getting into metalworking, you're probably going to need a welding set. It's the best way to join a couple of bits of metal together permanently. And if you're moving beyond small forged objects made on an anvil, it's essential.
When buying a welding set, you have a couple of choices. You can opt for a "Manual Metal Arc" (MMA) style set, which uses welding rods, or a "Metal Inert Gas" (MIG) set, which uses a spool of metal wire. The MIG set is far easier to use. You set your parameters like voltage and wire speed, and then it's just a case of pointing at where you want to weld, pulling a trigger, and moving at the correct pace. MMA welding is a little more complex. You have to set similar parameters but also need to choose the correct rod for the job.
Different thicknesses have different purposes and require different voltages. Then there's the fact you have to "strike" your own arc. This involves touching the rod to the metal so the arc is formed, and you can actually see through your welding mask. Because of this, you can't line everything up beforehand like you can with an MMA set. Then, there's the fact you'll need to change rods constantly. The main benefit of an MMA set is cost. It's far cheaper to buy and run one. It may also be seen as a more skillful way to weld. But if you can afford it, a MIG set will likely yield better results with less stress.
A cutting torch
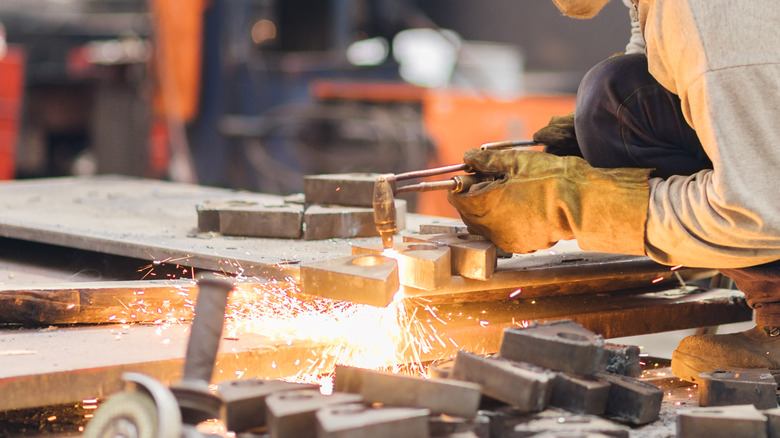
A propane torch is fairly inexpensive and can be one of the most useful tools in the metal shop. Cutting an elaborate shape from a large piece of steel can take a lot of time and effort with a grinder, but a cutting torch can get through it in a few minutes. The torch uses burning propane to melt metal, which is then hit with a blast of oxygen. This oxidizes the molten metal and blasts the slag out through the other side, leaving a somewhat clean cut. With that being said, you will probably have to clean up the edges of cuts you make this way, but it's still far easier than just using a grinder.
As an added benefit, a propane torch is an easy way to heat bits of metal up. This means it's a great accessory for the anvil we mentioned earlier. You can buy the cutting torch and tubing for under $200, which need to be connected to a propane tank. Make sure there are no leaks and a flashback arrestor is in place before you fire up the torch for the first time.
Welding with a cutting torch is also possible, but you'll need to move beyond propane for that. A hotter acetylene torch is required. Acetylene also cuts through metal a lot easier and will heat things faster. However, propane is cheaper and easier to find, so you should probably stick with that while you're getting started.