How To Clean Your Car's Engine Bay: A Step-By-Step Guide
We may receive a commission on purchases made from links.
The engine bay under the hood is one of the dirtiest parts of a daily-driven car. But it's also one of the most neglected places to clean. It's not unusual to find a plethora of dust, dirt, grime, and oil stains under the hood, and most vehicles have their share of leaves, pine needles, animal nests, and other debris. It may seem daunting to clean the engine bay and its collection of electrical parts, wiring, sensors, fuses, and other sensitive electronics. There's a reason why professionals charge up to $400 to restore the like-new appearance of an otherwise dirty, grimy engine compartment.
The reality is you don't need to spend big money to achieve a squeaky-clean engine bay. You can do it using a few household materials and some old-school techniques. Here are the step-by-step instructions on how to clean and detail your car's engine bay. First, here are the materials you need:
- Garden hose with spray adaptor
- Microfiber towels
- Cleaning wipes
- Spray bottle filled with soapy water
- Vacuum cleaner
- Detailing brushes
- Trim restorer
- Plastic garbage bag
- Cleaning sponge
- Socket set
Step 1: Preparation and dry cleaning

Park the vehicle on safe and level ground, preferably under the shade. Engage the parking brake and open the hood, ensuring the hood prop is in place. Next, grab a socket set, loosen the battery terminals, and remove the battery from under the hood. Not only will this prevent shorting the electricals, but it frees up space so you clean more efficiently.
The best time to clean is when the engine is cool or slightly warm to the touch. Do not douse a hot engine with cold water! Doing so will prematurely damage metal, plastic, and rubber components. It would be best to wait an hour or two to cool the engine before proceeding if extremely hot.
Grab a vacuum and a detailing brush to agitate and remove dust, leaves, sand, and other loose contaminants from the engine bay. Gently wipe the brush over the dirty parts and suck the dirt using the vacuum, focusing on areas above the firewall, the electrical connections, ignition coils, and rubber hoses. If the engine has a plastic cover, do your best to dry clean around the engine as much as possible.
Step 2: Cover the engine and wash
Grab a large garbage bag and lay it over the entire engine. The trick is to protect the engine and its electricals from gushing or standing water. When cleaning an engine bay, it's essential to clean the underside of the hood with soapy water, and covering the engine with plastic protects it from excess moisture while washing and rinsing.
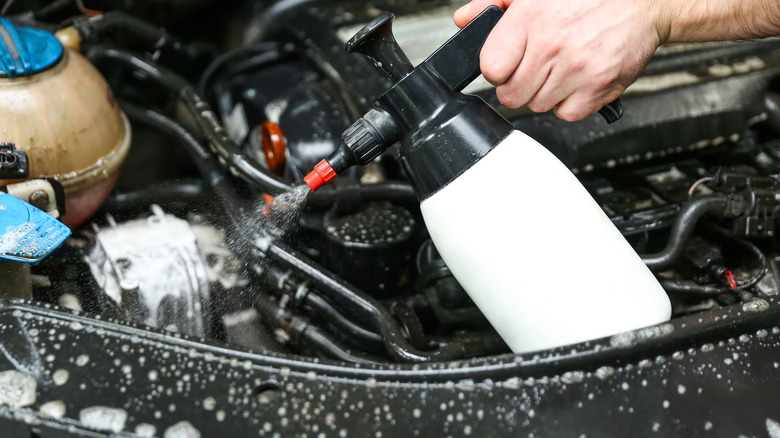
Grab the garden hose and rinse the underside of the hood using a light spray. You could also use a pressure hose using the lowest pressure setting. The idea is to avoid dousing the engine bay with strong water gushes to prevent issues later.
After rinsing, spray liquid cleaner on the dirty parts and agitate the underside using a sponge. Work your way from top to bottom and focus on the areas around the engine (the non-covered bits), spraying the cleaner as you wipe with a sponge. In some areas, using a detailing brush or toothbrush is more suitable. Rinse with water when done. Remember to use a light spray.
Step 3: Clean the engine
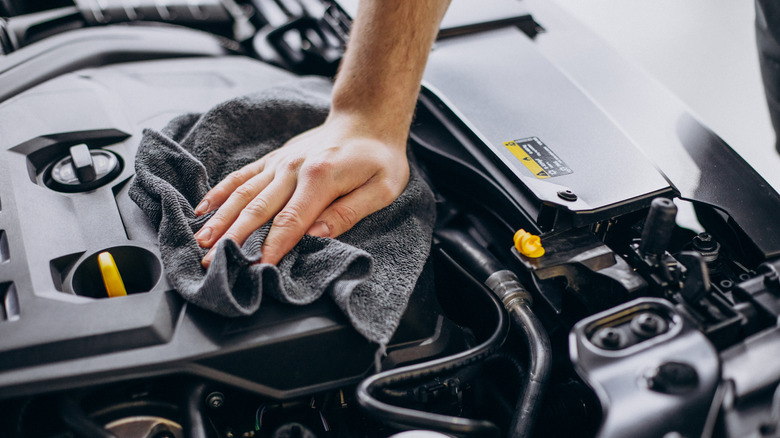
After cleaning the hood underside and the surrounding areas of the engine bay, it's time to clean the actual engine. Carefully remove the wet plastic cover from the engine to begin. Grab the cleaning wipes to remove any excess dirt, sludge, and oil stains from the valve covers and the surrounding areas. You may need more cleaning wipes than usual when dealing with an extremely dirty or neglected engine bay. The idea is to rid all areas of thicker sludge and grime.
The next step is to spray some liquid cleaner on the dirty areas and wipe clean with a microfiber towel. Work your way one section at a time, and pay attention to nooks, crevices, and wiring sockets with thicker dirt. You could also use a detailing brush for hard-to-reach areas. Get a separate dry towel and give the just-cleaned sections a final wipe to remove excess moisture, preparing the engine bay for the final detailing step.
Step 4: Detailing

At this point, you can stop and admire your work. However, spending a few minutes detailing will give fabulous results while protecting the rubber and plastic parts from heat and deterioration. We recommend using a water-based trim restorer like Meguiars Ultimate Black. It protects all non-painted vinyl, rubber, and plastic trim and has a non-greasy formula that repels dust and dirt.
Squeeze a moderate amount of the trim restorer on a plastic bowl. Grab a detailing brush, dip it inside the bowl, and brush the solution to all plastic and rubber trim, including hoses, sockets, and above the plastic engine cover (when applicable). However, avoid applying the trim restorer on drive belts to prevent slipping and squeaking after starting the engine. Allow the trim restorer to cling for 5–10 minutes before wiping off the excess with a clean microfiber towel.
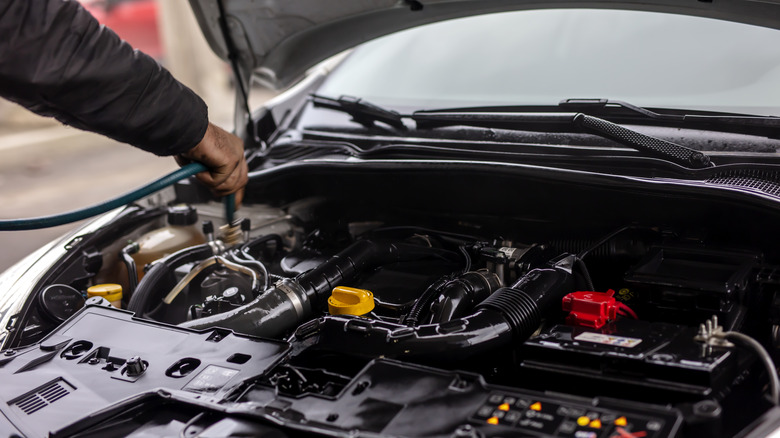
The final step is to re-install the battery and connect the cables, connecting the positive terminals before the negative and tightening appropriately using a socket set. You can clean the engine bay once or twice yearly to maintain a like-new appearance.